Some days ago, on Wednesday, it was Granny Square Day. Em …, I can’t believe it, but I missed it completely!
Blame it on the heat, or the summer flu I’m suffering from at the moment and that is making me very tired, or whatever … I don’t know!
However. Lately I’ve been experimenting a bit with colours and colour combinations using circles and Granny Squares. In this process, I also created a little Granny. So, to honour Granny Square Day, too late or not, I thought I’d share the pattern with you.
Nothing big, but quite nice, I think.
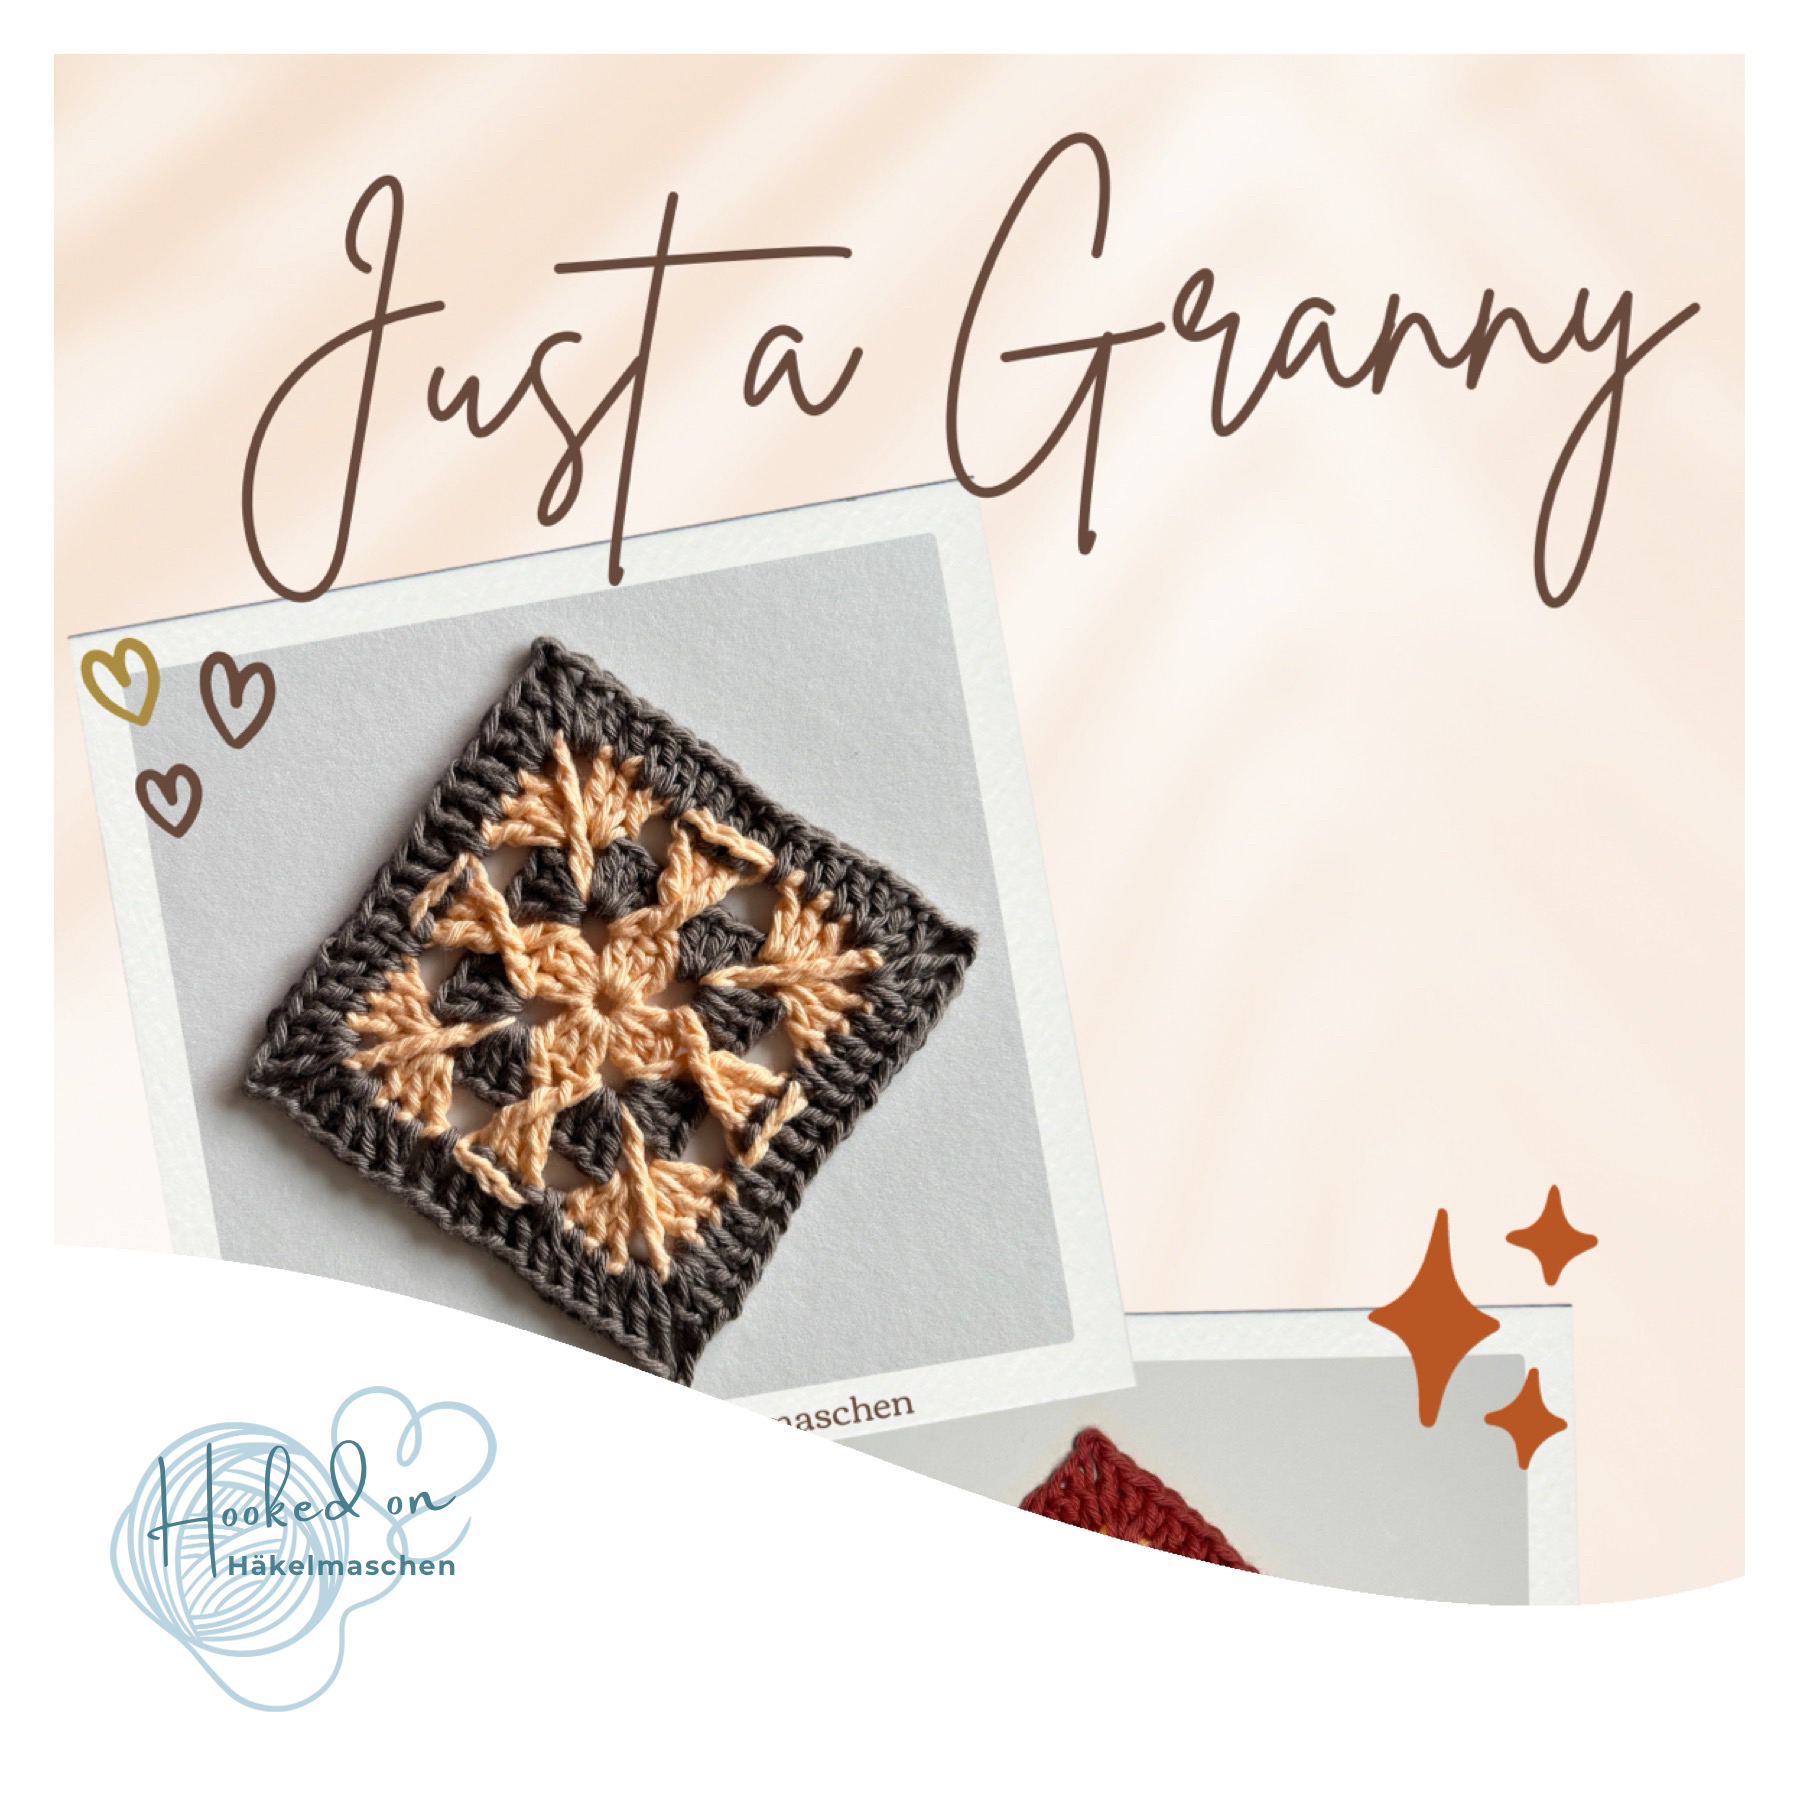
Just a Granny
“Just a Granny” is a four round Granny Square and measures about 10 cm / 4 inch- if made with a #3 (DK / worsted weight) yarn.
I made my version using only two colours as I think it shows the pattern best.
Of course you can also use more colours or a different yarn. Using a different yarn though might affect the size of the square.
The Granny requires only a small amount of yarn and I used some leftovers from my stash. For both I used Hobbii Rainbow Cotton 8/6. It is 100 % Cotton and has a yardage of 105 m / 50 g. I find it best to work with a 3,75 mm hook.
I made two colour variants. The first one is made with

- # 49 – Peach
- # 47 – Dark Old Rose
… and the second one uses
- # 65 – Apricot
- # 12 – Volcano Gray

Apricot and Volcano Gray is one of my favourite colour combinations. Unfortunately it looks like #65 Apricot is discontinued, at least in the 8/6 quality.
The Pattern
Like a regular granny, the pattern mostly uses double crochet, but also includes extended treble crochet, double treble crochet, and shallow back post double crochet (all US terms).
Due to these special stitches I have categorised the pattern as „beginning intermediate”. But since it is only a few stitches and rows, I think that even an adventurous beginner can do it. Of course, the placement of the stitches is explained in the pattern. And if you have any questions, please don’t hesitate to contact me.
In case you’ve never heard about a shallow back post double crochet: it is more or less worked in the same way as a normal bpdc. Only the placement of the stitch is a bit different which makes it a bit less textured. The pattern includes a link to a helpful video on how to do this stitch (made not by me but by Tamara Kelly from Moogly).
Pattern Link

Happy belated Granny Square Day and have fun 💕