

Last updated on February 8, 2026
Tunisian crochet offers a wide range of stitches and patterns. Basic stitches include the Tunisian Simple Stitch (TSS), Tunisian Knit Stitch (TKS), Tunisian Purl Stitch (TPS), Tunisian Full Stitch (TFS), and the Tunisian Reverse Stitch (TRS). They can be used either individually or in combination with each other to create a variety of patterns.
If you are completely new to Tunisian crochet and are not yet familiar with the techniques and basic terms, you will find more detailed information on the page
Tunisian Crochet – the Basics.
The section on the anatomy of stitches is particularly helpful for understanding the terminology used below.
Each of the samples below starts with a
Standard Foundation Row
To work a foundation row start with the required number of chains, then continue with the
Forward Pass
- Skip the first chain, start in the second chain from the hook.
- Insert the hook under the back bar of the chain, yarn over and pull up a loop. Keep this loop on the hook.
- Repeat this across the entire row, making sure that all stitches remain on the hook.
Continue with the
Return Pass
without turning the work. Work from left to right:
- Yarn over and pull through the first loop on the hook.
- Yarn over and pull through the next two loops on the hook.
- Repeat yarning over and pulling through two loops until only one loop remains on the hook.
This last loop stays on the hook. It is also the first stitch of the next row.
This foundation row is used for all stitches described below.
Detailed instructions on how to work a foundation row, including pictures, can be found on the Tunisian Crochet – The Basics page.
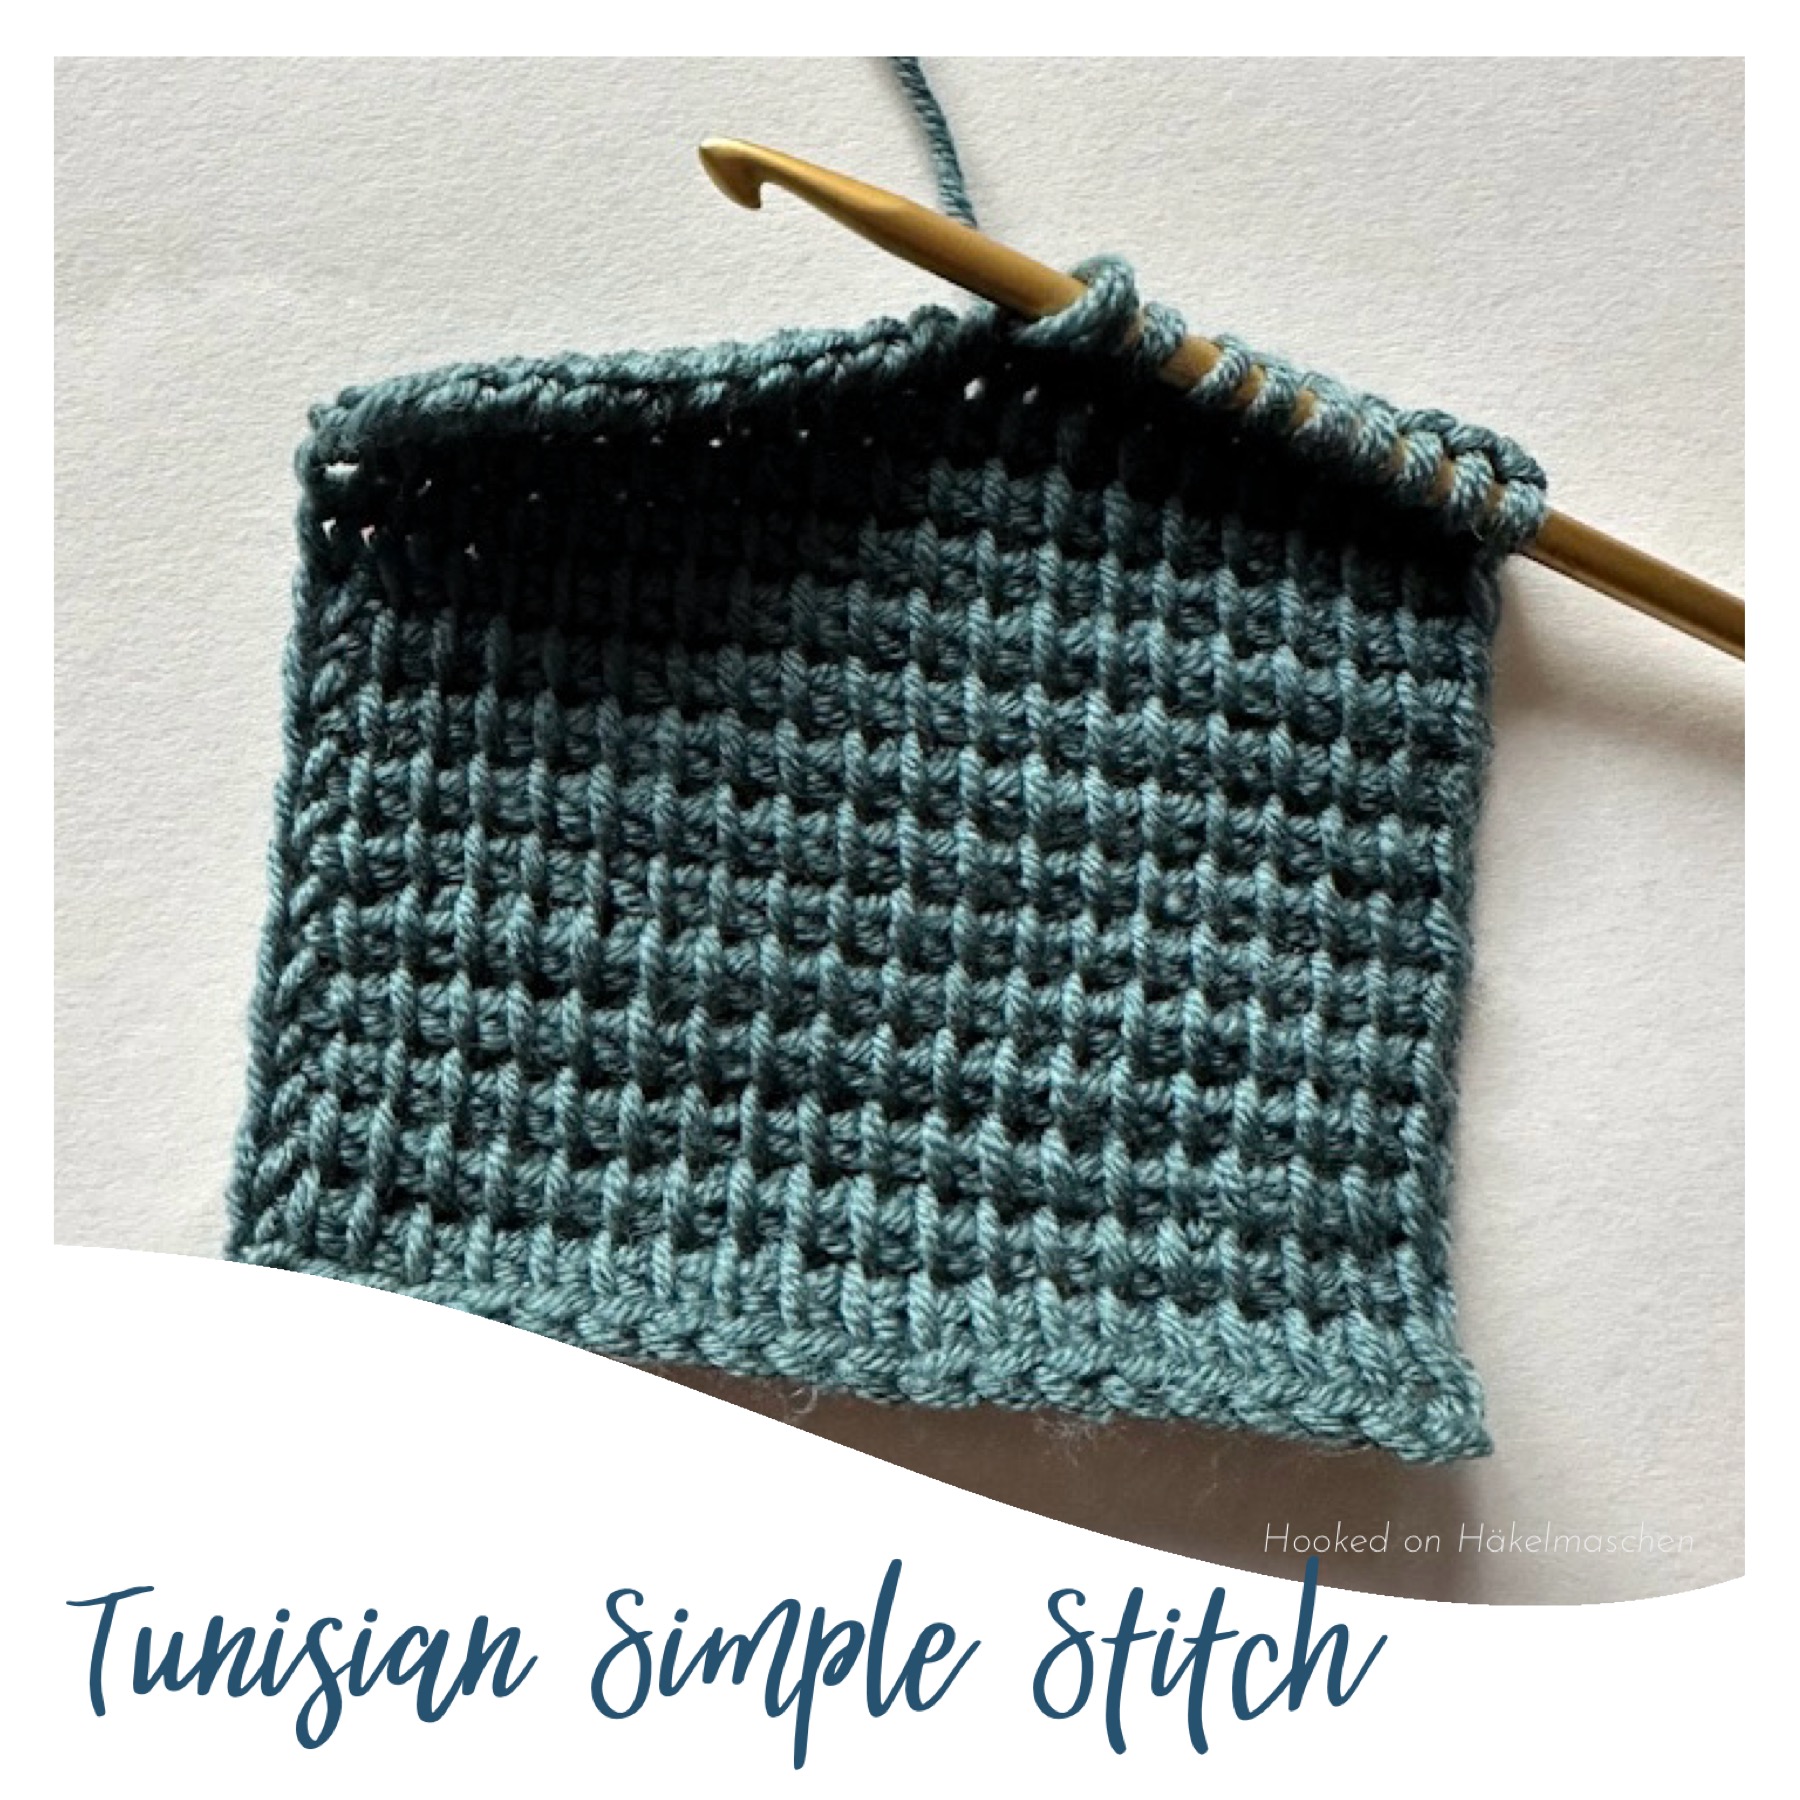
Tunisian Simple Stitch (TSS)
The Tunisian Simple Stitch (TSS), also known as Afghan stitch, is the most basic stitch in Tunisian crochet. It creates a dense fabric with clearly defined vertical bars.
Because of its simple structure, it is often the first stitch used to learn the basic techniques of Tunisian crochet.
How to work the Tunisian Simple Stitch
The picture numbers mentioned in the following text correspond to the detailed photos in the accompanying step-by-step image below.
Start with a Standard Foundation Row
Row 1 – Forward Pass (TSS)
Work from right to left with the yarn at the back.
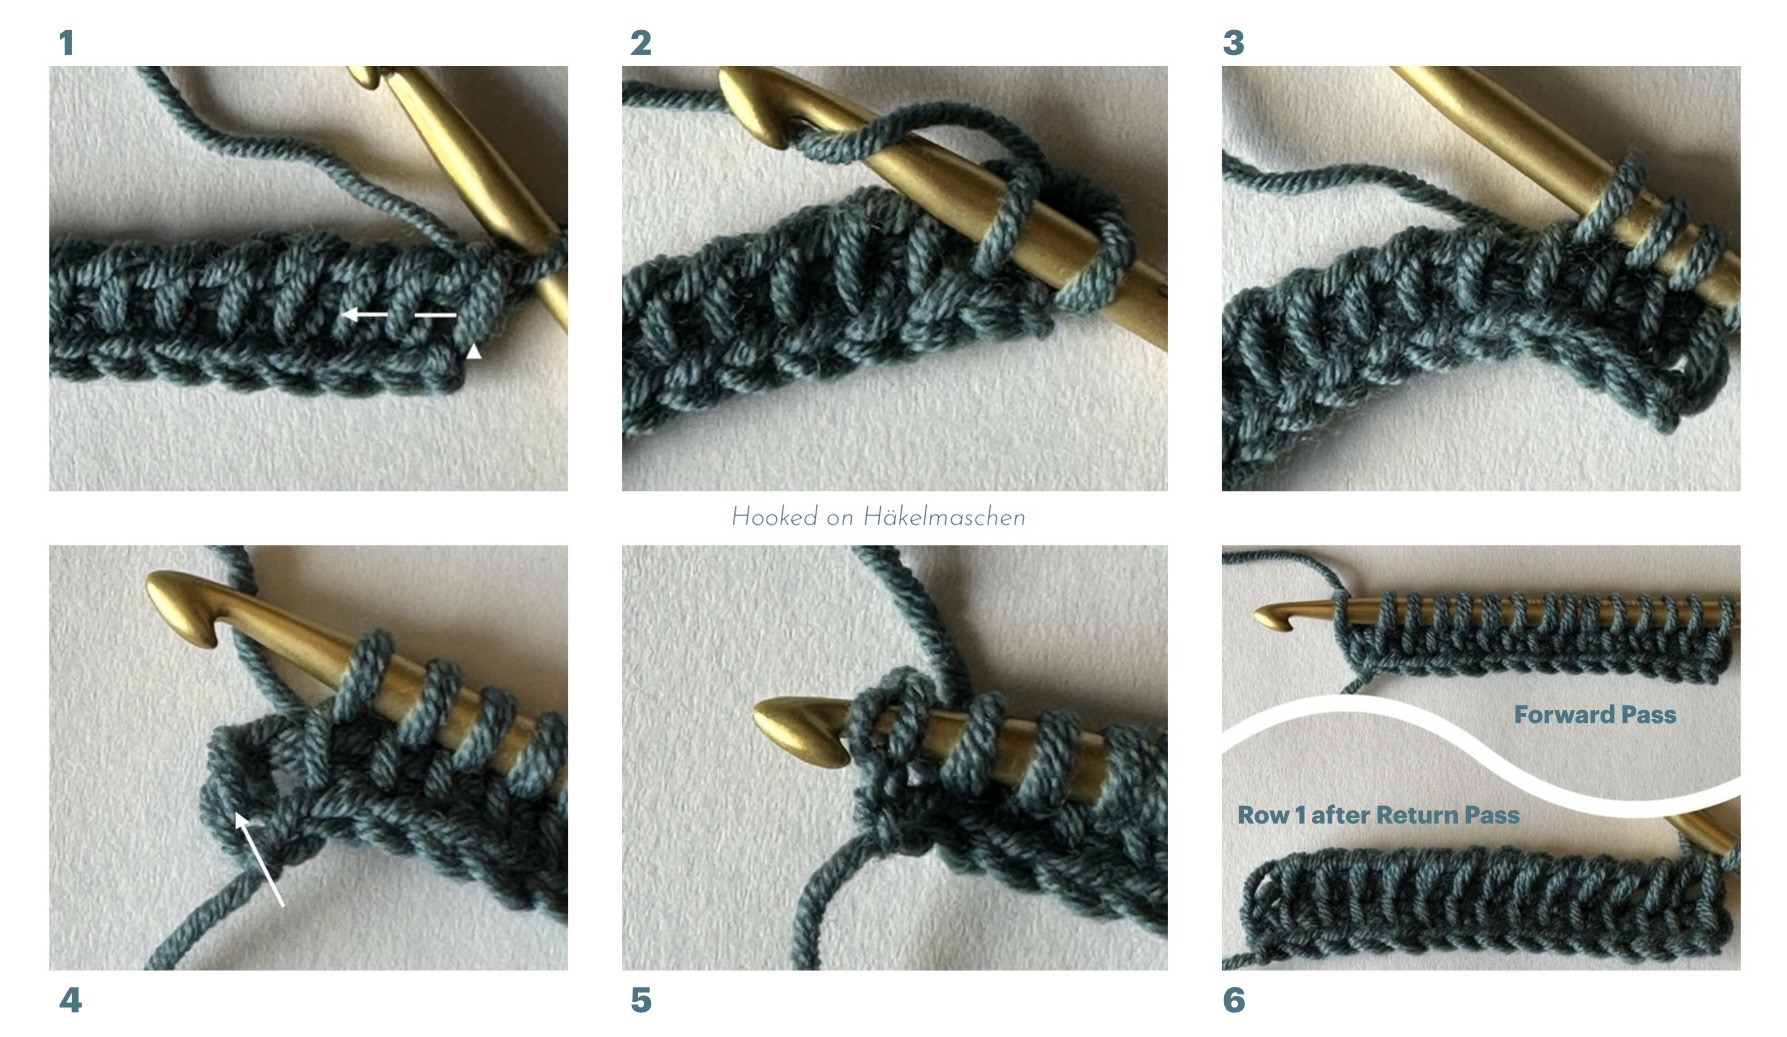
- Skip the first vertical bar of the foundation row / previous row (picture 1, white triangle).
- Insert the hook from right to left under the next front vertical bar, so that the vertical bar lies in front of the hook (picture 1, white arrow). Yarn over, pull up a loop and keep it on the hook (picture 2).
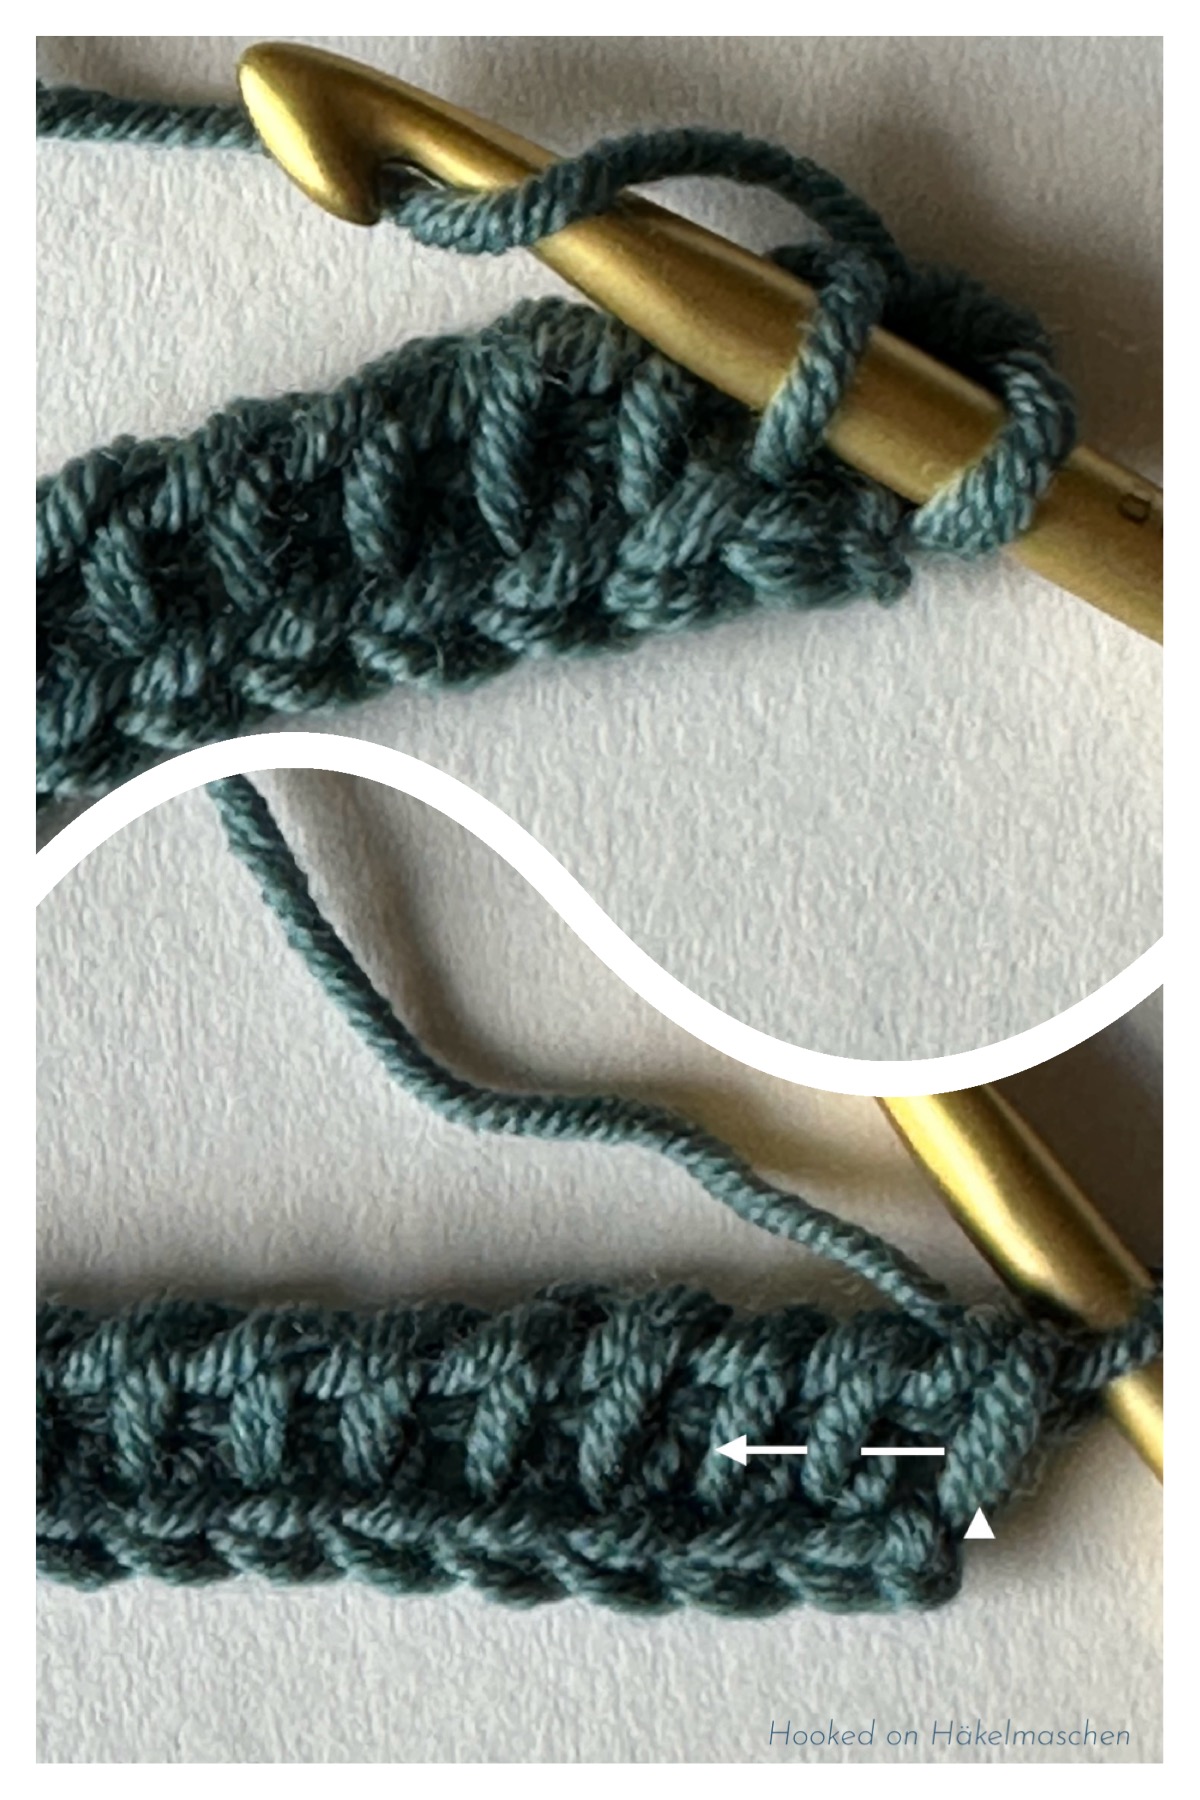
- Continue as before, picking up loops and keeping them on the hook (picture 3) until only the last front vertical bar (picture 4, white arrow) remains.
- Insert the hook under both vertical loops of the last stitch (picture 5), yarn over and pull up a loop, keep it on the hook.
- Don’t turn the work.
Row 1 – Return Pass (TSS)
Work from left to right with the yarn at the back.
- Yarn over and pull the yarn through the first loop on the hook.
- Yarn over and pull through two loops on the hook.
- Repeat yarning over and pulling through two loops until only one loop remains on the hook. Keep this loop on the hook.
For detailed pictures please refer to the explanations of the Standard Return Pass on the Tunisian Crochet – The Basics page.
Row 2 and following
Repeat the steps from row 1.
Tunisian Simple Stitch – Step by Step
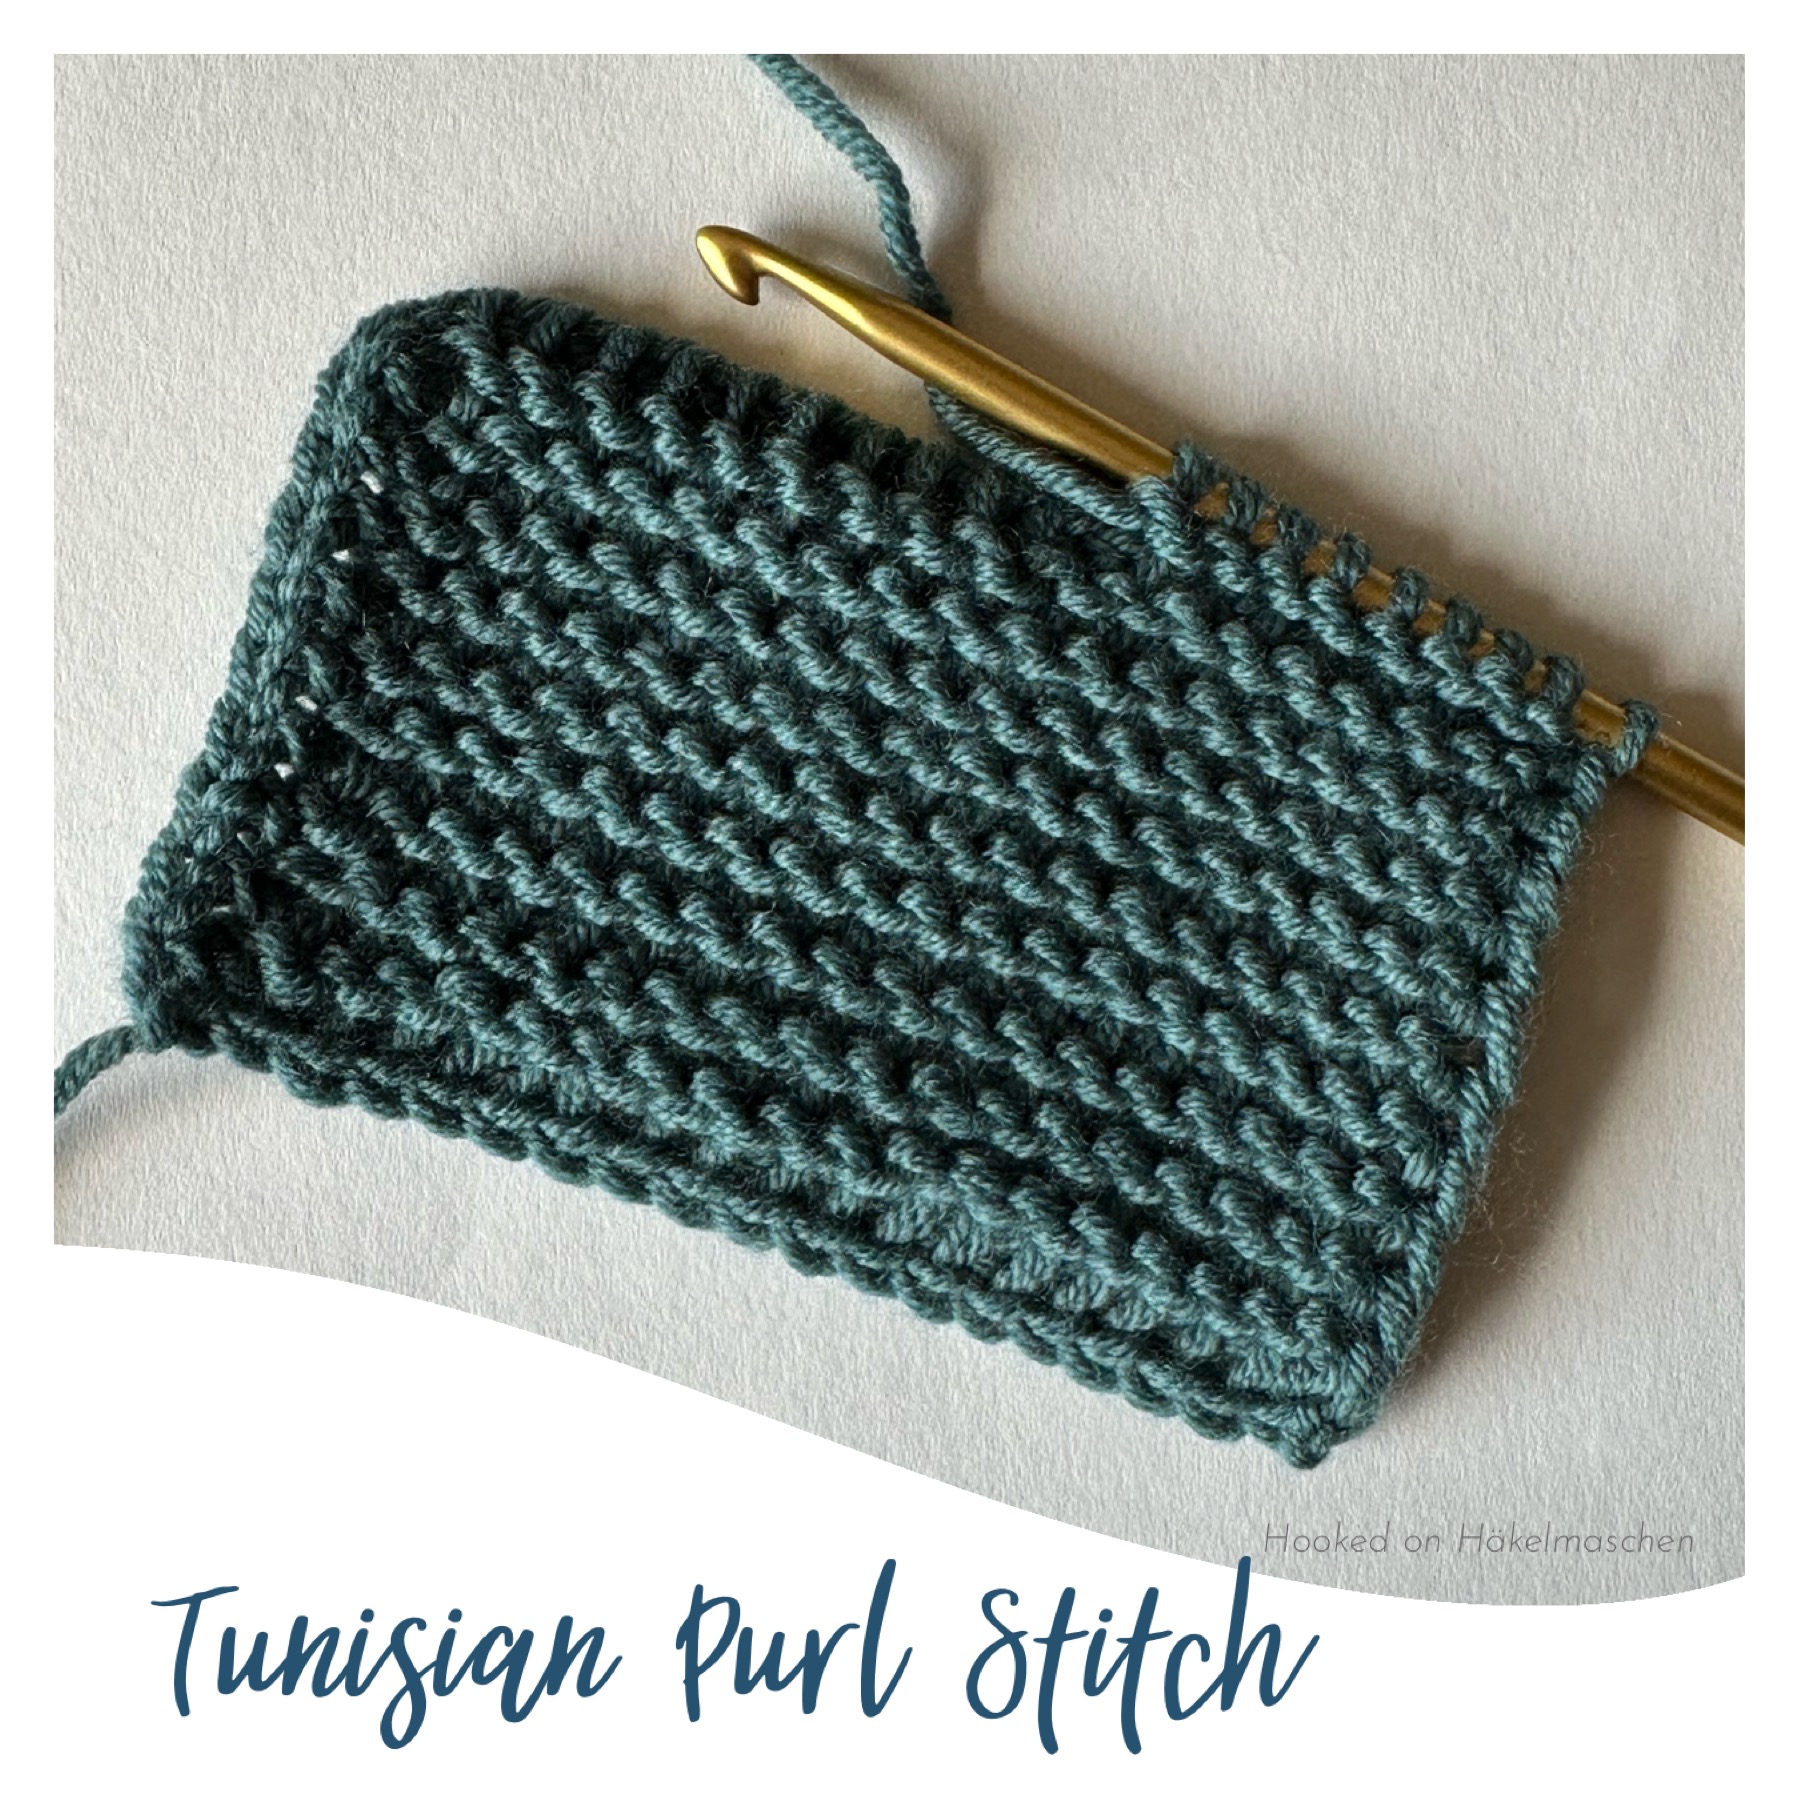
Tunisian Purl Stitch (TPS)
The Tunisian Purl Stitch (TPS) is similar in appearance to the purl stitch in knitting. It creates a raised texture on the surface of the fabric.
The stitch is worked in the same way as the Tunisian Simple Stitch, but with the yarn held at the front.
How to work the Tunisian Purl Stitch
The picture numbers mentioned in the following text correspond to the detailed photos in the accompanying step-by-step image below.
Start with a Standard Foundation Row.
Row 1 – Forward Pass (TPS)
Work from right to left with the yarn at the front.
- Skip the first vertical bar of the foundation row / previous row (picture 1, white triangle) and bring the working yarn at the front.
- Insert the hook from right to left under the next front vertical bar (picture 1, white arrow), yarn over, pull up a loop and keep it on the hook.
Note: while working this stitch, ensure that the yarn lies in front of and slightly under the vertical bar (picture 2). It is best to hold it down with your thumb while working the stitch. After finishing the stitch, give the yarn a little tug to tighten it slightly.
- Continue as before (picture 3) until you reach the last stitch (picture 4, white arrow).
- Insert the hook under both vertical loops of the last stitch (picture 5), yarn over and pull up a loop, keep it on the hook.
- Don’t turn the work.
Row 1 – Return Pass (TPS)
Work a Standard Return Pass as explained above for TSS.
Row 2 and following
Repeat the steps from row 1.
Tunisian Purl Stitch – Step by Step
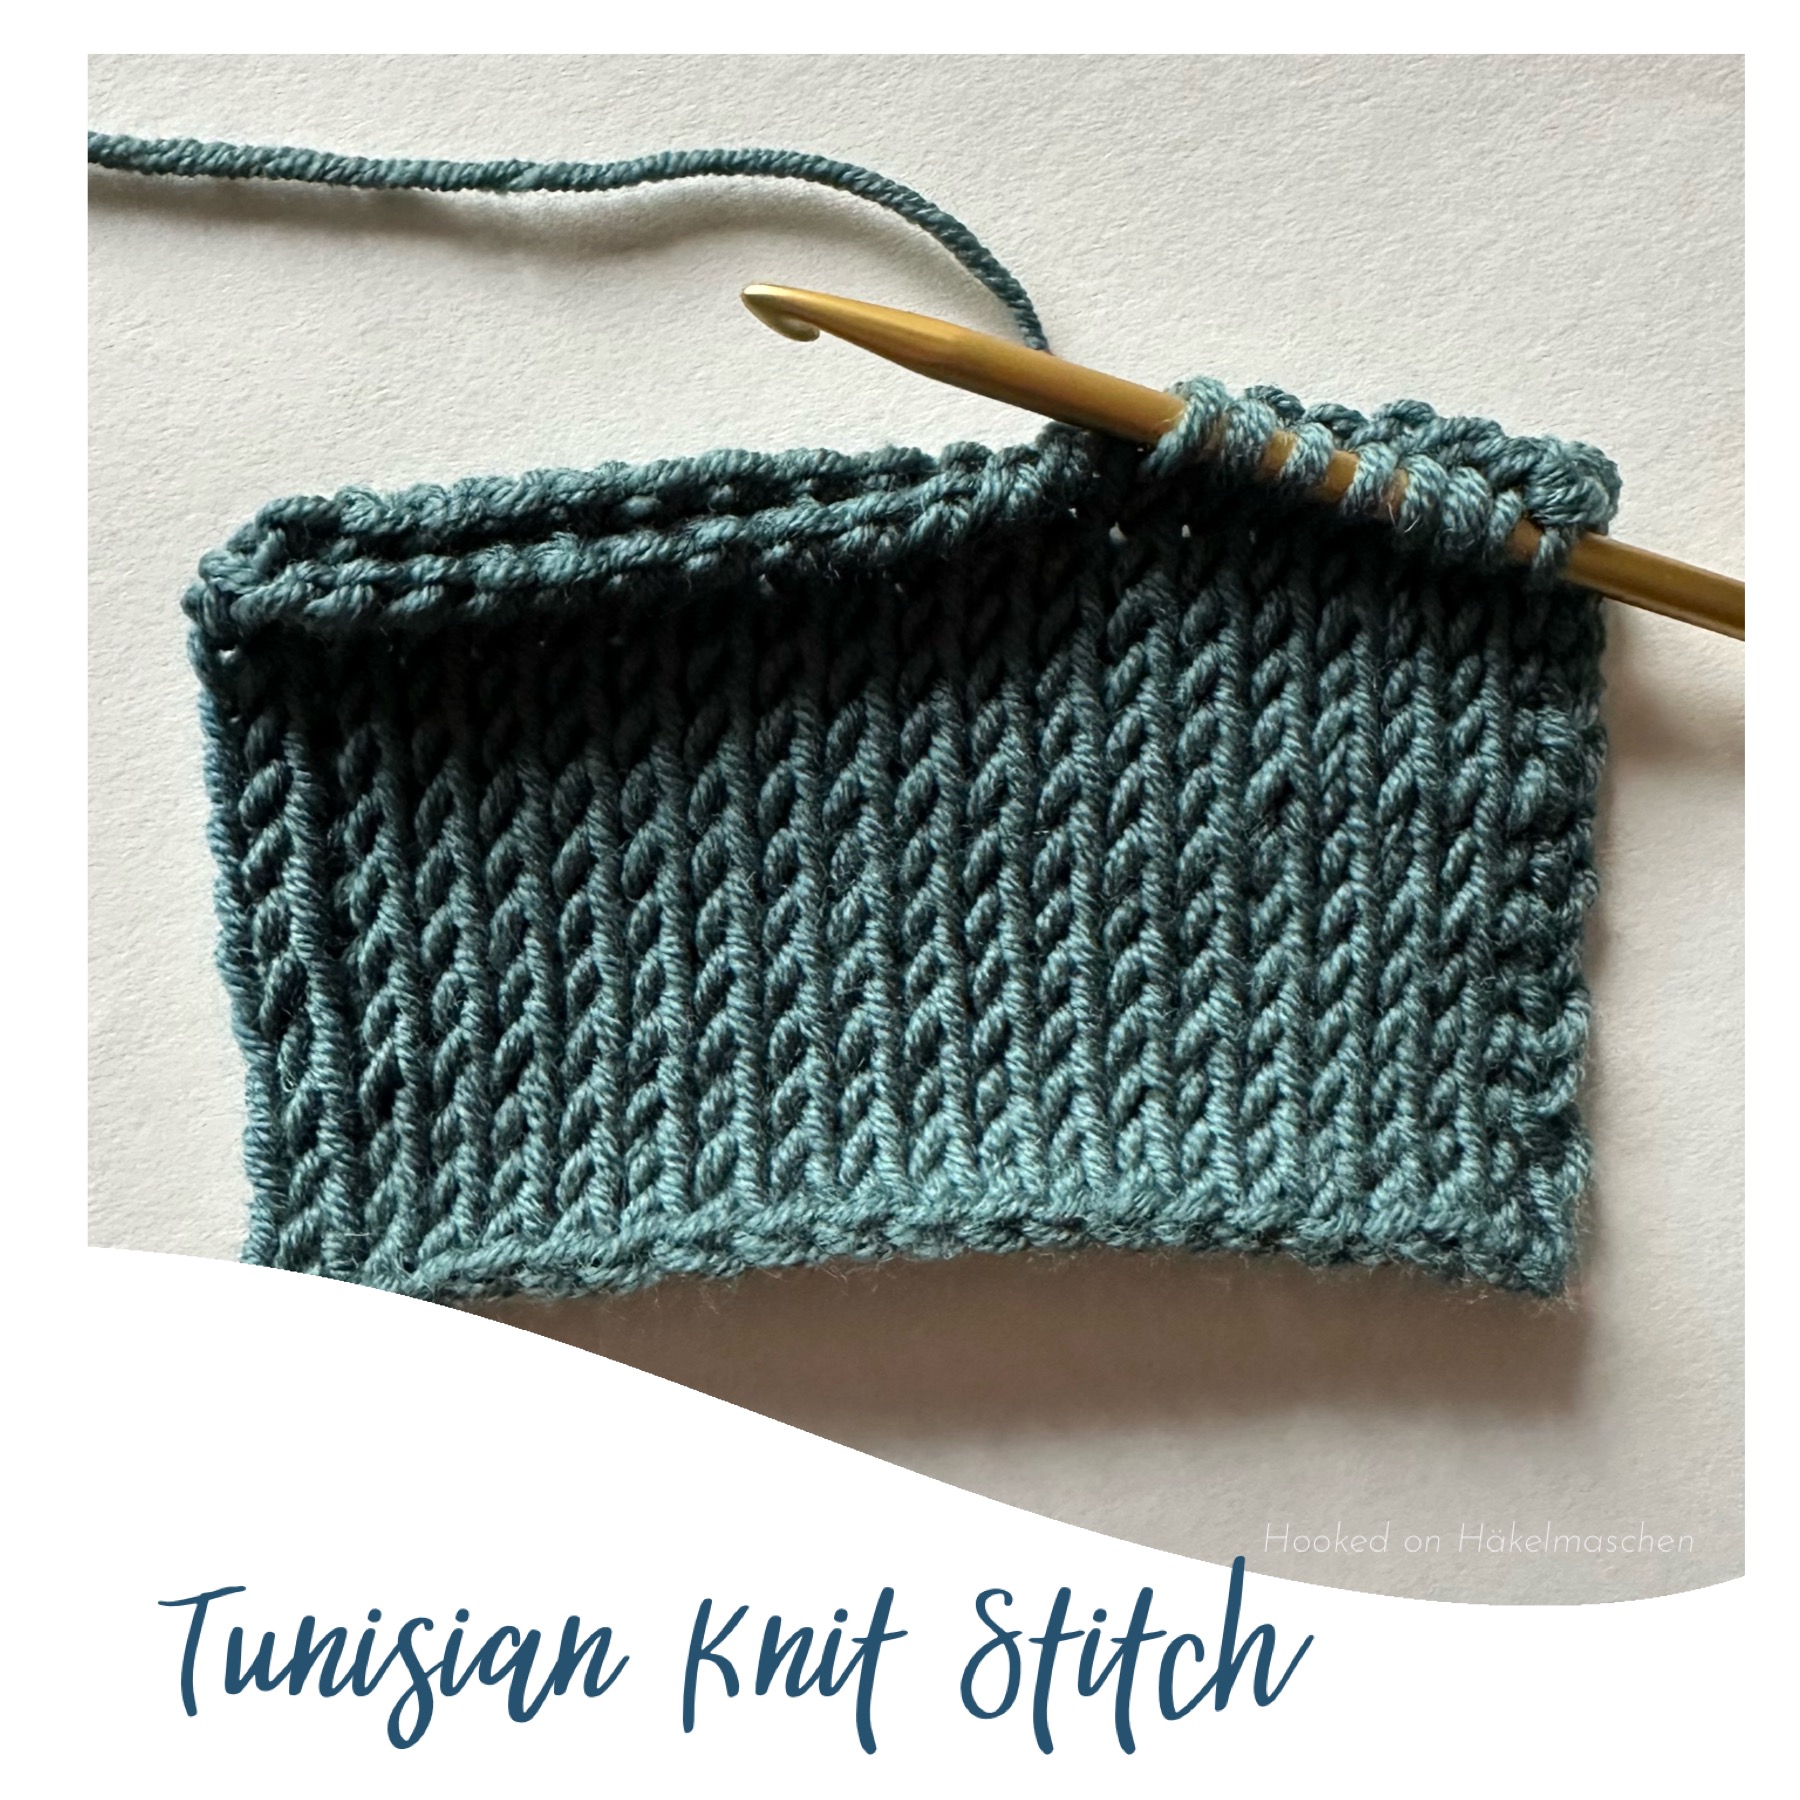
Tunisian Knit Stitch (TKS)
The Tunisian Knit Stitch (TKS) produces a dense fabric that resembles knitted stockinette stitch. The hook is inserted between the front and back vertical bars, which gives the stitch its characteristic knit-like appearance.
This stitch is often used when a smooth, knitted look is desired.
How to work the Tunisian Knit Stitch
The picture numbers mentioned in the following text correspond to the detailed photos in the accompanying step-by-step image below.
Start with a Standard Foundation Row.
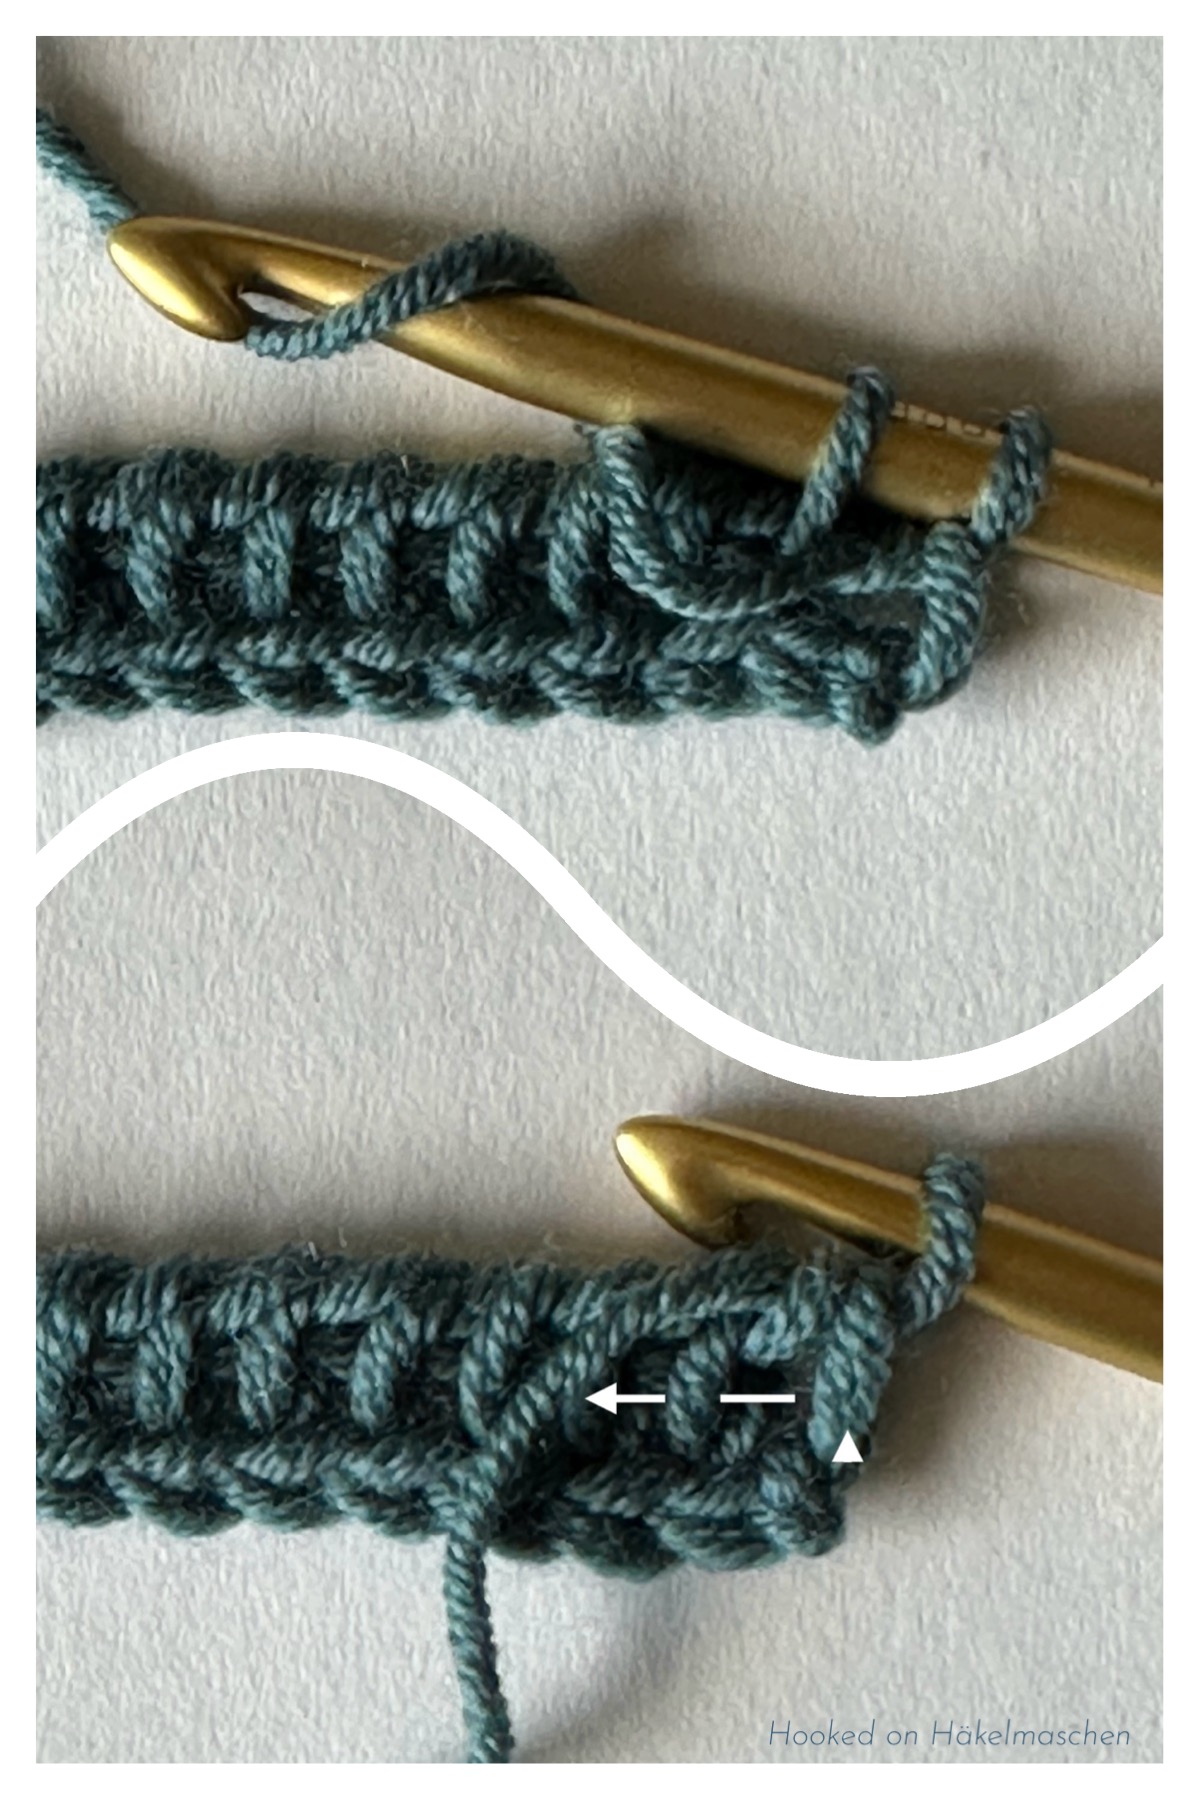
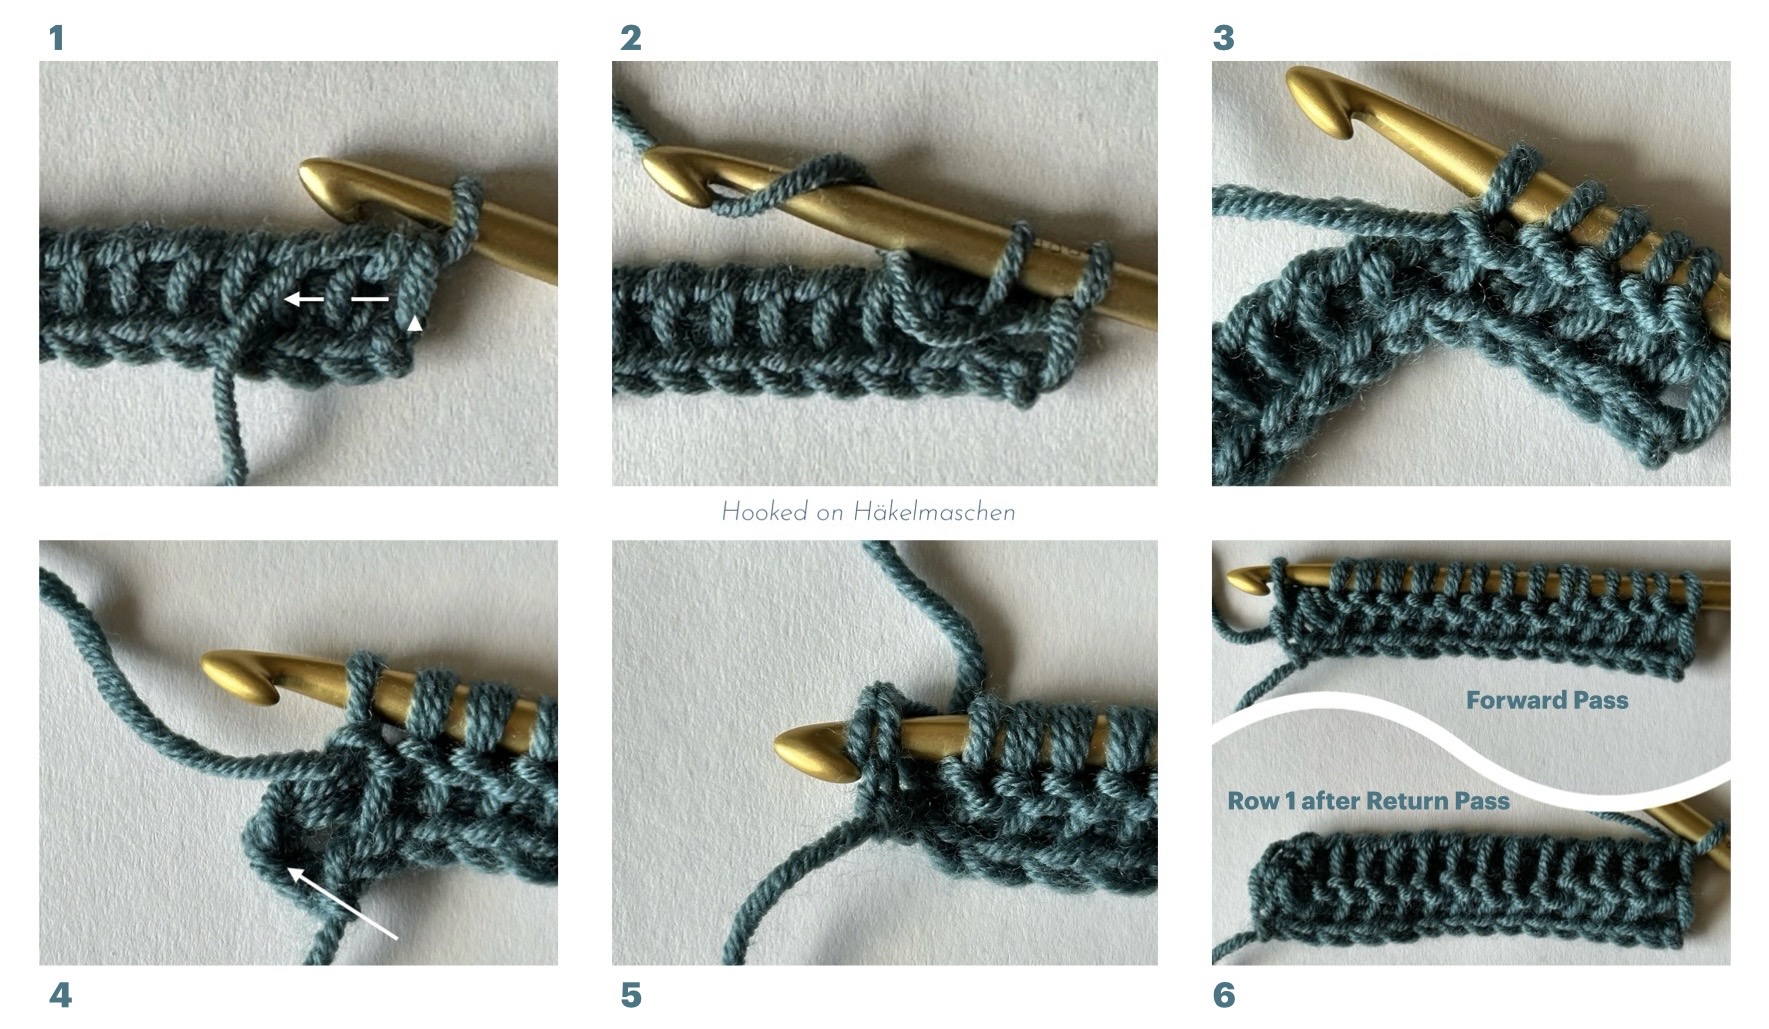
Row 1 – Forward Pass (TKS)
Work from right to left with the yarn at the back.
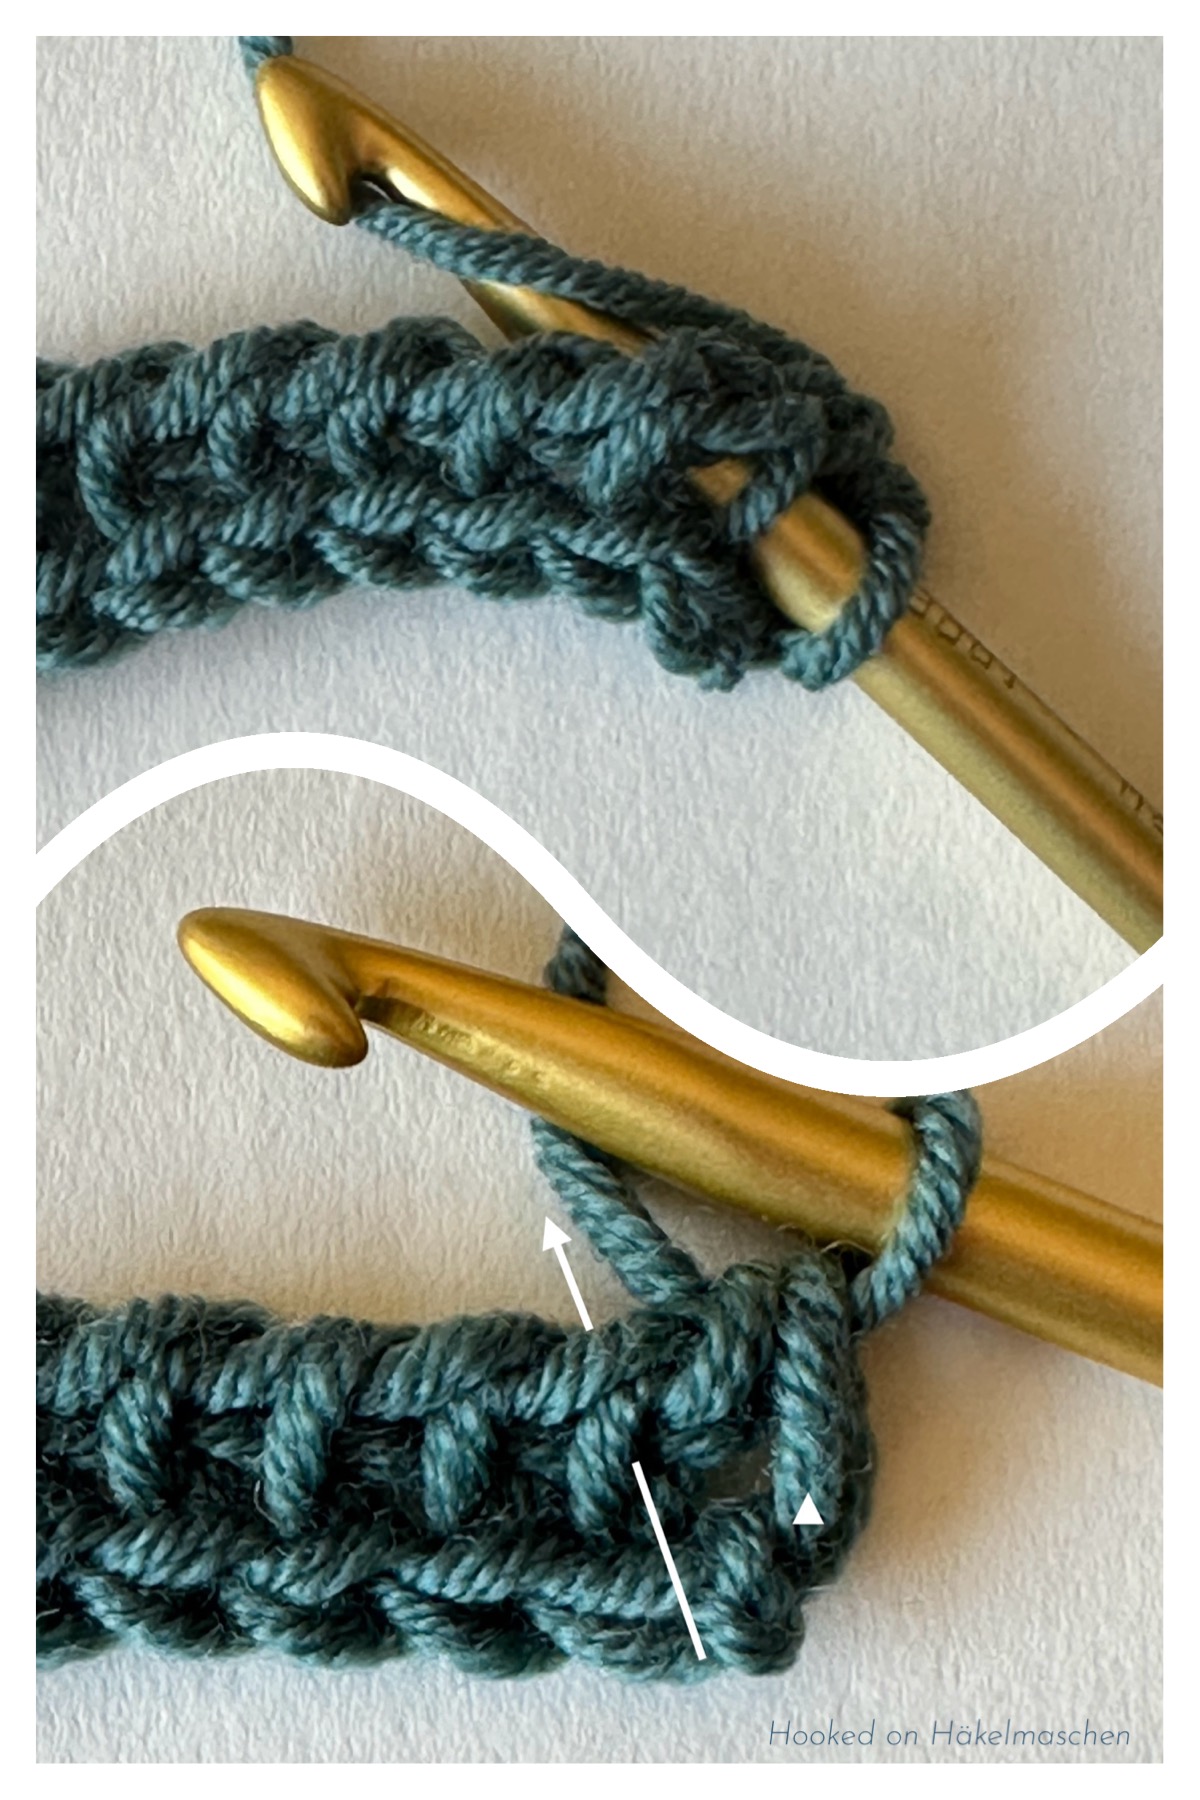
- Skip the first vertical bar (picture 1, white triangle) of the foundation row / previous row.
- Insert the hook from front to back between the front and back vertical bar of the next stitch (picture 1, white arrow ), yarn over, pull up a loop (picture 2), keep the loop on the hook (picture 3).
- Continue as before (picture 4) until only one stitch remains (picture 5, white arrow).
- Insert the hook under both vertical loops of the last stitch, yarn over and pull up a loop, keep it on the hook.
- Don’t turn the work.
Row 1 – Return Pass (TKS)
Work a Standard Return Pass as explained above for TSS.
Row 2 and following
Repeat the steps from row 1.
Tunisian Knit Stitch – Step by Step
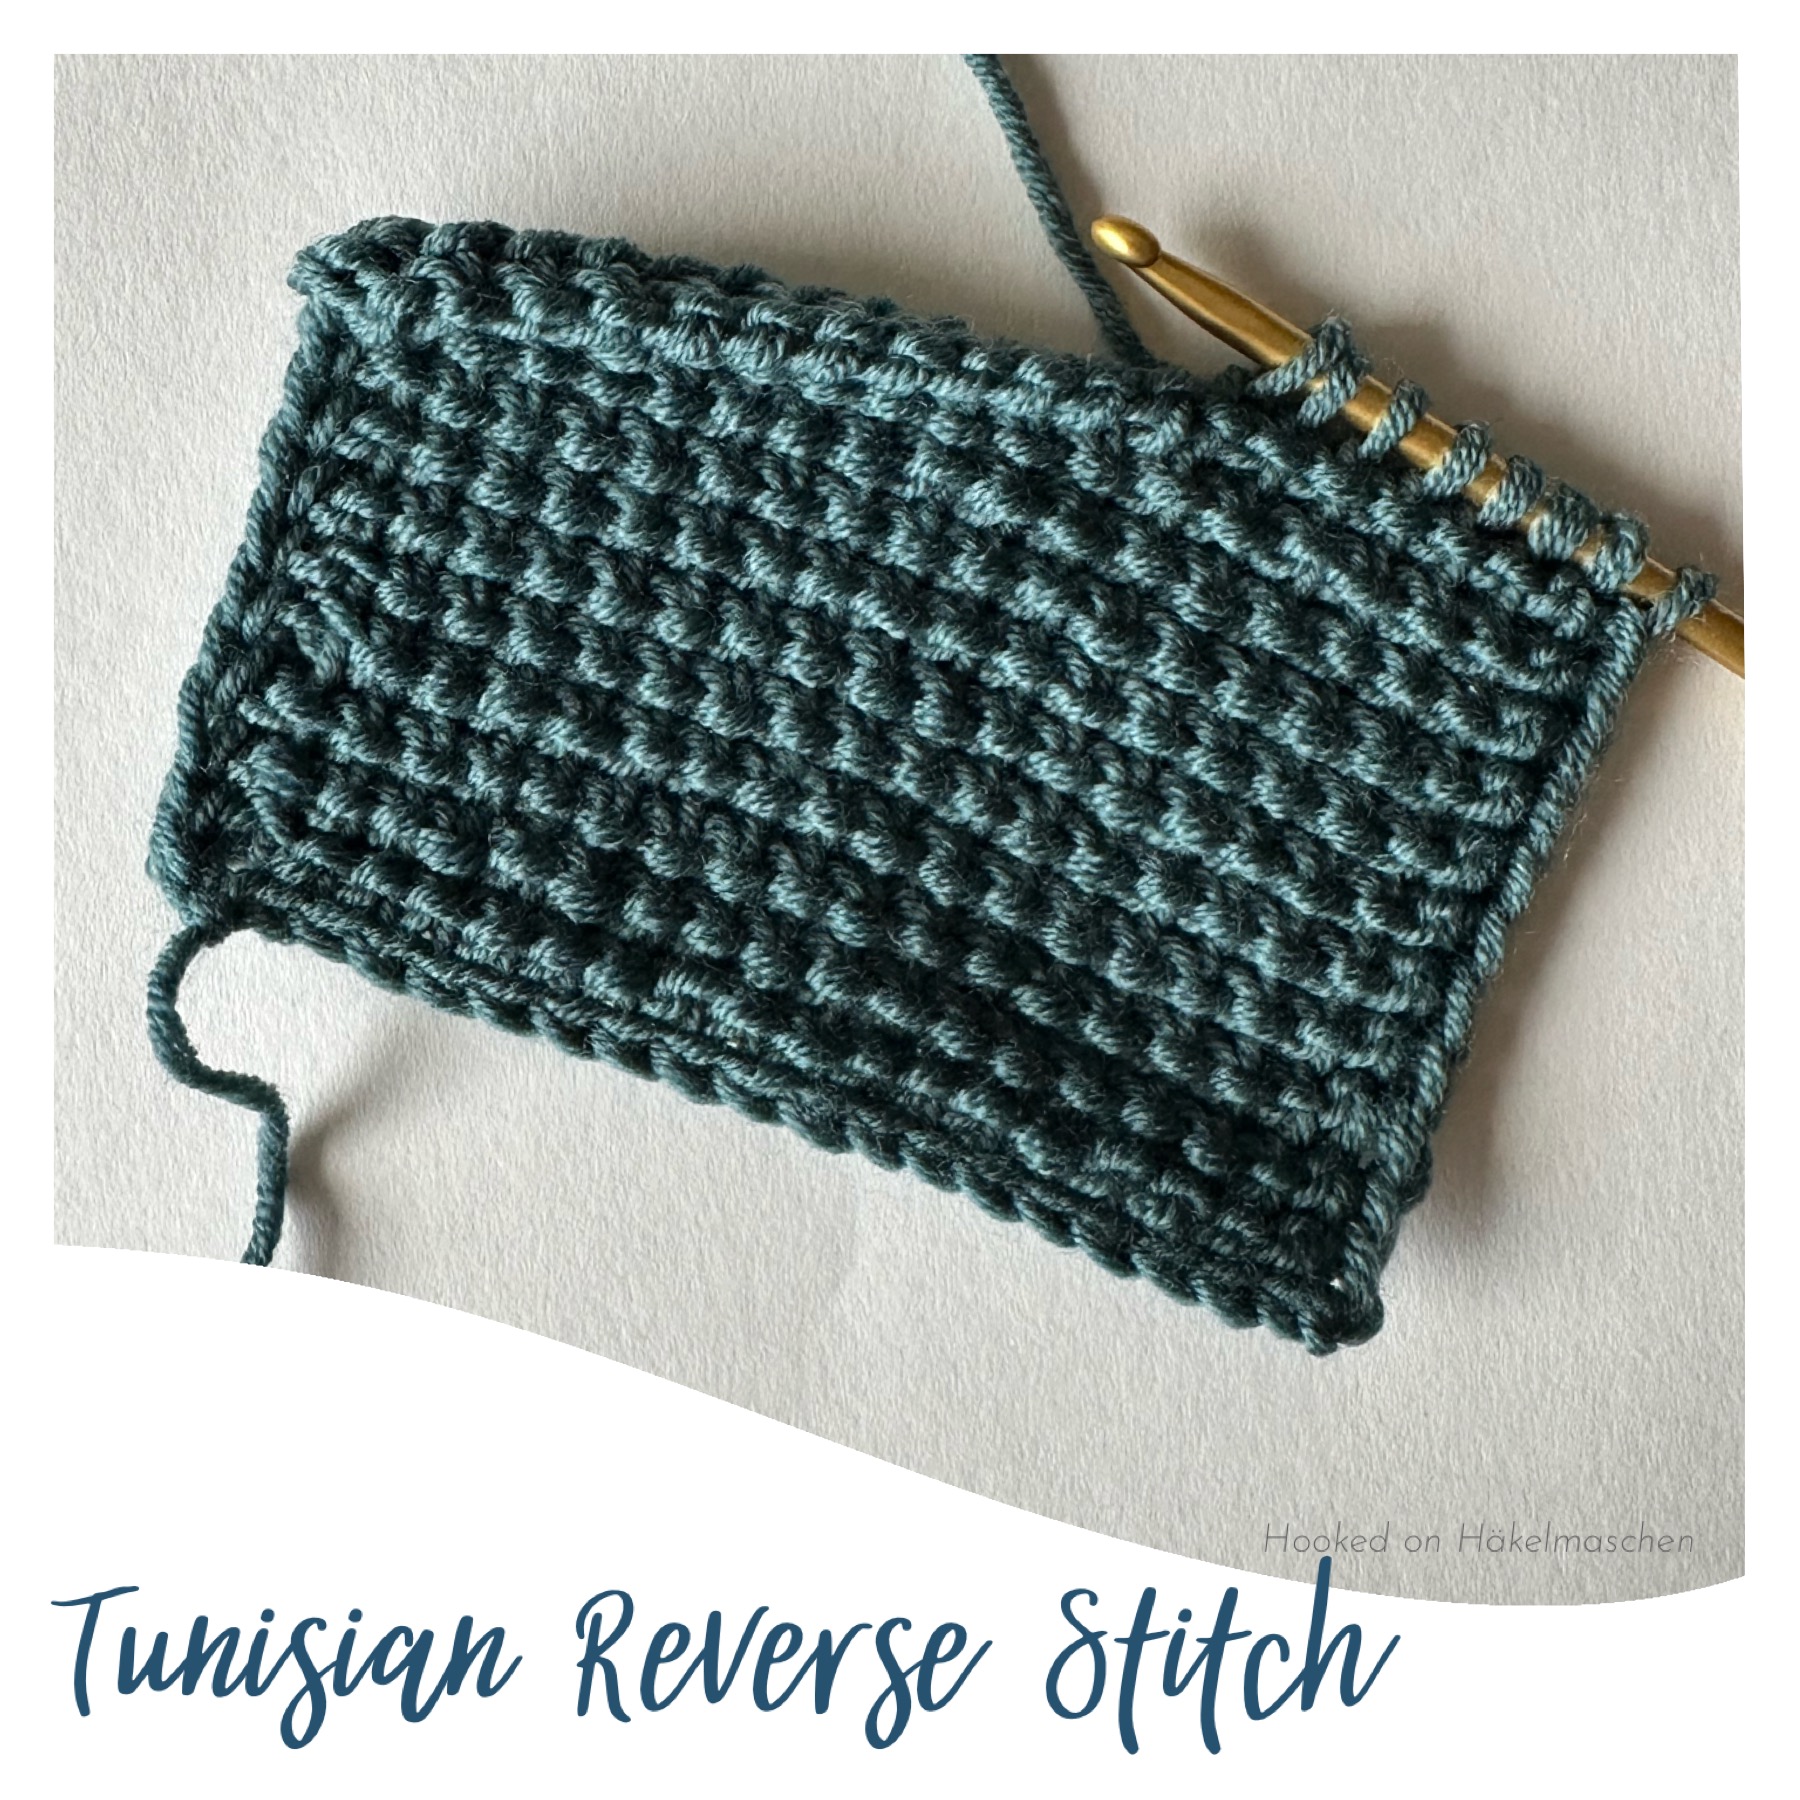
Tunisian Reverse Stitch (TRS)
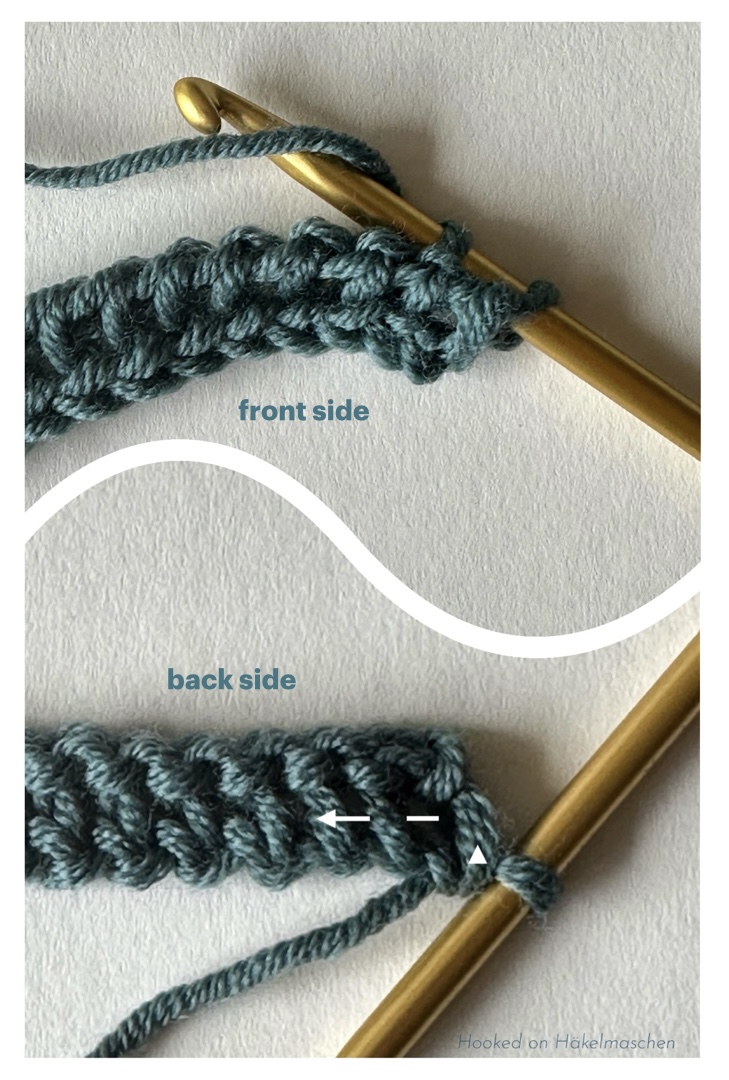
The Tunisian Reverse Stitch (TRS) is worked into the back vertical bar of the stitch. This creates a pronounced, raised texture on the front of the fabric.
It is often used to add structure or contrast to Tunisian crochet patterns.
How to work the Tunisian Reverse Stitch
The picture numbers mentioned in the following text correspond to the detailed photos in the accompanying step-by-step image below.
Start with a Standard Foundation Row.
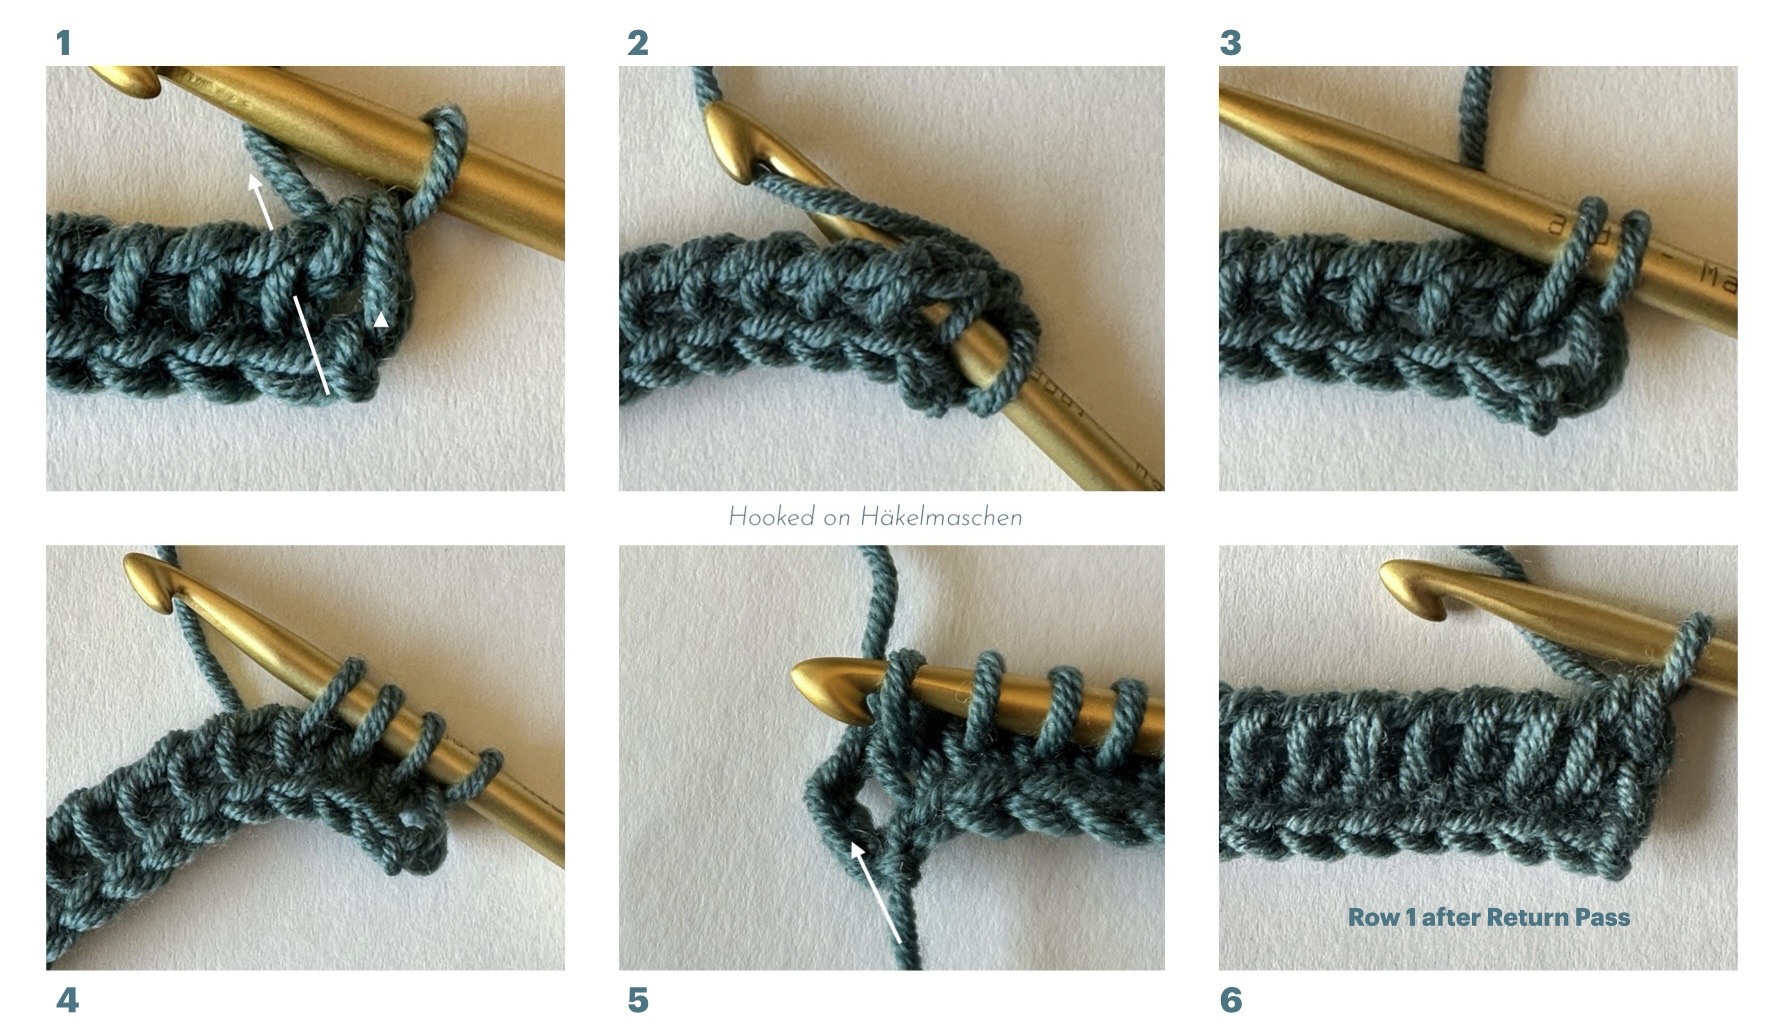
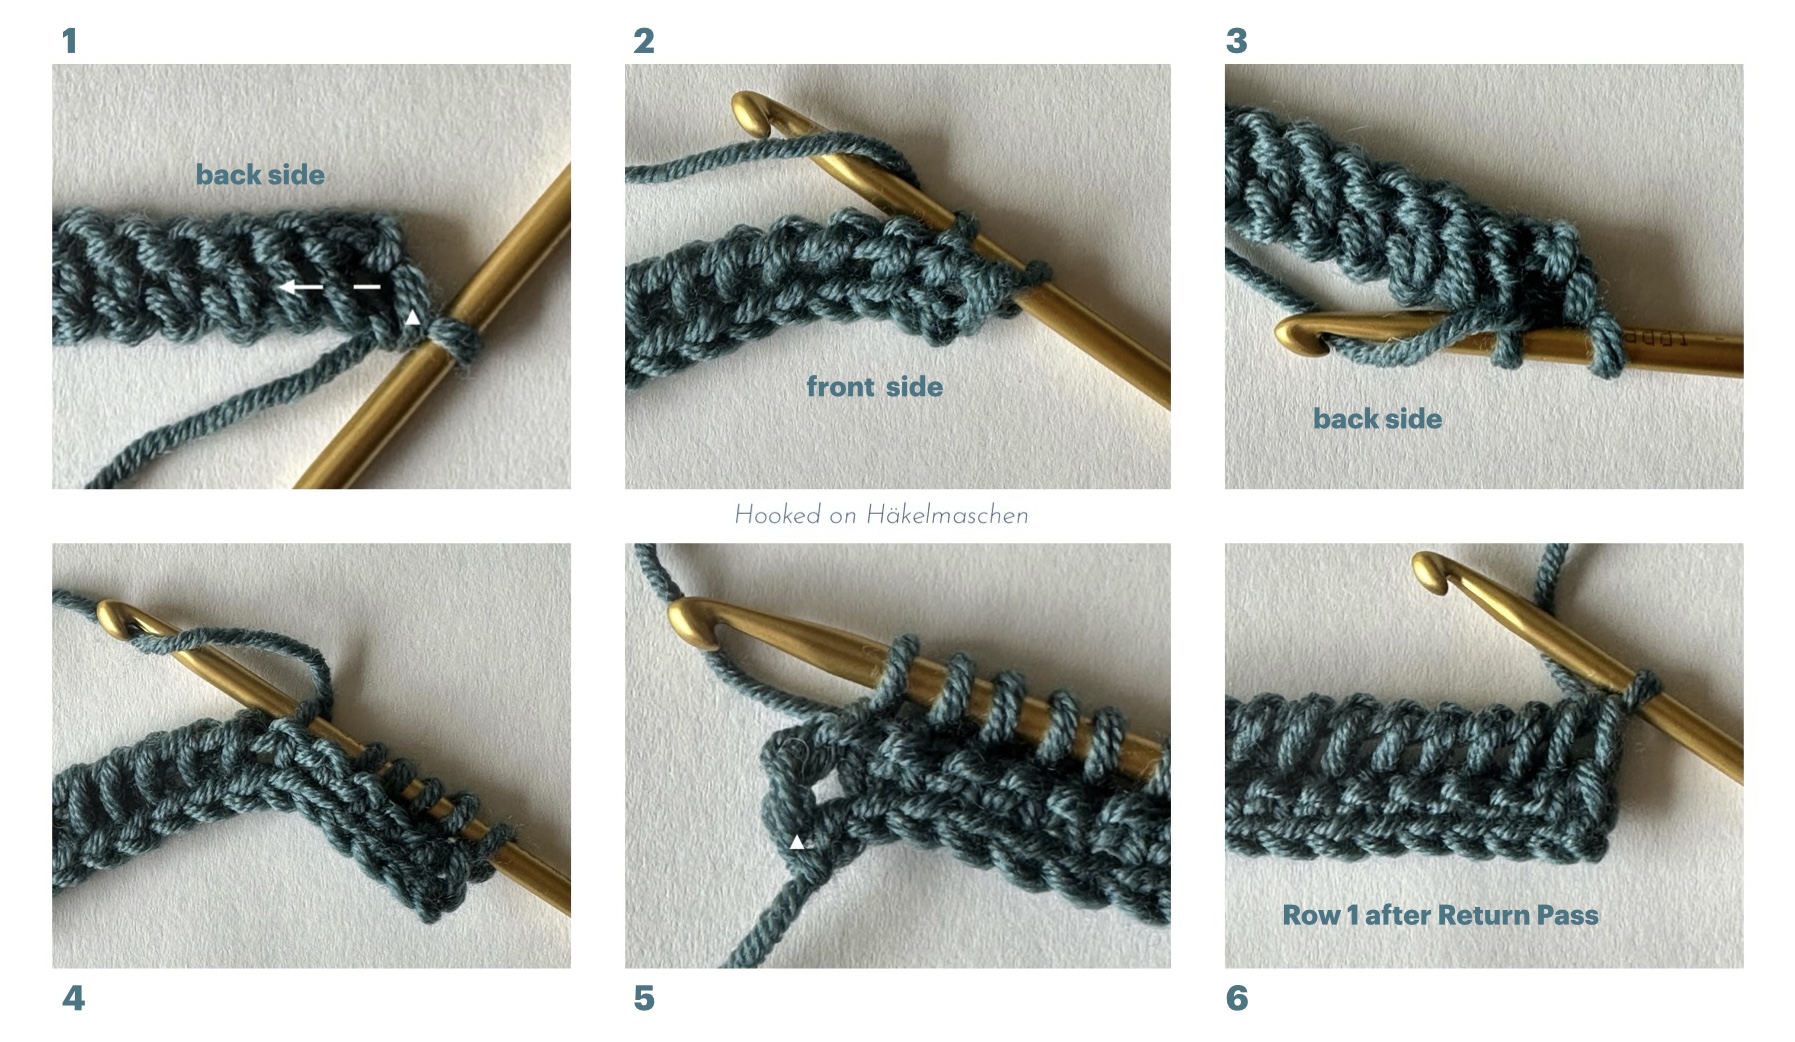
Row 1 – Forward Pass (TRS)
Work from right to left with the yarn at the back.
- Skip the first vertical bar of the foundation row / previous row (picture 1, white triangle).
- Insert the hook from right to left under the back vertical bar of the next stitch (picture 1, white arrow), yarn over, pull up a loop (pictures 2 and 3) and keep it on the hook.
Note: To work this stitch, it is best to tilt the work slightly towards you.
- Continue as before (picture 4) until only one stitch remains (picture 5, white arrow).
- Insert the hook under both vertical loops of the last stitch, yarn over and pull up a loop, keep it on the hook.
- Don’t turn the work.
Row 1 – Return Pass (TRS)
Work a Standard Return Pass as explained above for TSS.
Row 2 and following
Repeat the steps from row 1.
Tunisian Reverse Stitch – Step by Step
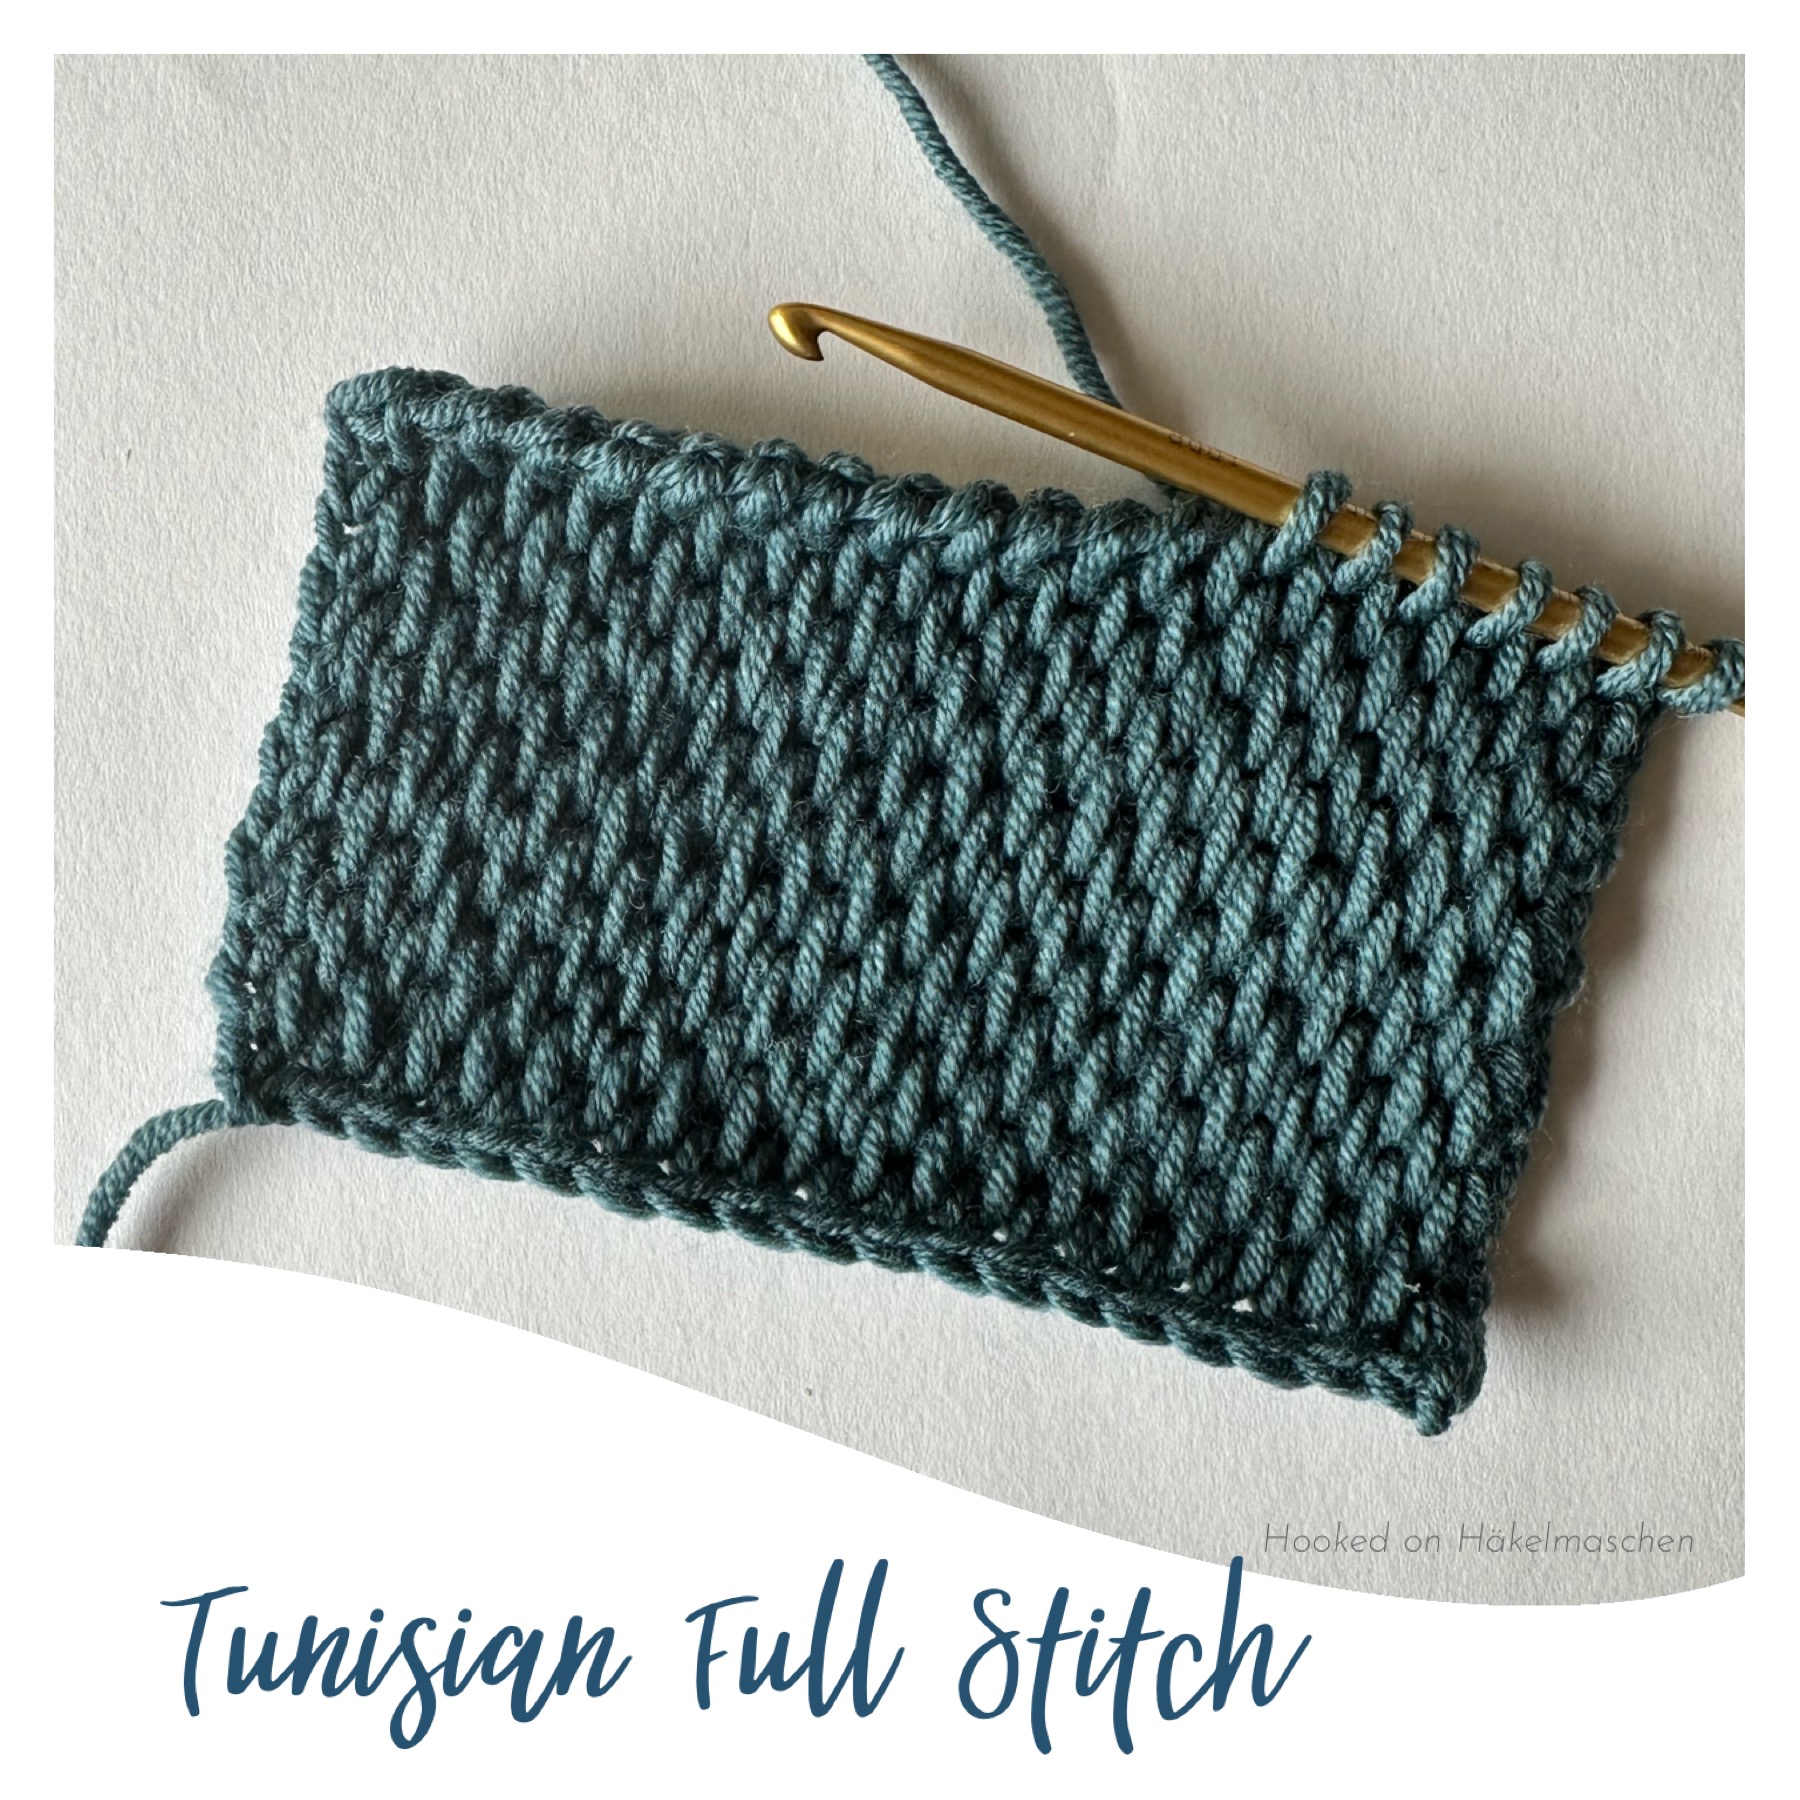
Tunisian Full Stitch (TFS)
The Tunisian Full Stitch (TFS), also known as Gobelin stitch, is worked around the horizontal bars between two stitches. It creates a dense, woven-looking fabric.
Because the stitches are staggered, this stitch is worked over a two-row repeat.
How to work the Tunisian Full Stitch
The picture numbers mentioned in the following text correspond to the detailed photos in the accompanying step-by-step image below.
Start with a Standard Foundation Row.
Row 1 – Forward Pass (TFS)
Work from right to left with the yarn at the back.
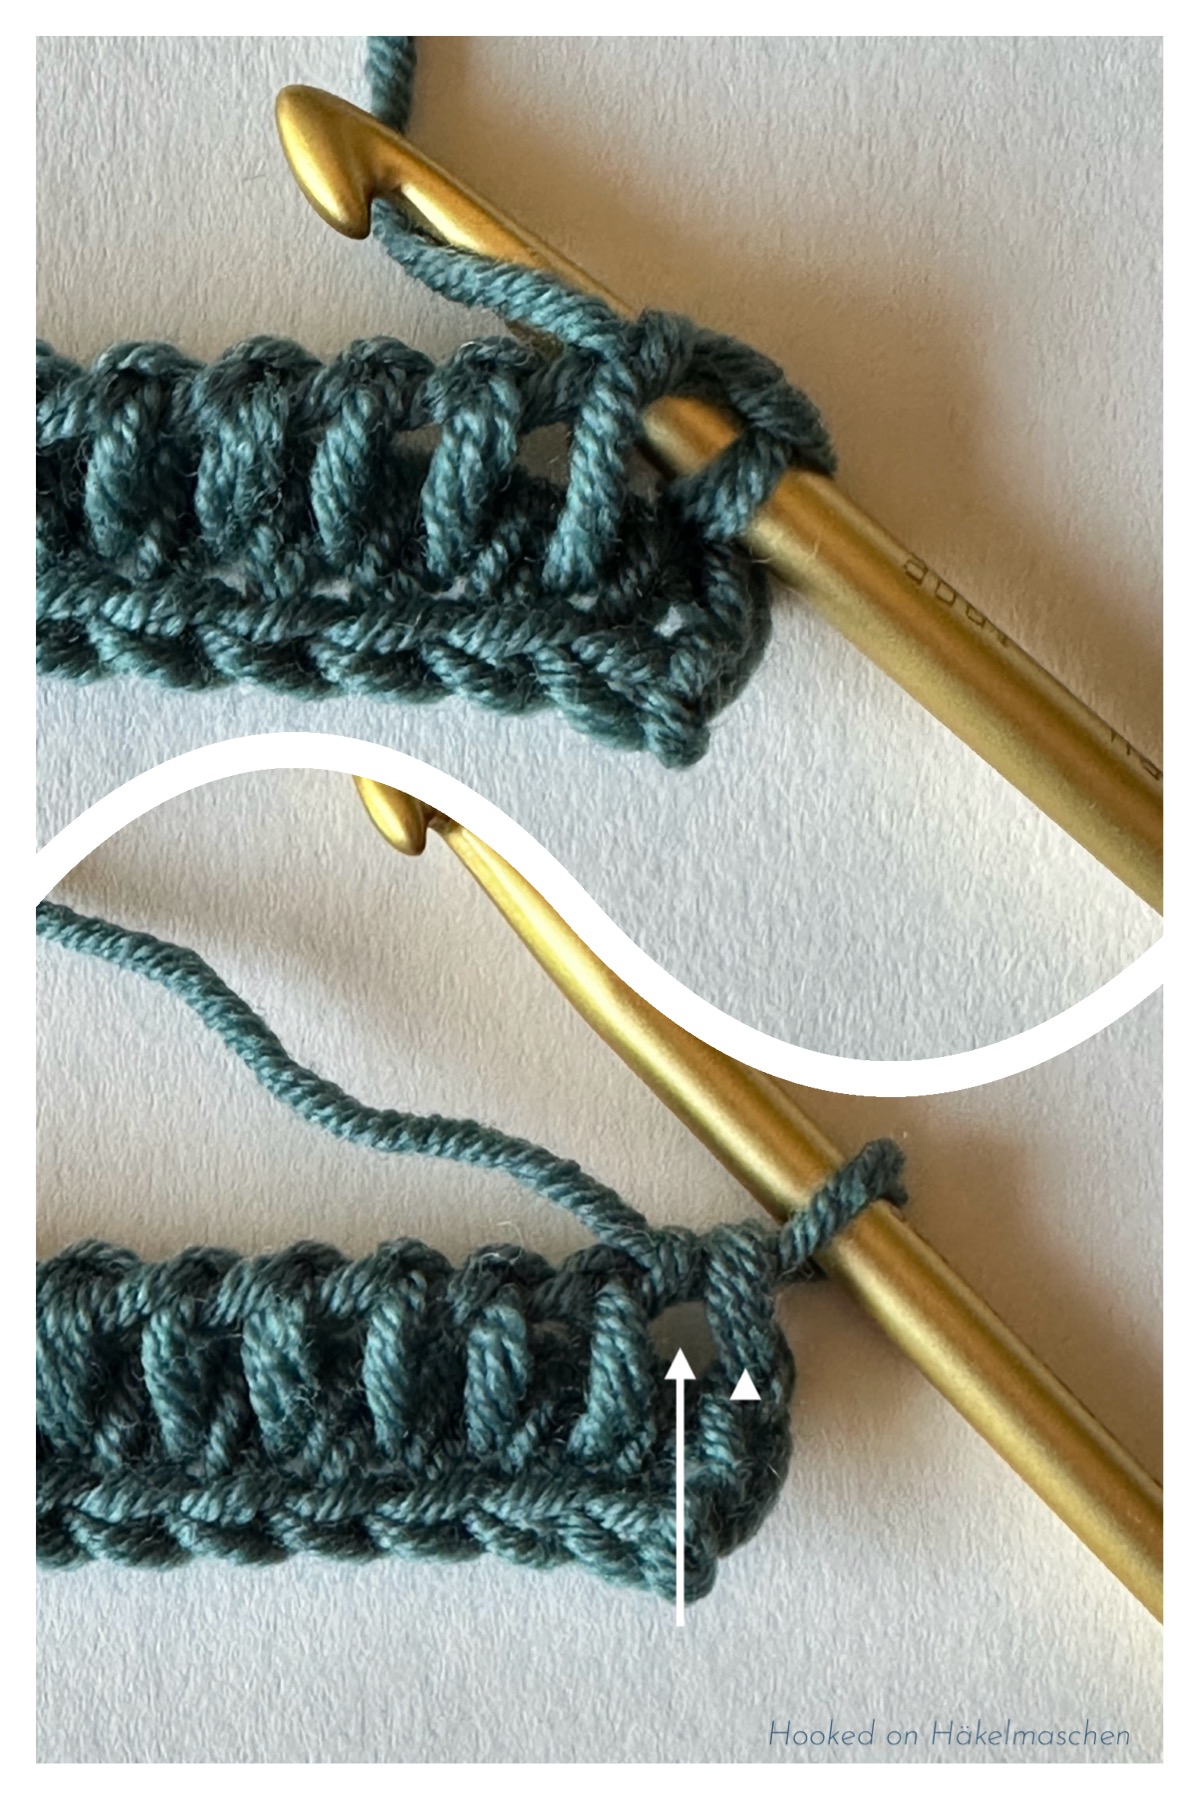
- Skip the first and the second vertical bar of the foundation row / previous row (picture 1, white triangles).
- Insert the hook in the space between the vertical bars of the second and third stitch (picture 1, white arrow), yarn over (picture 2), pull up a loop and keep it on the hook (picture 3).

- Insert the hook in the space between the vertical bars of next two stitches, yarn over, pull up a loop and keep it on the hook.
- Continue as before (picture 4) until only one stitch remains (picture 5, white arrow). Note: the last stitch of this row is worked in the space between the second to last (picture 5, white triangle) and last stitch.
- Insert the hook under both vertical loops of the last stitch, yarn over and pull up a loop, keep it on the hook.
- Don’t turn the work.
Row 1 – Return Pass (TFS)
Work a Standard Return Pass as explained above for TSS.
Tunisian Full Stitch – Step by Step, Row 1

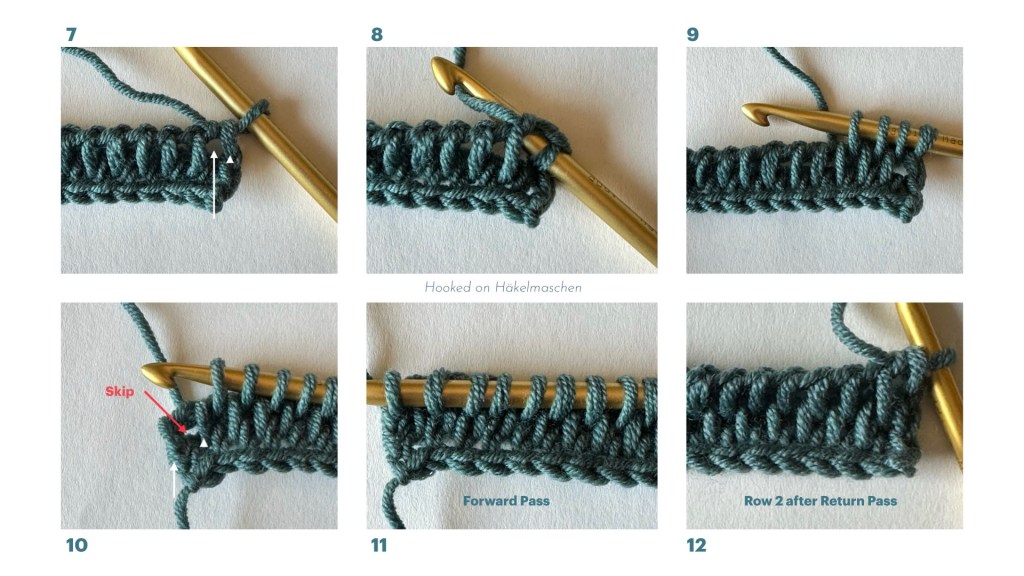
Row 2 – Forward Pass (TFS)
Work from right to left with the yarn at the back.
- Skip the first vertical bar of the previous row (picture 7, white triangle).
- Insert the hook in the space between the vertical bars of the first and the second stitch (picture 7, white arrow), yarn over, pull up a loop and keep it on the hook.
- Insert the hook in the space between the vertical bars of next two stitches, yarn over, pull up a loop and keep it on the hook.
- continue as before (picture 9) until you reach the second to last stitch (picture 10, white triangle).
- Skip the space between the second to last stitch and the last stitch (picture 10, red arrow), insert the hook under both vertical loops of the last stitch, yarn over and pull up a loop, keep it on the hook.
- Don’t turn the work.
Row 2 – Return Pass (TFS)
Work a Standard Return Pass as explained above for TSS.
Tunisian Full Stitch – Step by Step, Row 2
Row 3 and following
Repeat the steps from row 1 and 2.
Have fun trying out!

