Bloom the Mood

A pattern test for BebaBlanket

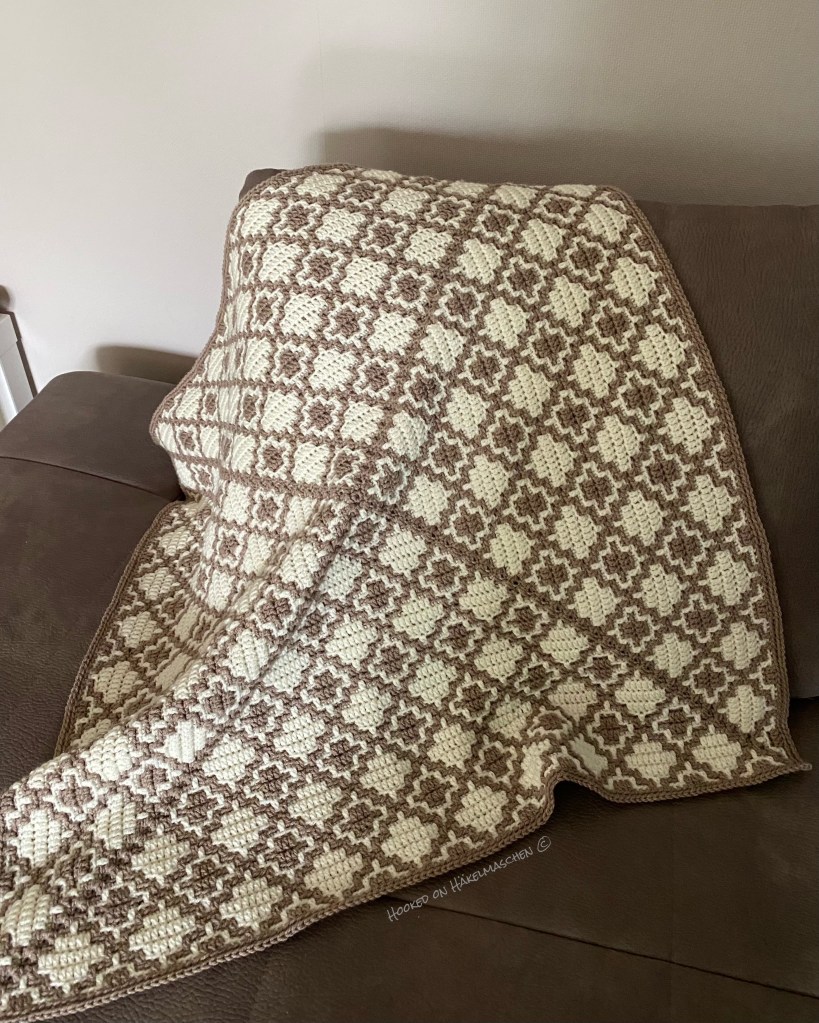
Bloom the Mood is a pattern from her BiS series.
BiS means Beauty in Simplicity . A series of quick and easy patterns that are meant as relaxing in between projects that don’t need too much counting.

And indeed, the pattern was relaxing and fun to work on!
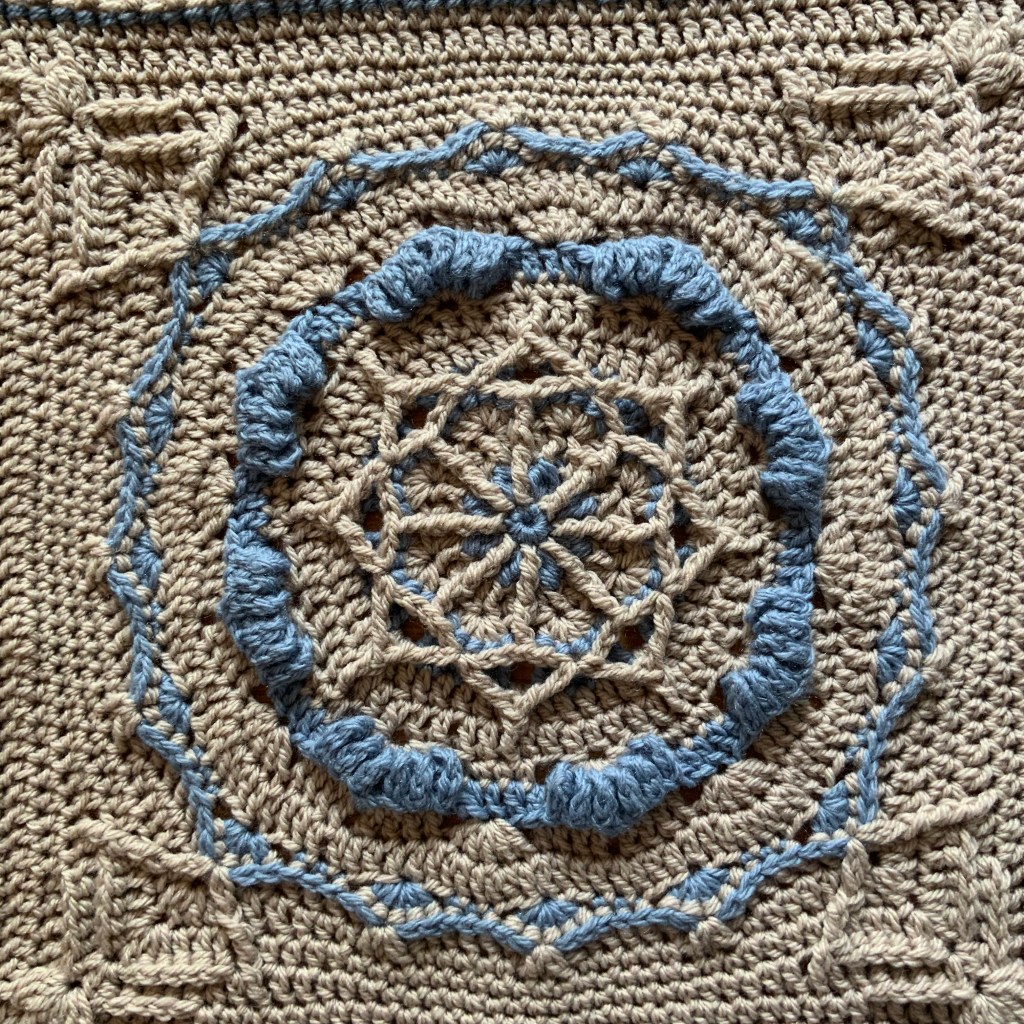
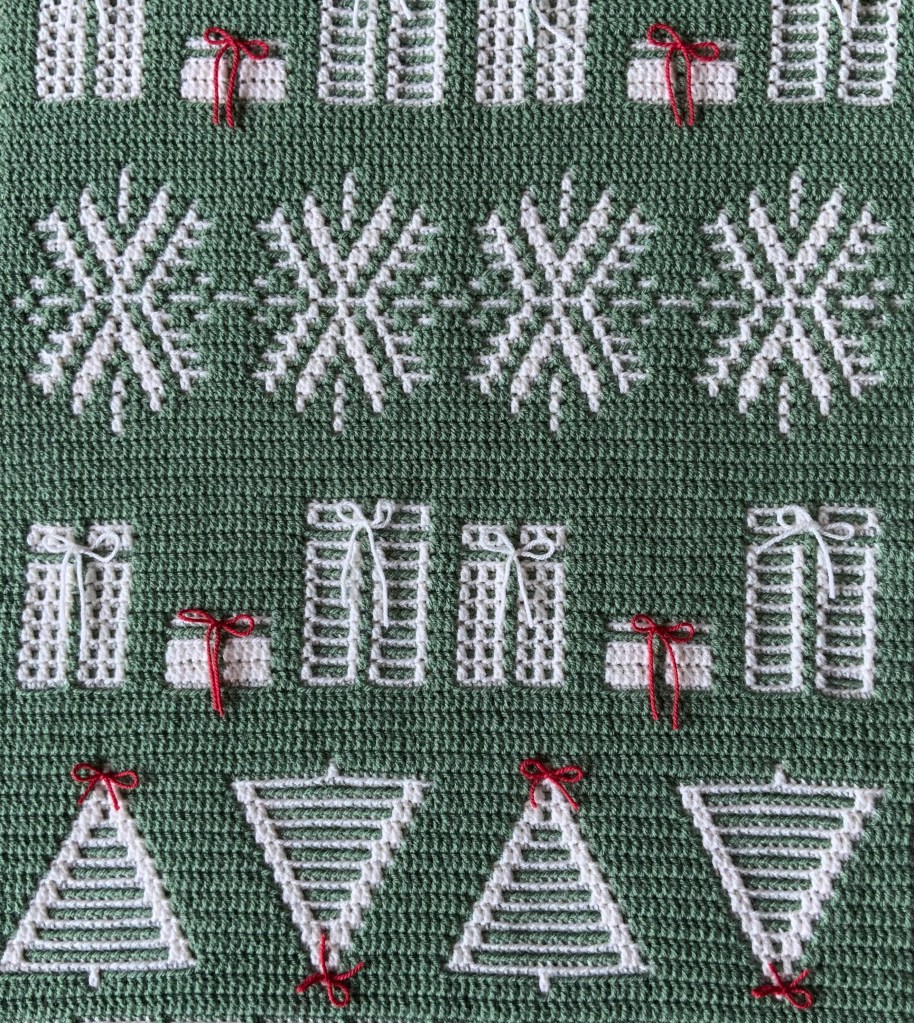
It has charts for 4 different flower motifs and a chart for a separation section. You can combine them just the way you like.

The flowers immediately reminded me of an old cross-stitch pattern. So I originally planned to make a small wallhanging. I decided to go with a cotton yarn to make it not too big and bulky. And I also was looking for some subdued colours to take into account the old cross-stitch pattern.

On my search I came across the 8/4 Rainbow Cotton from hobbii. They have a great colour range and I wanted to try this yarn for a very long time. The colours look a little different on the website but I am still happy with what I got.

I choose the colour Mist (the one in the middle) for the background, Light Jeansblue for the separations and Sage Green for the Leaves. Powder Rose, Dark Powder Rose, Apricot and Grayish Purple for the flowers.

Later on I replaced Apricot with Lilac which is not shown on the picture above. Apricot is a bit too bright for the subdued look I wanted to create. It is still a beautiful colour though and looks great in combination with the Grayish Purple.
The yarn is smooth and soft and I love working with it! I am sure it will become one of my favorite cotton yarns for making light blankets, pillow cases and so on.

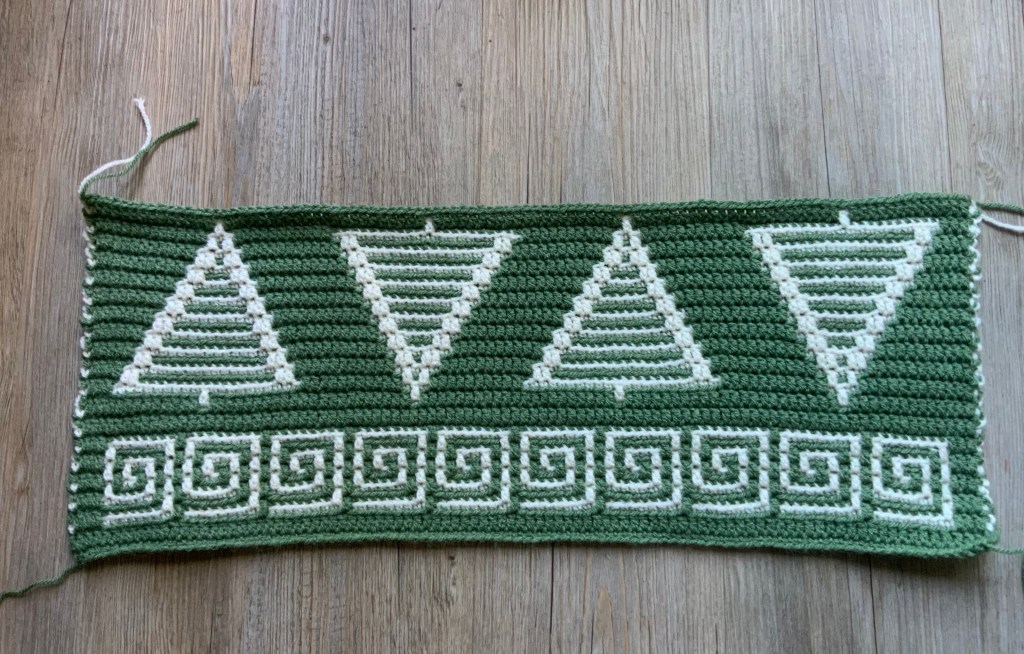
I started with a separation section and flower chart No. 1 in Dark Powder Rose.

Another separation and flower No. 2 in Powder Rose.

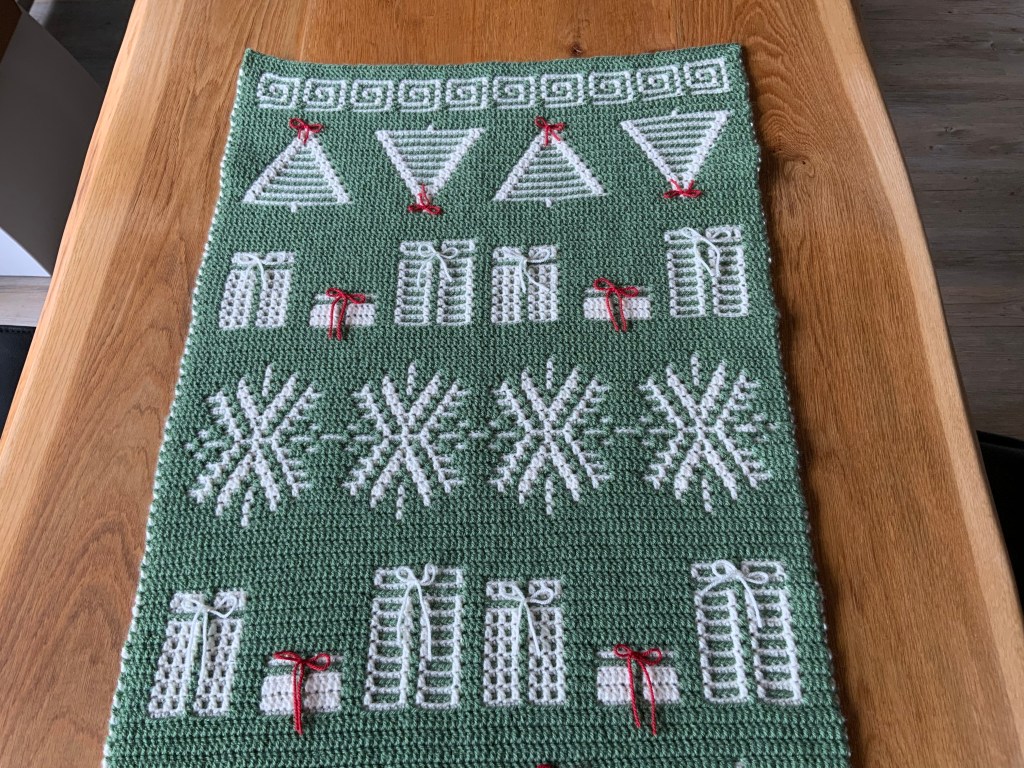
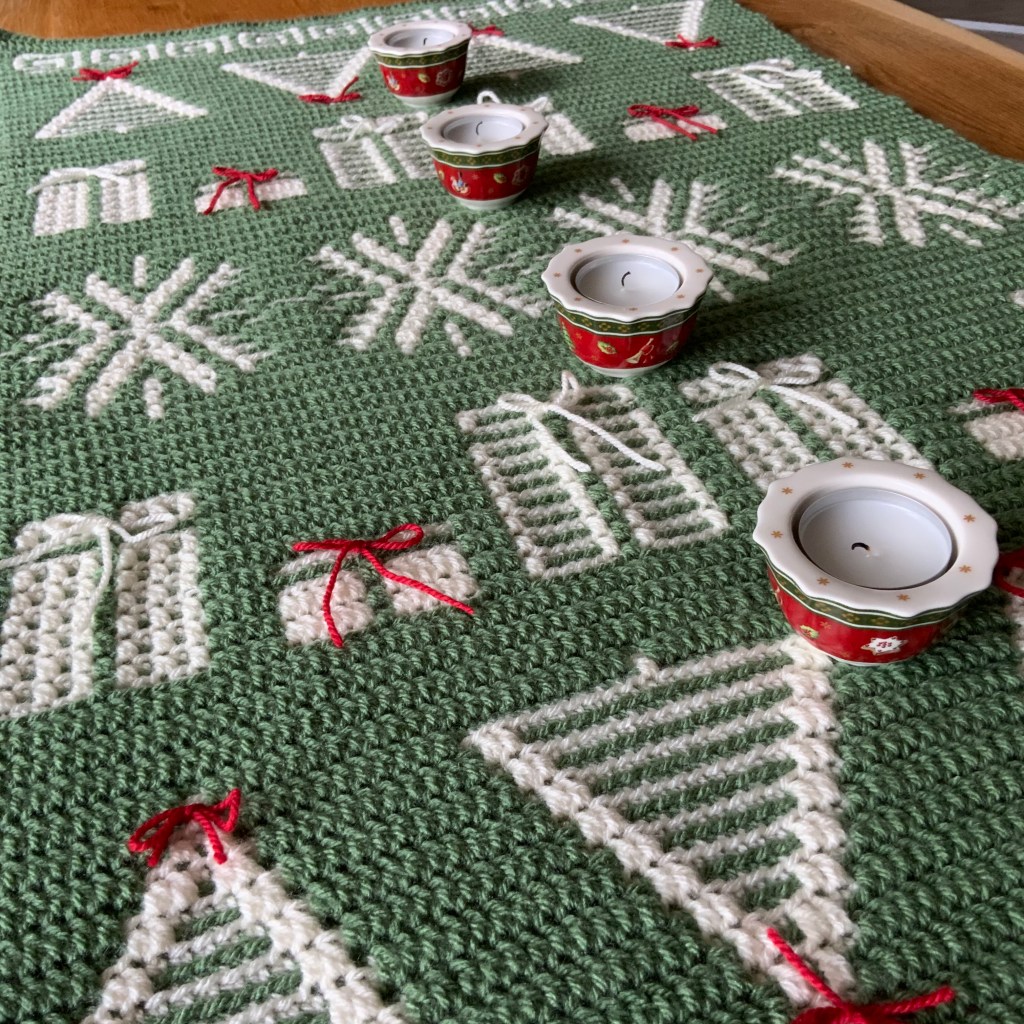
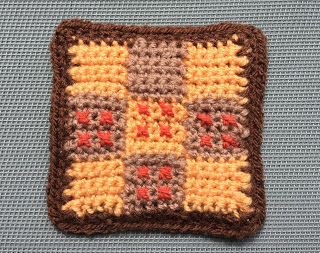
When I took the picture above and saw it lying on my table I decided spontaneously that it won’t be a wallhanging but a table runner for my dining table. And so I continued with flower No. 3 and No. 4.

No. 3 made in Lilac and No. 4 made in Grayish Purple.

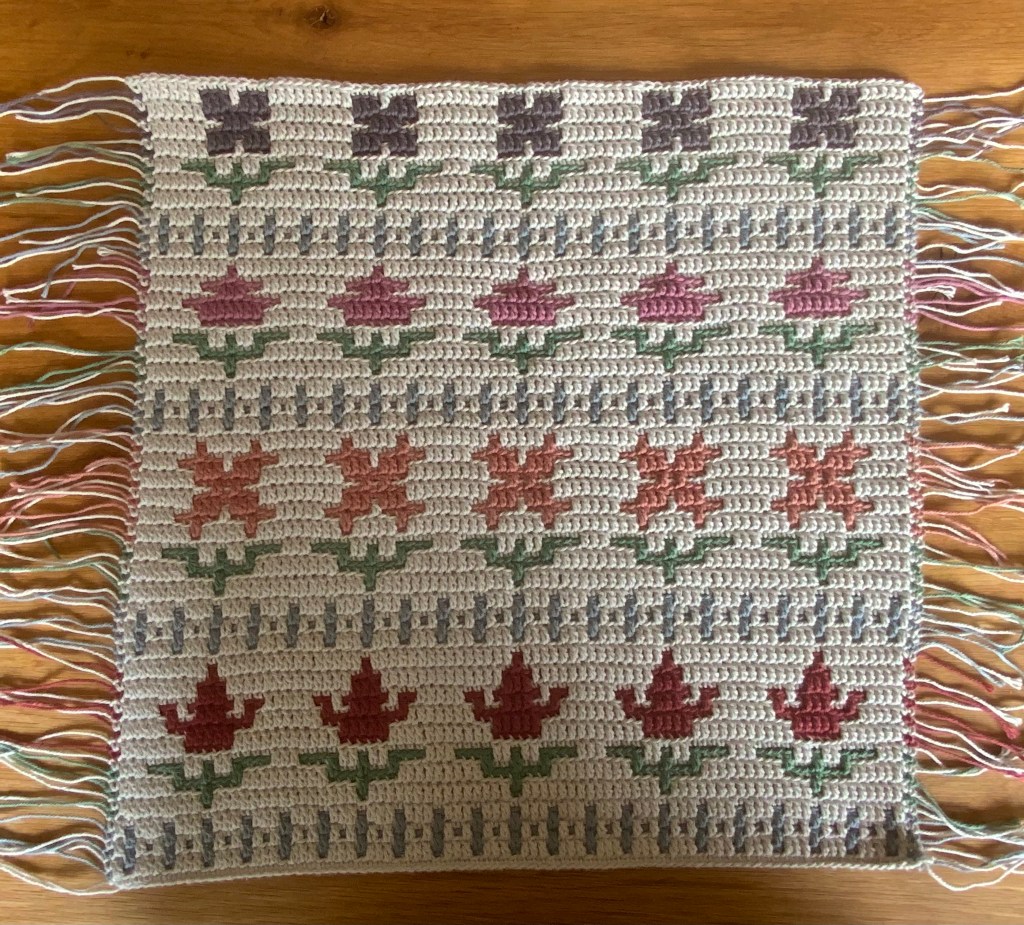
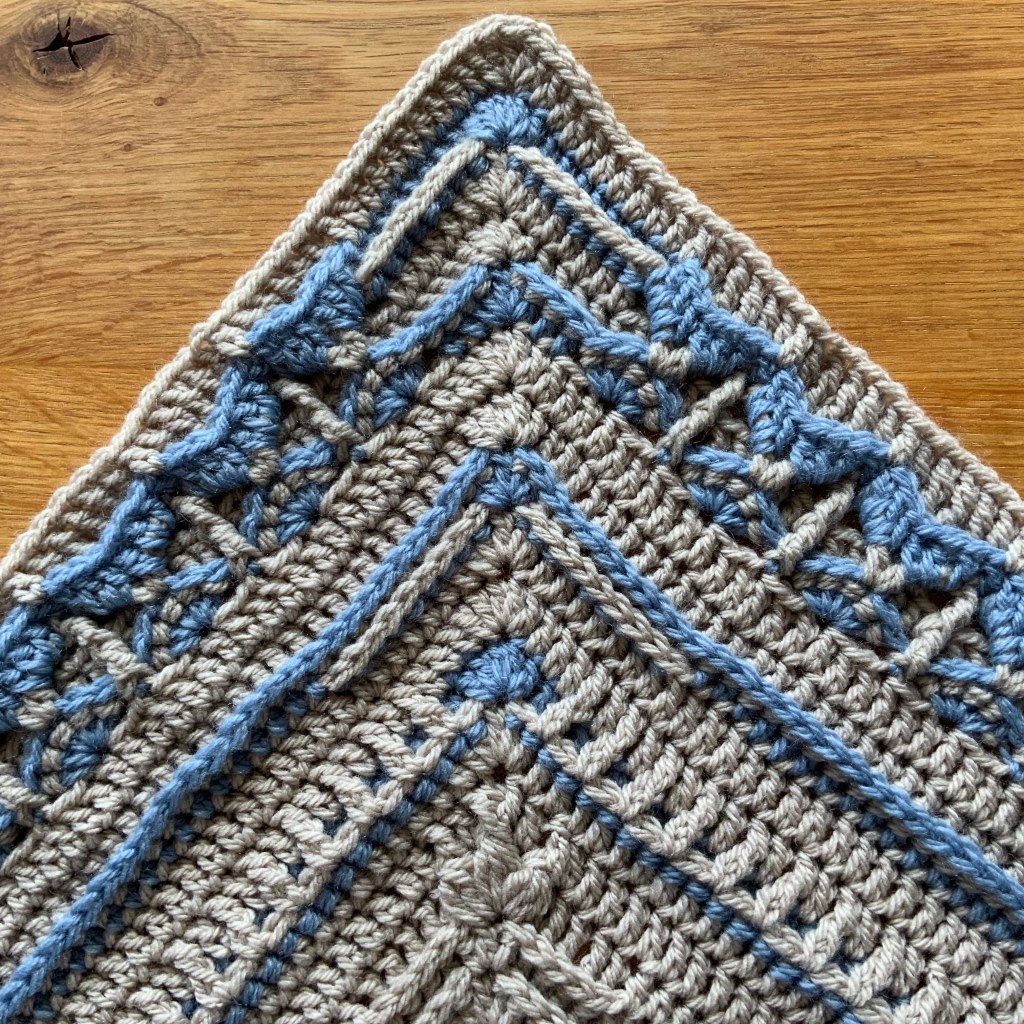
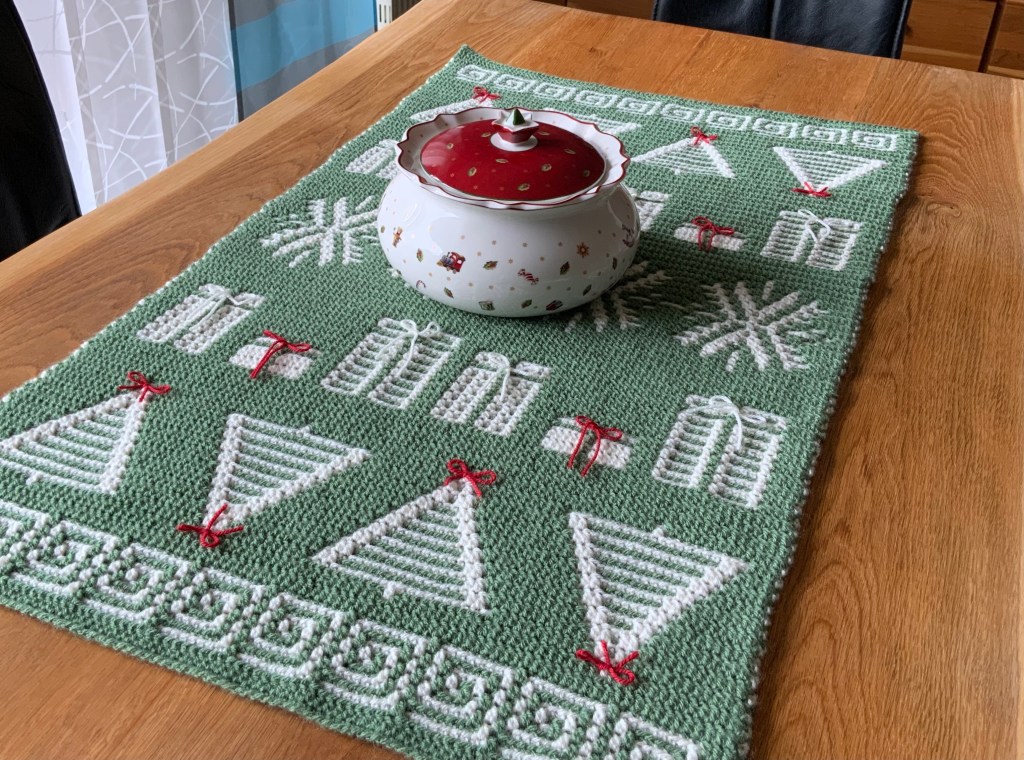
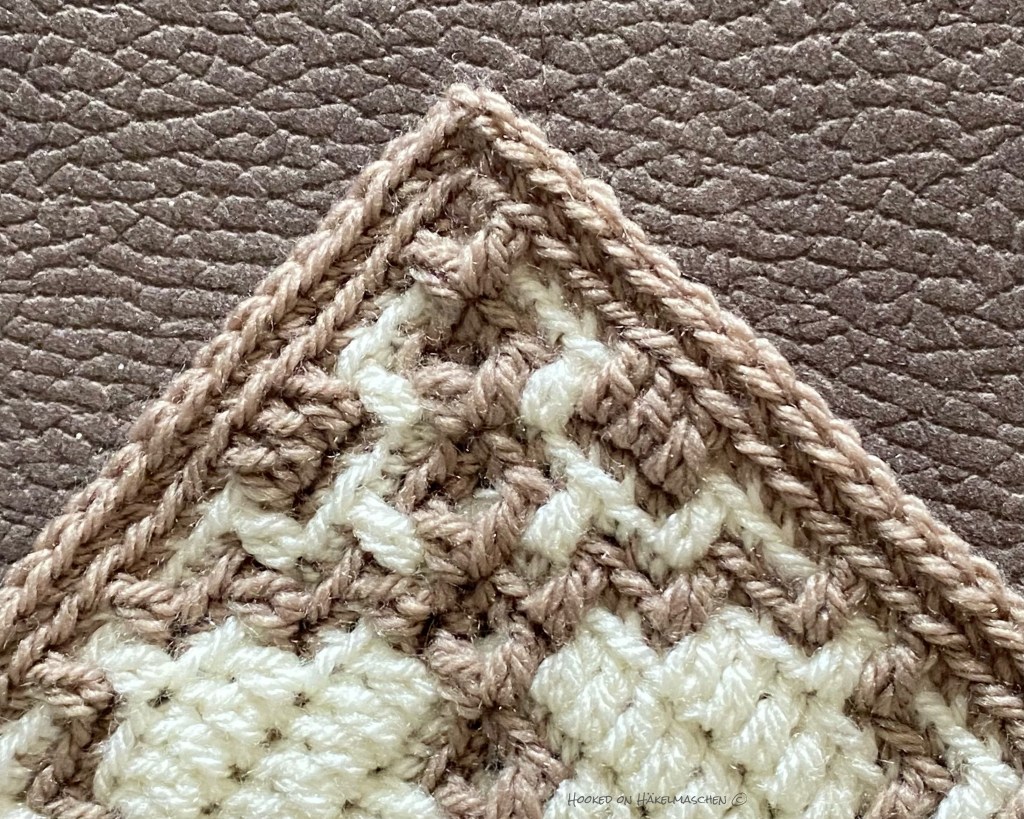
I repeated the whole section once more but in the opposite order. And finally decided on a small double border.

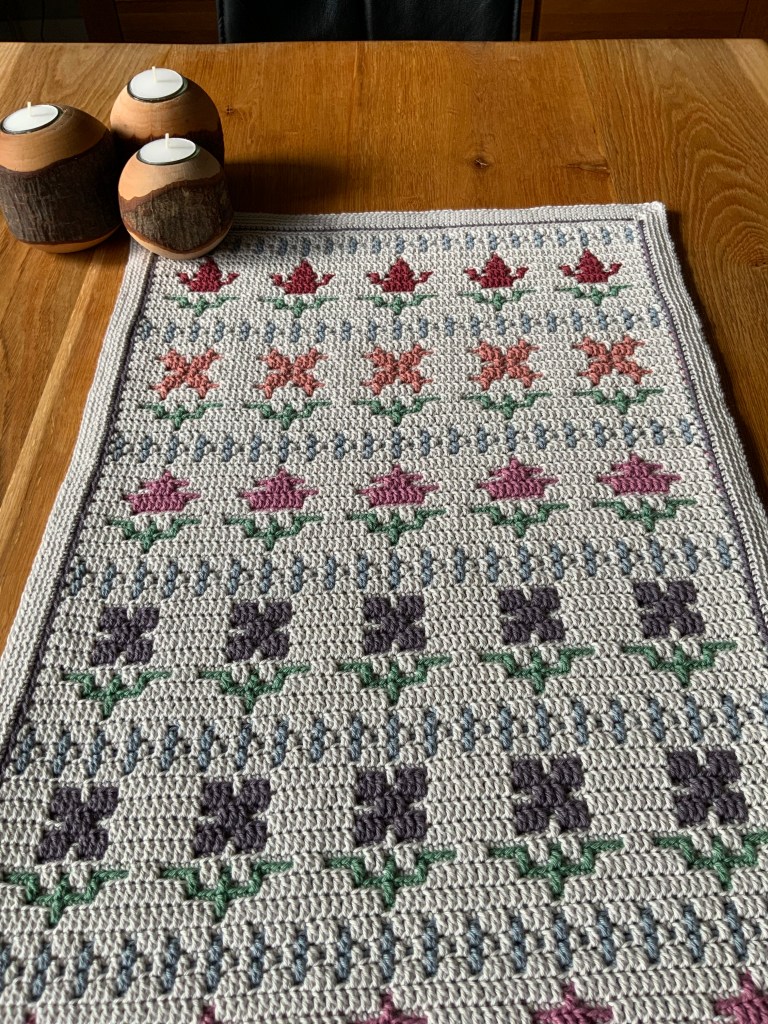
I am very happy with the result. Doesn‘t it look gorgeous?

Caramel Chocolate Cake

I just want to show you the new pattern by BebaBlanket that I was able to test earlier this year

Caramel Chocolate Cake

You have to look at the photos from BebaBlanket, her original blanket looks just YUMMY.

Mine is more a Blueberry Cream Cake but it was absolutely fun to test this pattern. The skill level for this pattern is upper intermediate. There are a lot of interesting stitches and stitch combinations.

I used King Cole Baby Comfort Dk in the colours Pebble and Jeans. Here some impressions of my test piece

Already August

Where has this year gone? Now it’s already August and I have the feeling that I can’t really finish any of my private projects. My Seashell Dudes, my When Summer turns into Fall blanket are still WIPs. My new blog is still not completely finished, let alone that I have already decided on a hosting provider.

But I have finished the test for Pam Knighton-Haener / A Yarn of Serendipity. It was quite a new experience because this time I checked the written instructions and also the videos she made for certain rounds. But more on that later when the pattern is published.

And I am working on a really big project: I am testing the pattern for a CAL that will probably start at the end of September! It will be a blanket in Overlay Mosaic technique but I can‘t reveal more yet …

I don‘t know how it is with you, but in Germany the summer 2021 is very changeable. It almost reminds me of the summers in my childhood when the climate crisis was not felt as clearly as it is now. We have quite a lot of rain and so far the heat waves that we had in the past few years have not materialized. Last year we had between 30 and 35 degrees Celsius around this time. I remember it so well because back then I tested Mosaic Christmas for BebaBlanket. That was a crazy feeling to test a Christmas pattern at 35 degrees!

Mosaic Christmas

was my second pattern in Overlay Mosaic. My first one was a placemat made with Chevron Apache Waves.I already mentioned it in this post. Mosaic Christmas is a pattern designed by BebaBlanket. It has charts for 4 different motifs, Christmas Trees, Snowflakes, gifts and an ornament that can be used as a separation.The main repeat goes over 45 stitches so the size is easily adjustable and you can create a lot of different items.

Mine was meant to be either a wall hanging or a table runner, it became a table runner.

I used Stylecraft Special Dk in Cypress and Cream. My Christmas Decoration is mostly red, so Green and White/cream is always a perfect match.

I only worked two repeats in width using the following layout

Ornaments / Christmas Trees / Gifts 
Snowflakes 
Gifts / Christmas Trees / Ornaments 

I didn‘t work a border but crocheted over the tails. Today I would just do a double border because I think it is a great finish but since it was only my second Overlay pattern I was just scared about all the tails. 😀

So, as it is already August, if you are looking for a nice Christmas project, here some more pics

No Limits

Phew, another pattern test is finished: No Limits, the new pattern by BebaBlanket.

No Limits is an Overlay Mosaic pattern worked in rounds but the pattern has also an option to work in rows. There are charts for 3 pattern variations for working in the round and 1 for working side to side. The best is: all variations can be combined with each other. And, when working in the round you don‘t have to cut the yarn after each round. The color changes are made in one corner and you just carry the yarn along.

My No Limits is based on pattern variation No 2. It is made with King Cole Comfort DK in the color Truffle (color A) and Stylecraft Special DK in Cream (color B) with a 4,5 mm hook.

I worked according to the chart as it is drawn (up to round 30) and repeated the pattern starting with round 19. After 3 repeats I had to stop because I ran the risk that my Truffle would not be enough for another repeat. I finished the pattern with one more round 19 in color A and a round of back loop single crochet, also in the color A.

My finished No Limits measures 80 cm in a square, big enough to cover my knees and lap on a chilly day.

A lovely pattern that is also suitable to play with colors a bit. But I especially like the corners. 

Mosaic Chevron

Mosaic Chevron

is another pattern test for BebaBlanket. She just released the pattern for this lovely chevron blanket in her Ravelry store.

I love chevron patterns. I have just dealt with this topic, so I know that there are a lot of different variations. But isn’t it amazing how you can influence the look of a simple chevron pattern by combining it with mosaic crochet?

I started with this test at the end of November last year, but I had a very slow start. I can’t say how many color combinations I’ve tried and discarded! Finally I decided to go with Stylecraft Special DK in Graphite and Duck Egg and I think this was a good decision.

The pattern is similar to the Chevron Apache Waves pattern that BebaBlanket released last year. Only the technique is different. Apache Waves is done Overlay Mosaic technique and Mosaic Chevron is worked in a technique that – in some places – is called Inset Mosaic.

In short words, the difference between both is, that Overlay is worked only from the frontside and the yarn is cut and the color is changed after every row. With Inset two rows are worked with the same color and the yarn is carried along the sides. (There are even more differences, but that is perhaps worth another blog post.)

I had the chance to test Chevron Apache Waves last year and made a place mat with this pattern.

It was my first pattern in overlay mosaic technique and so I didn‘t know much about the different border options. I just left all the tails as a fringe, which is one of the various options, and that works pretty good for a place mat or coaster.

In the meantime I have already done several mosaic patterns, both Inset and Overlay. I think Mosaic Chevron is my third blanket made with Inset mosaic technique. The result is a nice lap blanket. It measures about 74 x 102 cm.

Mosaic Chevron – pattern

Except for the mosaic double crochet the chevron pattern is done completely in single crochet and therefor I used a 4,5 mm hook. I was afraid that otherwise it would get too tight and I don‘t like blankets that feel hard and stiff.

As color A I used Duck Egg and color B is Graphite.

I started with 166 chains, that are 7 repeats in width and mixed the pattern with plain chevron sections.

Mosaic Chevron – My Layout

My layout looks like this:

  • 3 pattern repeats
  • plain section consisting of
    • 6 rows color B
    • 2 rows color A
    • 2 rows color B
    • 2 rows color A
    • 6 rows color B
  • 3 pattern repeats, starting again with row 1
  • plain section (as above)
  • 3 pattern repeats starting with row 1

The pattern states to start with row 3 after the plain section. And when I write that I started with row 1 that‘s just a different way of writing. It means, that I did two more plain rows in color A, just to get the same color scheme I started with.


Mosaic Chevron – My border

Compared with my Apache Waves place mat my Mosaic Chevron had only a few yarn tails. But of course on one side the carried yarn is visible. So I was looking for a plain and simple border, just to hide the threads.

I decided to go with just one row of single crochet in Graphite, worked with a 4 mm hook.

Here my scheme:

  • Top: following row 1 of the chevron pattern
  • Left side: one single crochet in every row
  • Bottom: following row 1 of the chevron pattern but without skipping stitches and the „tips“ worked in the chain spaces
  • Right side: one single crochet in every row
  • 3 single crochet in each of the four corner stitches

I really enjoyed working on this pattern. It is easy to memorize and relaxing! And the graphic result is great in my eyes!


Spring Time

Spring time, old tests, new tests

In terms of calendar, we have had spring for over 3 weeks now. But the weather outside doesn’t feel like that yet. The nights are still cold and the days chilly. It’s real April weather – as we call it. Sometimes sunny, sometimes cloudy, sometimes rainy and we also had some tiny snowflakes.

Nevertheless nature awakens. The first bushes and fruit trees are blooming and the forest is also beginning to turn green. The sparrows are just preparing to breed under our roof again. And in the morning you are woken up by the chirping of the birds.

I love this time of the year, but I think I actually like every season. I just don’t like the super hot days in summer, when it is too hot for the slightest movement at 40 degrees Celsius.

I am just so exited about the little peach tree that we bought last year and that is blooming on our terrace. It is supposed to stay small so that it can grow in a bucket. We also bought a small cherry tree and some apples – all in buckets as our garden is not very big and most of the space is already occupied by an old pine tree and a little birch.

I am curious to see wether we will have some fruits this summer. We already had some very tasty apples last year but the peaches haven’t ripened properly.

„Old“ tests

I finally finished one of my tests for BebaBlanket. I think she is going to release the pattern on the coming weekend, so I prepared already my Ravelry page and a post about the lap blanket I made.

Besides misssBerlin is currently running a test. New caps for the Dudes.
I mentioned it before.Cuteness overload! I just finished the three new caps, there are only a few beads left that have to be sewn on. Two tiny arms also must be sewn on, as, besides the caps, I managed to make a new Dude as well.

Another reason why I am waiting for better weather. When the sun is shining it is easier to take photos as you don’t have to worry about decent lighting.

„New tests“

And there are two completely unexpected tests:

One is from Moi-Raya and is about Carreaux Crochet. This is a very special crochet technique where you create a dense and thick fabric. It is double sided but worked in one work step. The motif is shown on both sides, only the colors are switched. Perfect for a potholder, coaster or something like that. In 2019 I worked with her for the first time and tested the basics for this technique. Here one of my test patches – front and back side.

The current test is for different tiles, the motifs are inspired by french flor tiles.

This is really a demanding test that takes time. The technique is not difficult and neither are the stitches. But I have to concentrate a lot to make no mistakes.

And also Pam from A Yarn of Serendipity designed another lovely square. The test is run in different phases and my part will start at the end of April. I’m really looking forward to it!

I was able to test for Pam for the first time in September last year. To give you an imagination of her lovely work, this is my test version of the Carter Jude Square. 

It is part of a series of squares she designed as a legacy for her grandchildren.

 Well, enough for today. Tiny beads are waiting …


Swirly Candy

My first attempt to Brioche crochet 🍭

Swirly Candy is the new pattern by BebaBlanket.

When I started this test last December I had no idea about Brioche crochet. Of course I had seen a lot of patterns using this technique but I had never made one.

I think that this is a very good qualification for testing a pattern as it really shows wether the instructions are written in an understandable way.

I have to admit, on my very first attempt I found it a bit tricky to get the correct start. More or less there are two colors worked in one magic ring, the second color in front of the first. That sounds complicated, but no need to be afraid, there are pictures to help … And in the first rounds I also wondered if my placement of stitches really is correct, but there are more pictures to help … After mastering the first seven rounds it‘s only fun to continue! It is only a two round repeat that is easy to memorize. So it really isn‘t difficult and there’s a great result!

To get used to this technique I tried some different color combinations with Sage andMocha, Cream and Pistachio, Clematis and Mocha.

For all my samples I used Stylecraft Special DK and a 4,5 mm hook. As recommended in the pattern I would advise to go up a hook size or two. The pattern consist of mostly front post double crochet and therefore it contracts a little and tends to bulge outwards.

According to the instructions you can either work smaller hexagons and join them to a blanket (or something else) or you can continue with one hexagon as big as you like. At first I thought of making the smaller hexagons with one main color and different contrasting colors. But – as parallel to this test I was still working on my Mix And Match Blanket – I didn‘t want to start another one.

So I decided to make something smaller with the combinations I liked most: Cream and Sage, and the combination of Clematis and Mocha.

My Swirly Candy in Cream and Sage

I turned my Swirly Candy in Cream and Sage into a table set as a decoration for my coffee table. But I rejected my fist thought of making some suitable coasters. (I think I would go crazy if someone really put a cup of coffee or a juice glas on it, hehe.) &

As written above it tended to bulge a bit, but blocking and doing a border helped. Nevertheless I will try a 5,00mm hook for my next one.

You can find some more details about my table set on my Ravelry Page


My Swirly Candy in Clematis and Mocha 

My Clematis-Mocha combination will become a cushion cover, one side Clematis / Mocha, the other side Mocha / Clematis. I am just trying different methods for joining to see which one I like best. Of course I will update this post when I am finished.

The pattern for Swirly Candy is available in Ravelry, here.

Update 2021-03-15:

YAY, my cushion is finished! I first tried different joining methods like 

  • single crochet with a color change in every stitch – looks to busy
  • single crochet with one strand of yarn – looks very thin and seems to vanish
  • Whip stitch with two strands of yarn – looks messy when I do it

Finally I joined the two plates of my cushion with simple single crochet stitches, using two strands of yarn in the color Clematis. And I really like the result!

I filled it with a kind of fiber fill from an old pillow that I no longer use due to its shape. 

I cannot say which side I like best …


Mix and Match

My latest test: Mix and Match

This is my preliminary result of the lastest test from BebaBlanket, Mix and Match. I still have to decide about the border, but so far I am very happy with the result.

Tiramisu Yarn

The yarn for this blanket was sponsored by Stenli yarns, a Bulgarian company. I am very glad about that! Thank you!

Tiramisu is a Cotton Merino Mix and comes in 450 g bobbles.
I already used it for my Greek Islands blanket and fell in love with it. It is soft and smooth to work with. (And I am NOT saying this because it was sponsored) It is considered to be a DK weight. Personally I think it is a bit thinner, so I used a 3,5 mm hook.

Both blankets I made with Tiramisu have a comfortable weight and a nice drape.


My Mix and Match Journey

The pattern alone makes Mix and Match a good match to my Greek Islands blanket. Therefore I wanted to use not only the same yarn but also similar colors. For my Greek Island blanket I used Denim (my favorite color) as main color. The second color (it had no name, sorry) was color changing from beige to brown. So for my Mix and Match I decided to go also with Denim combined with the color Sea Shore, a combination of brown, creme and light blue. 

Stenli yarns are not available in any shops here in Germany. You have to order online, directly from the web-shop located in Bulgaria. That means: orders always take some time … I really was happy when my yarn arrived in November.The disappointment couldn‘t have been greater when I started with the test. What I didn’t realize when placing the order online was the fact that the color Sea Shore has not only color changes from blue over beige to brown. A white thread runs through each of the colors and therefore the brown in particular becomes very “busy”. It distracted the geometrical shapes of the pattern completely.

I had no choice but to reorder yarn – this time a harmless, solid beige – and started again at beginning of December.

Like in my Greek Islands I wanted to use Denim as base color (color A), but then the next problem arose: especially with design 3 there was kind of an optical illusion for me that drove me mad. 

The upper stripe shows my first attempt with Denim as color A. Even triple-checking the pattern didn’t help, my eyes kept seeing mistakes. I had to switch the colors and to restart for the second time. Does this only happen to me? 

So, admittedly my start was not the best! But the tide has turned! And t was worth the whole effort for me!

Mix and Match crochet pattern

Mix and Match is done in Mosaic Crochet, the so called Inset Mosaic. I don’t know if this in an official name or just a creation by the Facebook group, where I first read about it. In contrast to the Overlay Mosaic technique two rows are always worked in one color. The work is turned after each row – so worked from front- and backside – and there is no need to cut the yarn.

The pattern includes 4 different designs (squares) with identical stitch counts, so you can combine them any way you want. Or just follow one of the 5 suggested layouts that are also part of the pattern.

I choose layout 4, consisting of 3 designs arranged in 3 different ways. The complete layout has 6 squares in width and 9 in height. 

My blanket turned out about 98×117 cm without border, and I used about 500 g Denim (color B) and 465 g Beige (color A) so far.

The pattern is easy to follow but challenging. You have to work very carefully, otherwise you might mix up the designs. I often had to go back two rows to correct a mistake.

But again: the result was worth the effort!  The pattern is available on Ravelry.