Last updated on January 25, 2026
Finally I managed to write down the two missing patterns for my Tunisian phone cozies. Yes, I know, it took some time…
But all are ready now!
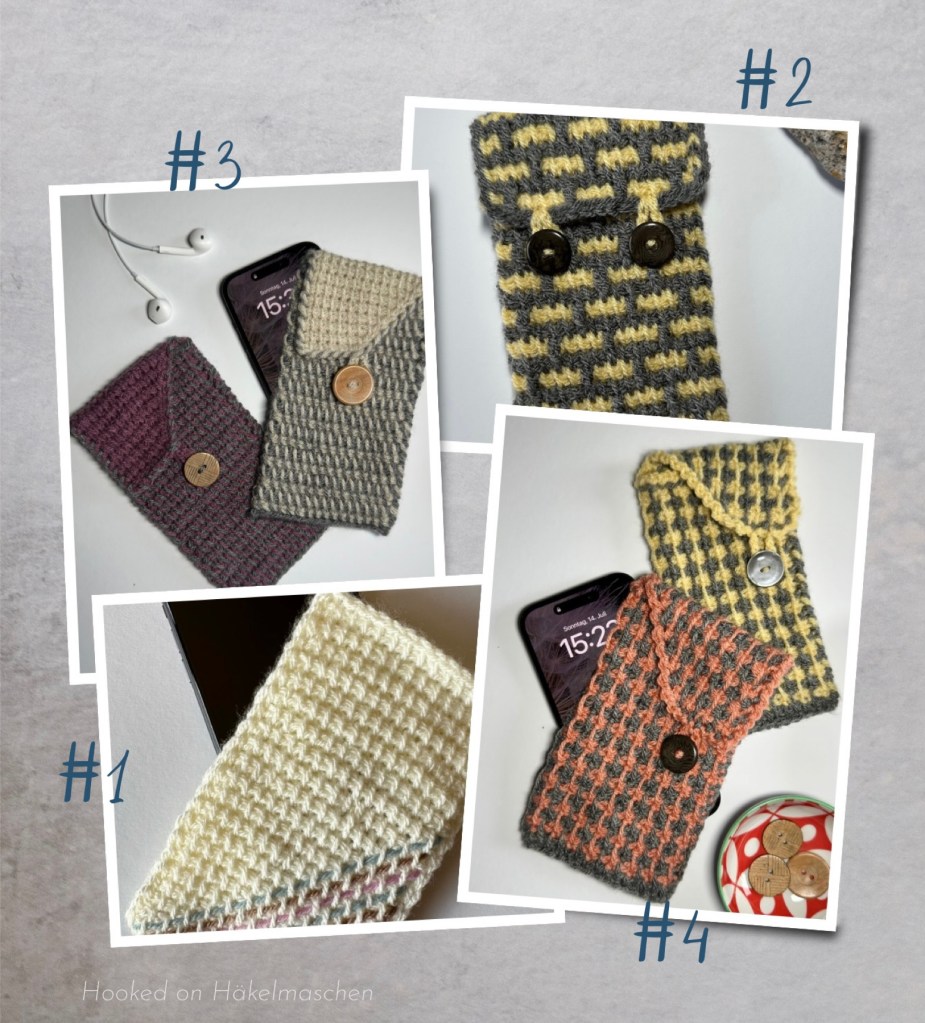
I created these little bags while experimenting with different Tunisian crochet techniques. If you’ve just started Tunisian crochet, they are great for practising new techniques and/or stitches. Or perhaps they will inspire you to create something beautiful with Tunisian crochet yourself.
The bags are designed for an iPhone 14 Pro and measure approximately 9.5 x 17 cm. However, the size of all 4 patterns can be easily adjusted.
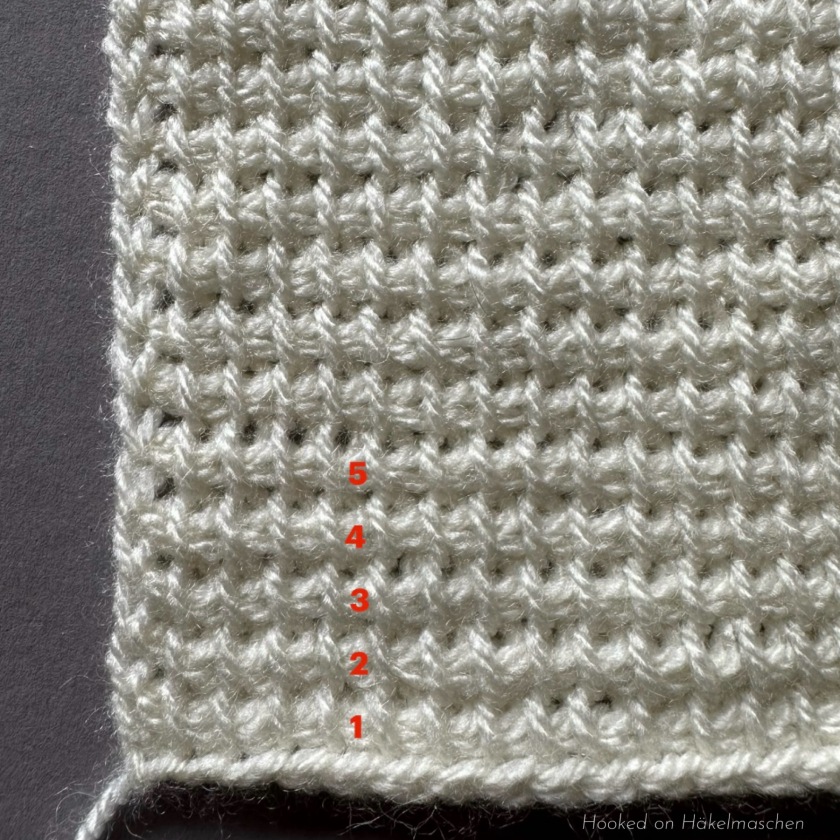
Each cosy, including the flap, is worked in one piece and then sewn together.
I used Stylecraft Special DK in various colours and a 4.5 mm Tunisian crochet hook. Each bag requires approximately 20 to 25 g of yarn, making the patterns ideal for using up leftover yarn.
If you need help or want to refresh your knowledge of the basics of Tunisian crochet, please have a look at these tutorials
- Tunisian Crochet – The Basics
- Basic Tunisian crochet stitches
- Colour changes and stitch decreases in Tunisian crochet
The special stitches used are explained in the corresponding patterns.
Please note: The patterns are not tested yet. So, if you find any mistakes or have any question, please don‘t hesitate to contact me.
How I define skill levels in my Tunisian crochet patterns
There is no official, universally agreed system for skill levels in Tunisian crochet. What is considered easy or advanced can vary depending on personal experience and familiarity with certain techniques.
For my patterns, I define the skill level based on a combination of the stitches used, the techniques involved, and the amount of shaping or pattern complexity.
- Beginner / Easy patterns use basic Tunisian stitches and simple, repetitive row structures with little to no shaping.
- Intermediate patterns combine different stitches and may include colour changes or simple shaping techniques.
- Advanced patterns introduce more specialised Tunisian stitches, multiple techniques within one project, and/or more complex construction.
Each cozy below includes a short overview of the required stitches and techniques, so you can easily decide if it matches your current skill level.
Phone Cozy #1
A simple and easy pattern to practise the Tunisian simple stitch.
The cozy is decorated afterwards by weaving in some colourful threads.
The pattern was already featured earlier.

- Skill level: Easy
- Stitches used: Tunisian simple stitch
- Techniques used: only basic techniques such as foundation, forward-, and return pass
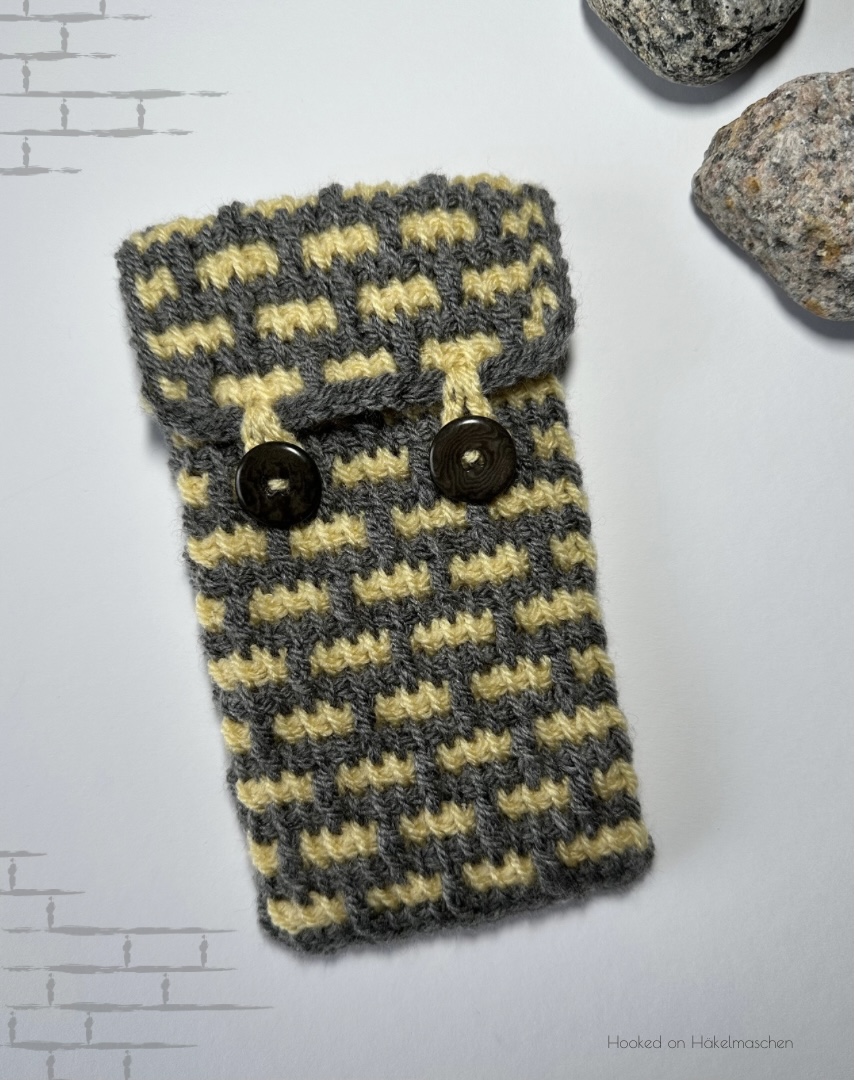
Phone Cozy #2
This design uses the Tunisian brick stitch. The pattern is good to practise colour changes and a stitch that also can be used in Tunisian mosaic crochet.
This pattern also was featured earlier.

- Skill level: Easy
- Stitches used: Tunisian simple stitch, extended Tunisian front post double crochet
- Techniques used: basic techniques, colour changes on the right-hand side
Phone Cozy #3
This cozy also has a two-colour design, yet the look is more woven.
It demonstrates another colour-changing technique and shows how to decrease stitches on the left side.

- Skill level: Easy – Intermediate
- Stitches used: Tunisian simple stitch
- Techniques used: basic techniques, colour changes on the left-hand side, and decreases on the left-hand side
Phone Cozy #4
This is a slightly more complex pattern that requires a bit more concentration when working on it.
It goes a little beyond the basic stitches and shows how to decrease stitches on the right side.
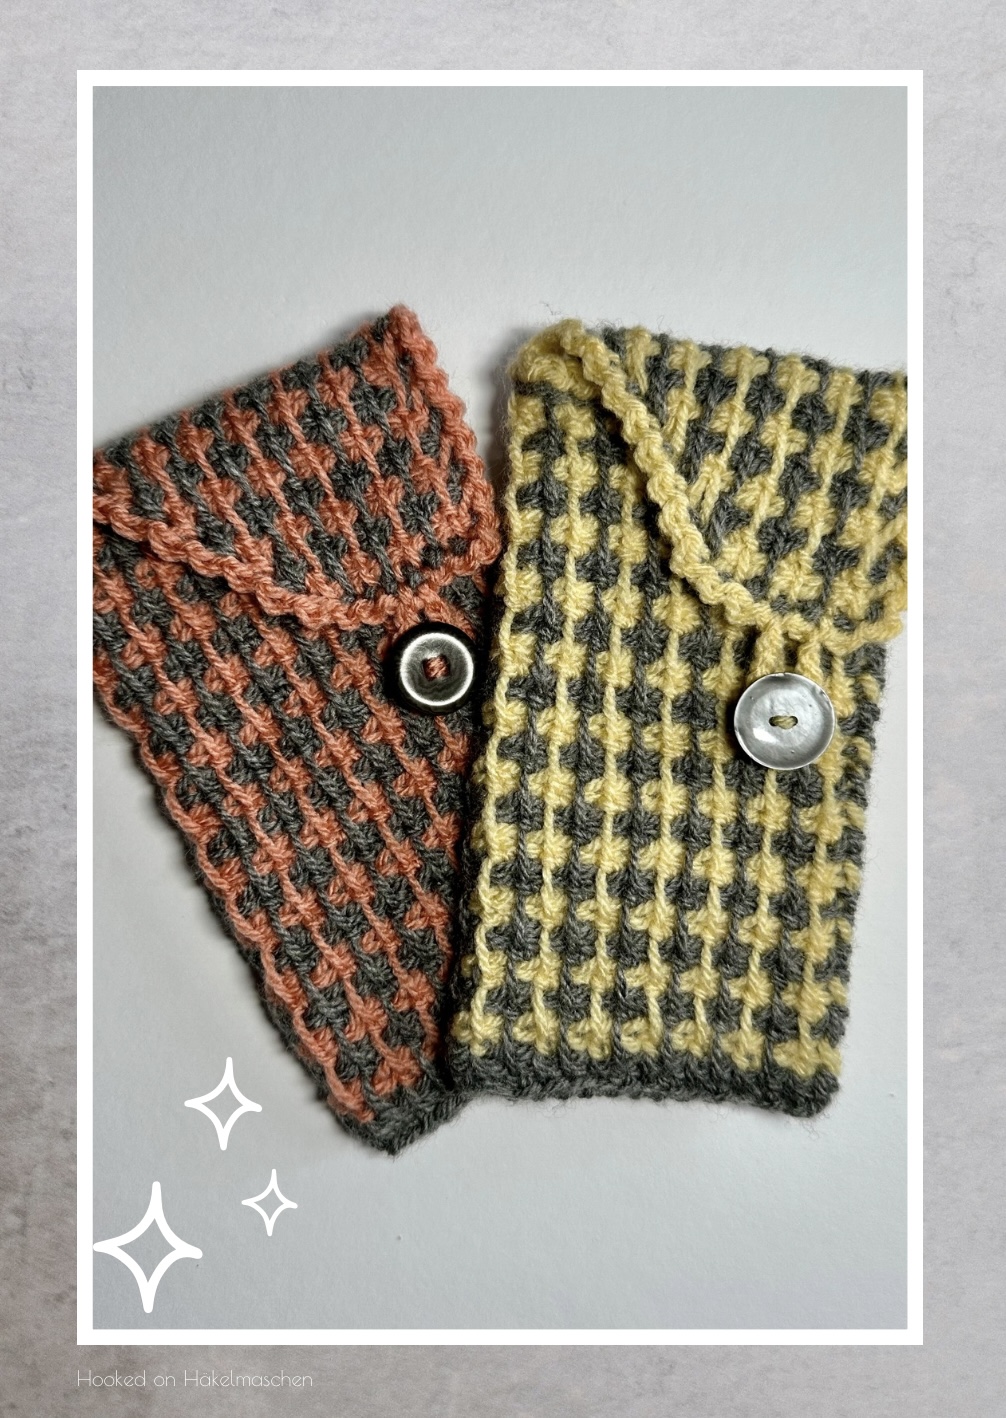
- Skill level: Intermediate
- Stitches used: extended Tunisian simple stitch, Tunisian slip stitch
- Techniques used: basic techniques, colour changes on the right-hand side, and decreases on the right-hand side
Additional notes
The stitching of a button and a corresponding closure is optional for the cosies. Therefore, I did not go into more detail with the individual patterns, except for #2.
For the loops I simply crocheted a small chain to form a little eyelets.
The size and position of the eyelet naturally will depend on the size and position of the button.
Here some pictures of what I did:

But there are, of course, other ways to close the bags, such as small straps or press studs for instance. It is also possible to dispense with a fastener altogether and simply leave the pouches open.
I hope you found some inspiration for your next Tunisian crochet project. Happy hooking!