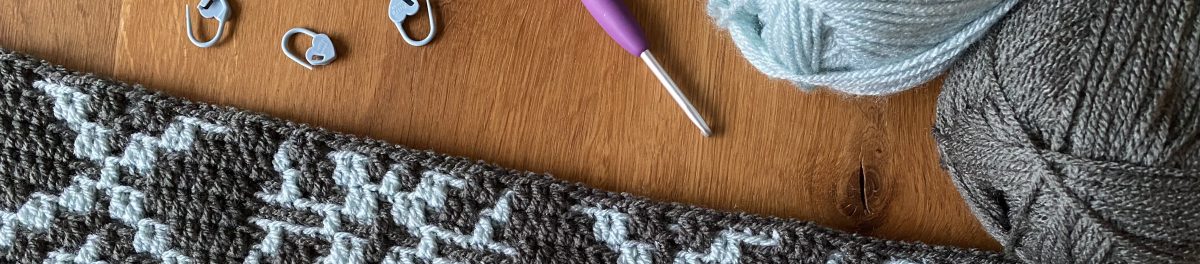
Hello Spring CAL – Part 1

Lasr updated: 15 July 2026

Today is the day, the Hello Spring CAL starts!

As a few people have asked me about this: yes, I’ll be posting my colour choices and the colour placement I’m using for the individual parts of the CAL here.

So let’s start with my

Yarn and colours

I used Stylecraft Special DK and a 4 mm hook. My colours are

  • 1001 White
  • 1822 Pistachio
  • 1027 Khaki
  • 1081 Saffron
  • 1723 Tomato
Hello Spring  CAL, yarn samples in White, Khaki, Pistachio, Saffron, Tomato
My colour choice

When I saw Ana’s pattern, I’d originally had a slightly different colour scheme in mind.
But for some reason, it didn’t work. Although I tried two different colour arrangements, I realised fairly quickly that it wasn’t going to work. It was perhaps a bit too dark for a spring design. So I decided against it and needed to come up with something new.

Even so, I LOVE these swatches:

Two mosaic crochet samples showing the effect of different colour placement, both using the colours White, Graphite, Pistachio and Apricot.
Colour Samples in White, Graphite, Pistachio and Apricot

I haven’t unraveled them yet and will keep them as inspiration for any further project.

Whilst searching for further colour combinations, I came across a drawing featuring stylised flowers in two different shades of green against a white background. Somehow, it really gave me that ‘spring’ feeling. To achieve this look, I chose White and Pistachio as the main colours and added a touch of Khaki. I completed the look with a few splashes of Saffron and Tomato.

mosaic crochet sample showing the same pattern in the colours White, Khaki, Pistachio and Saffron

My colour placement Part 1

You can also download the row-by-row colour placement guide for the entire blanket at the end of this post.

Hello Spring CAL showing a crocheted sample of Part 1 of the mosaic pattern

And last but not least, here’s a collage showing all the test versions created by the One Skein of Love test team.

Hello Spring CAL, collage showing sneak peeks of the blankets made by the test team

See you next week!

Get the colour placement guide

Hello Spring CAL

Get the pattern

Hello Spring CAL pattern on Ravelry

More posts in the Hello Spring CAL series

Hello Spring CAL

Hello Spring CAL – Part 2

Hello Spring CAL – Part 3

Hello Spring CAL – Part 4

Hello Spring CAL – Part 5

Hello Spring CAL – Part 6

Hello Spring CAL – Round up

Hello Spring CAL

Last updated: 15 July 2026

The days are not only getting a bit longer but also a bit warmer. The first bushes and trees are sprouting and the sparrows are preparing their nests under our roof. Spring is coming in the northern hemisphere!

Ana from One Skein of Love is celebrating the season with her Hello Spring CAL.

The pattern is an overlay mosaic design and – much like Winter Wonderland – consists of various motifs that can be combined in many different ways.

I started testing the Hello Spring pattern in early February 2022.

It was originally designed as a blanket. But, due to time constraints, my version will only be crocheted over 5 repeats in width. That way, it will make a beautiful wall hanging.

My final choice of colours was inspired by a drawing I saw somewhere online: flowers in two or three different shades of green against a white background. They looked fresh and airy and immediately reminded me of spring. I’ve tried to capture that feel and spring-like look.

Hello Spring CAL, crocheted sample, folded to reveal different sections of the mosaic pattern.

I used Stylecraft Special DK. The colours are mainly White and Pistachio combined with Khaki and a touch of Saffron and Tomato.

As we were on holiday last week, I haven’t quite finished my test project yet. I’m still working on the border. I hope to be able to show you more next week though.

The CAL starts next Monday, 21 March 2022, and runs for 6 weeks. Further information and, of course, the pattern are available in Ana’s Ravelry shop – you’ll find the link below.

Get the colour placement guide

Download my row-by-row colour placement guide for the Hello Spring pattern

Get the pattern

Hello Spring CAL pattern on Ravelry

More posts in the Hello Spring CAL series

Hello Spring CAL — Part 1

Hello Spring CAL — Part 2

Hello Spring CAL — Part 3

Hello Spring CAL — Part 4

Hello Spring CAL — Part 5

Hello Spring CAL — Part 6

Hello Spring CAL — Round-up

Fancy Nancy

Last updated on May 14, 2026

While revising my blog page, I realised that I had forgotten to show my Fancy Nancy square. Shame! So I thought I would write a quick post to put that right!

Fancy Nancy is another beautiful Afghan square design by Pam Knighton-Haener from a Yarn of Serendipity. I tested this pattern already in October 2021.

Pam usually designs her squares with Aran (#4) cotton yarn. I must admit that this is not my favourite type of yarn. I haven’t found one that I like working with yet. So this time, I decided to try using my standard acrylic DK (#3) yarn. Just to see how it works!

I used Stylecraft Special DK in Copper, Parchment and Gold, my favourite autumnal colours. I followed Pam’s colour scheme number 2, only switching the colour for the final round.

With Aran yarn, the squares should measure either 28 cm (11 inches) or 30 cm (12 inches), depending on the hook size used. Using DK yarn, my Fancy Nancy was 25 x 25 cm (about 10 inches) tall.

I’m really pleased with the result!

I suspect, however, that cotton yarn would show off the stitches better. The pattern includes lots of treble crochets and double treble crochets. These stitches simply look better when they’re blocked as blocking always opens up the stitches a bit. tight. Unfortunately, I still find it difficult to pull acrylic yarn tight properly. Unfortunately, I still find it difficult to block acrylic yarn properly. The results are usually not as good or as long-lasting as with cotton yarn.

Fancy Nancy Square

I started testing for Pam in September 2020, and since then I’ve had the chance to test four of her lovely squares. Well, actually five, to be precise! I’ve just finished testing her latest design. The pattern hasn’t been published yet, so I can’t show it to you just yet. But what I can show you again are the squares I’ve made so far.

Perhaps I should get some suitable cotton yarn after all and crochet a few more? One day, they’d make a beautiful blanket.

All of Pam’s designs are so richly textured that they would look great even in a single colour.

If you would like to try one of Pam’s designs just pop over to her Ravelry store. She also offers some of her patterns for free – do have a look!

Fancy Nancy Square on Ravelry

2021 is gone

I am probably a bit late with my review of the past year, but better late than never, as we say. I have been working on a new test since the middle of December and hardly have time for anything else. Due to various circumstances the time frame to finish this test is more than sporty. It is a beautiful blanket but that’s all what I can tell you for now – it is a still a BIG secret.

Review 2021

Scrolling through my photos and thinking about the past year there were definitely some highlights. Like every year I was surprised how many there were and tried to capture them here.

One of the biggest highlights in 2021 was that I started my blog, otherwise I would not be sitting here writing this post right now. It all started last February on blogspot with “This and That – made by ELeni“. Later I decided to rework the blog completely and switch to WordPress. A decision I do not regret to this day.

Through the blog I got in touch with Ana from One Skein of Love. Now I test for her and am one of the admins of her Facebook group. As life goes!

From a crochet point of view 2021 had started with several tests for Dana from misssBerlin. It is always so much fun to create her little Dudes. In 2021 we had the The Succulent Dudes, The Suga’ Dudes, and The Carnival Treat Dude s. Unfortunately I did not manage to finish my Seashell Dudes, just as I did not finish my When Summer turns into Fall blanket.

My first test for Ana was the Gretchen blanket, followed by Oh So XOXO and two really big projects, Geometrics Cal and Winter Wonderland.

And in between, apart from some tests for BebaBlanket, I also worked with Pam from A Yarn of Serendipity again: The Margaret Square, Brood of Angels and Fancy Nancy, which I haven‘t shown here yet.

And, oh yes, I wrote down my own pattern, my first one, published on Ravelry. That was also quite an experience!

Quite a busy year!

And of course not forgetting the short holiday that we were able to take despite the pandemic. Something very precious in times like these. And the first peach from our little peach tree. Unfortunately we could only harvest one, the others fell from the tree before they were rally ripe. But the one was so sweet and delicious!

And, after one and a half socks have been hiding in my knitting basket since the beginning of 2020, they were finally finished for Christmas. Hubby has new socks and loves them.

I am curious to see what 2022 will bring! I wish you all the best for this year!

Winter Wonderland Mosaic – Round up

Last updated: 13 July 2026

This post documents my progress during the Winter Wonderland Mosaic CAL. While the CAL has long since ended, I have kept these posts as a record of the project. For an overview of the blanket, yarn information, colour placement guides and related resources, please visit my main Winter Wonderland article.

Winter Wonderland Mosaic

After the Winter Wonderland CAL is over now I thought it might be a good idea to collect all information about my blanket in one place.

Winter Wonderland CAL

CAL- timeframe

11 November – 16 December 2021

Pattern

Winter Wonderland Mosaic CAL
available on Ravelry
and Etsy

Designer

Ana Morais Soares from One Skein of Love

Technique

overlay mosaic crochet

Test phase

12 October – 14 November 2021

finished

26 November 2021

Colour inspiration

Mood board by Pippin Porppycock

Yarn and colours

Stylecraft Special DK (295 m / 100 g)

White, 4 balls
Silver, 3 balls
Grey, 2 balls
Graphite, 3 balls
Lipstick, 2 balls

Hook

Clover Amour Hook, 4 mm

Gauge

23 stitches, 15 rows —> 13,5 x 8 cm

Repeats

9 repeats, 183 stitches

Rows / Patterns

256 rows, Pattern 1 – 14, following the CAL pattern

Border

Double border

Finished Size

114 x 148 cm

Yarn amounts

And for those who are interested – my detailed yarn amounts

Winter Wonderland Mosaic, list of the final yarn amounts

I worked on this project for about 61/2 weeks. It was a stressful time but I enjoyed it a lot. It‘s definitely my most favorite project in 2021.

More posts in the Winter Wonderland series:

Winter Wonderland Mosaic
Winter Wonderland – My colours part 1
Winter Wonderland – My colours part 2
Winter Wonderland – My colours part 3
Winter Wonderland – My colours part 4
Winter Wonderland – My colours part 5
Winter Wonderland – My colours part 6

Winter Wonderland Mosaic – My colours part 6

Last updated: 13 July 2026

This post documents my progress during the Winter Wonderland Mosaic CAL. While the CAL has long since ended, I have kept these posts as a record of the project. For an overview of the blanket, yarn information, colour placement guides and related resources, please visit my main Winter Wonderland article.

Winter Wonderland Mosaic

Part 6 is the final part of the Winter Wonderland CAL and includes the instructions for the border.

As usual, the border will be a double border to hide all the yarn ends.

I know that a lot of people don’t like the double border. If you’re one of them, you can of course choose a different option.
Personally, I love double borders. In my opinion, they’re the most beautiful finish for a mosaic blanket. They might be a bit more time-consuming, perhaps, but they give the blanket a neat look and a lovely drape.

Unfortunately, I had a bit of trouble with my round of slip stitches this time. My border was meant to be two-tone: the back layer in Lipstick and the front layer in Graphite with a strip of Lipstick. So I thought a round of slip stitches in red would look nice. I started the round, but I just couldn’t manage to get it to look neat.

I suspect my Lipstick yarn was just a little thicker. After the third attempt, I gave up and changed to Silver.

From then on, everything went smoothly. Until I’d finished the first round of the front layer. Ana’s method of crocheting a double border leaves a narrow line of slip stitches visible right next to the border. The silver thread looked good in combination with the grey sections at the top and bottom of the blanket, but I didn’t like the look of it at all in the darker areas at the sides. So I started again from the beginning and simply crocheted through both loops along the long sides.

If you’re following my colour scheme, I’d recommend using Lipstick, Grey or Graphite for the slip stitches. Silver and White are particularly hard to see on both sides.

My colour placement Part 6

Winter Wonderland Mosaic, list of row-by-row colours for Part 6

Have fun with this last section of this beautiful pattern 💕

More posts in the Winter Wonderland series:

Winter Wonderland Mosaic
Winter Wonderland – My colours part 1
Winter Wonderland – My colours part 2
Winter Wonderland – My colours part 3
Winter Wonderland – My colours part 4
Winter Wonderland – My colours part 5
Winter Wonderland Round up

Winter Wonderland Mosaic – My colours Part 5

Last updated: 13 July 2026

This post documents my progress during the Winter Wonderland Mosaic CAL. While the CAL has long since ended, I have kept these posts as a record of the project. For an overview of the blanket, yarn information, colour placement guides and related resources, please visit my main Winter Wonderland article.

Winter Wonderland Mosaic

We’ve now reached week 5 of the Winter Wonderland CAL. This is the final section before the border.

As I mentioned in my post on Part 2 of the CAL, I had a few time-related issues with this test. Sometimes there’s just so much going on in everyday life. We had some urgent work to do on the house that couldn’t be put off.

To ensure I could still finish the test on time, I decided, in consultation with Ana, to put my blanket on hold for the time being. Starting with Pattern 11 in Part 4 of the CAL, I tested the instructions on a separate piece. A small swatch covering just 2 repeats. That was much quicker, but served the same purpose.

I just used a few bits of leftover yarn that I still had lying around in my basket. I hadn’t really paid much attention to the colours at the time. Still, when I’d finished, I actually really liked the combination.

It’s completely different from my blanket – a bit of a rustic look – but it’s lovely too. What do you think?

Stylecraft Special DK in Parchment and Mocha combined with King Cole Comfort DK in the colour Stonewash.

After that, I was finally able to finish my blanket in peace. And this is what Part 5 looks like in my ‘usual’ colours.

Winter Wonderland Cal – Part 5

My entire blanket, just before adding the border.

My colour placement Part 5

Winter Wonderland Mosaic, list of row-by-row colours for Part 5

More posts in the Winter Wonderland series:

Winter Wonderland Mosaic
Winter Wonderland – My colours part 1
Winter Wonderland – My colours part 2
Winter Wonderland – My colours part 3
Winter Wonderland – My colours part 4
Winter Wonderland – My colours part 6
Winter Wonderland Round up

Winter Wonderland Mosaic – My colours Part 4

Last updated: 13 July 2026

This post documents my progress during the Winter Wonderland Mosaic CAL. While the CAL has long since ended, I have kept these posts as a record of the project. For an overview of the blanket, yarn information, colour placement guides and related resources, please visit my main Winter Wonderland article.

Winter Wonderland Mosaic

Week 4 of the Winter Wonderland CAL is here. Time for snowmen!

But first, I’d like to list

My final yarn amounts

I listed the approximate amounts of yarn last week, whilst I was still working on the border. Here now a few more details, including the left overs.

I needed a total of 13 balls of Stylecraft Special DK and used 1.044 g / 3.080 m of it. That’s almost exactly the same amount as Ana used for her blanket.

Winter Wonderland Mosaic, list of the final yarn amounts

My colour choices Part 4

To be honest, I found it a bit tricky choosing the colours for this part.

As Graphite and Lipstick, which I used in Pattern 8, are relatively dark colours, I thought the blanket could do with something a bit lighter again. That’s why I chose a combination of the colours White and Silver for the section with the snowmen.

But once I’d finished their bodies and started on their heads, I wasn’t so sure anymore whether that had really been such a good choice. They looked a bit plump and pale.

Do you get what I mean?

Unfortunately, time is usually a major factor when testing a pattern. You have to think carefully about whether or not to rip back 15 rows. And as long as there isn’t a mistake that inevitably catches your eye, you usually leave it as it is. And that’s what I did this time too, even though I wasn’t entirely happy with it.

So I was all the more pleased when I noticed that Ana had created this little ‘fun touch’! Little ‘shawls’ to dress the snowmen. They really do work wonders, don‘t they?

I made eight little shawls in Graphite and one in Lipstick. The red shawl is being worn by Snowman No. 3 (the third from the right). Each scarf is crocheted from 40 chain stitches and I think they’re just the right length.

.

My colour placement Part 4

Winter Wonderland Mosaic, list of row-by-row colours for Part 4

More posts in the Winter Wonderland series:

Winter Wonderland Mosaic
Winter Wonderland – My colours part 1
Winter Wonderland – My colours part 2
Winter Wonderland – My colours part 3
Winter Wonderland – My colours part 5
Winter Wonderland – My colours part 6
Winter Wonderland Round up

Winter Wonderland Mosaic – My colours Part 3

Last updated 13 July 2026

This post documents my progress during the Winter Wonderland Mosaic CAL. While the CAL has long since ended, I have kept these posts as a record of the project. For an overview of the blanket, yarn information, colour placement guides and related resources, please visit my main Winter Wonderland article.

Winter Wonderland Mosaic

Oh wow, it is already week 3 of the Winter Wonderland CAL

Fortunately, my blanket is almost finished now – I’m currently working on the border. Next week I’ll be able to tell you exactly how much yarn I’ve used in total, how much is left, and so on.

I was actually a bit sad when – after all these weeks – I’d crocheted the last stitch of the blanket section and cut the last thread!
Such a beautiful pattern – I had so much fun testing it. OK, I know I say that a lot! But this time, for the first time ever, I’m 100 per cent happy with my choice of colours. That makes it something really special for me!

My Part 3

My colour placement Part 3

Winter Wonderland Mosaic, list of row-by-row colours for Part 3

Some more impressions of week 3:

More posts in the Winter Wonderland series:


Winter Wonderland Mosaic
Winter Wonderland – My colours part 1
Winter Wonderland – My colours part 2
Winter Wonderland – My colours part 4
Winter Wonderland – My colours part 5
Winter Wonderland – My colours part 6
Winter Wonderland Round up

Winter Wonderland Mosaic – My colours Part 2

Last updated: 13 July 2026

This post documents my progress during the Winter Wonderland Mosaic CAL. While the CAL has long since ended, I have kept these posts as a record of the project. For an overview of the blanket, yarn information, colour placement guides and related resources, please visit my main Winter Wonderland article.

Winter Wonderland Mosaic

I’d really been hoping the weather here would improve, but this year it’s a typical November. Cold, grey, rainy and foggy.
Actually, after finishing Part 2 of the Winter Wonderland CAL, I’d completely forgotten to take some nice photos. I wanted to make up for it now, but unfortunately. the weather and lighting aren’t on my side – what a shame! Now, unfortunately, the photos I already have have to suffice.

I’m currently working on the last twenty rows of the blanket body. Phew!
I don’t think this has ever happened to me before – that a pattern has already been published, but I haven’t finished my test project yet. But sometimes, unfortunately, life gets in the way!
I’m really glad that I was at least able to finish the test in advance by crocheting a small sample – just over two repeats – of the final section. For this, I simply used some yarn from my stash. I really must take a photo to show you – it’s a completely different look, but the colours look great too

Yarn Update

As I’m now almost finished with the blanket, I have a better idea of how much yarn I’ll need in total. 

For the blanket it will be

  • 4 balls White
  • 2 balls Silver
  • 2 balls Grey
  • 2 balls Graphite
  • 1 ball Lipstick

For the border I will need an extra ball Lipstick and probably one more Graphite.

My colour placement Part 2

Winter Wonderland Mosaic, list of row-by-row colours for Part 2

I hope you have fun 💕

More posts in the Winter Wonderland series:

Winter Wonderland Mosaic
Winter Wonderland – My colours part 1
Winter Wonderland – My colours part 3
Winter Wonderland – My colours part 4
Winter Wonderland – My colours part 5
Winter Wonderland – My colours part 6
Winter Wonderland Round up