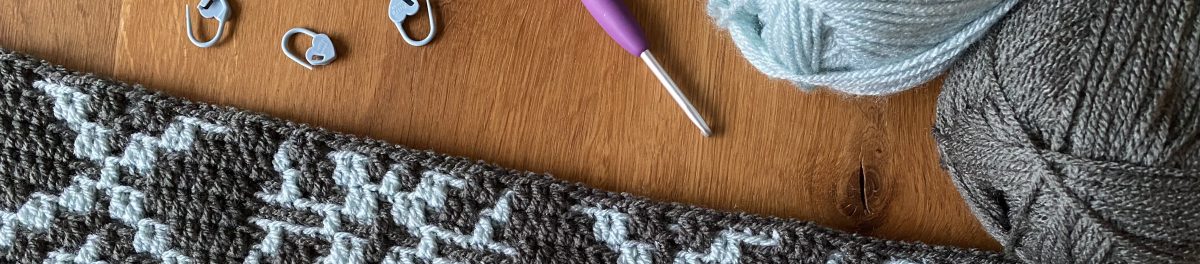
I recently had the opportunity to test a new design from Pam Knighton-Haener / A Yarn of Serendipity: The Pinwheel Square.
The pattern was just released and is available on Ravelry. You will find a link at the end of this post. The skill level of the pattern is categorised as mid-intermediate. As always, the written instructions are very clear and accompanied by detailed photos for each round. Made with Aran / Worsted Weight yarn (#4) the final size of the square will be 11 or 12 inch / 28 or 30,5 cm – depending on the size of the crochet hook used. And of course, the final stitch count matches all the others from Pam’s squares.
My yarn and colours
As you may know, I often use a light weight (#2) cotton yarn for these tests. For example Schachenmayr Catania or Hobbii Rainbow Cotton 8/4. The reason is simply that I’ve accumulated a wide variety of colours of these yarns through crocheting amigurumi, so I am happy to use them up. Besides the great colour range, both yarns also have good stitch definition.
Somehow this time I decided to go with my stash of Stylecraft Special DK.
I recently used a similar colour combination for another overlay mosaic crochet test. It was all in neutrals, and I loved the result. I was curious to see how a colour palette like that would look in traditional crochet.
Well, I am more than happy with the result!
I used a 4 mm hook and the final size of my square is 26 cm – about 10 1/4 inch. If you are interested in my colour way, here my notes.
You may have already seen that Ana from One Skein of Love has published a new blanket pattern: Stellar.
Again, it is a pattern in Overlay Mosaic – this time she used Hobbii Portobello in two different colours. Of course you can use any other yarn as well and as many colours you like. A colour changing yarn would also look great!
Photocredit: Ana Morais Soares / One Skein of Love
The pattern is available on Ana’s Ravelry page and in all her other shops.
I had the pleasure of testing this pattern and translating it into German. However, I only had little time over Christmas and the turn of the year, so I only made a small square for testing. Originally I wanted to use it as a coaster, but when I finished it I thought it would be a good size for a potholder as well.
I used Hobbii Rainbow Cotton 8/4 and a 2,75 mm hook. Colours are 002 Natural White and 079 Dusty Blue Green.
With 170 m / 50 g Hobbii Rainbow Cotton 8/4 is rated as a Fingering weight yarn. So it’s actually too thin to make a potholder out of it. Therefore I made a second square in reversed colours and connected them both together – just to achieve a nice thickness.
The Joining
At first I thought about joining the two squares in one step with the slip stich round. Like I did for my Wooly Friends Bag . What I didn’t like about this method was the patience I needed. It cost me a lot of concentration to catch the corresponding stitches of both parts. All yarn tails were constantly in my way and it took me ages to get it done. I have therefore discarded this idea and tried something else:
I prepared each of the squares with a slip stich round. This gave me the opportunity to work a separate border (front layer) on each square and to use the back of the slip stitches to join the squares.
The layers are joined with simple stitches through the back of every second slip stitch.
When you do a normal double border, it can sometimes be hard to work in the back of the slip stitches in case your stitches are too tight or you started with the front layer first. That’s why I wondered if it would make a difference whether you connect the squares first or work the borders first. I just gave it a try and initially made the border on one square, then joined it to the other one without a border. As the join is worked with a needle and not with a crochet hook, it is not difficult to work in the back of the slip stitches either way. So, in my opinion, it will not make a difference.
I worked the border on each side of the potholder like I would have done with the front layer of a double border: 4 rounds of single crochet worked in back loops only. Then both layers were joined with a slip stitch round. For the hanger, I made a thin (2 chains) I-cord from both colours and pulled it through one of the corners. That’s it!
The finished size of my potholder is 21 x 24 cm (about. 8 X 9,5 inch).
I hope you all had a great start in 2024 and are doing well!
I’d like to start the new year by showing an ‘old’ project: My Legacy Blanket.
If you’ve read my posts on this topic from last year, you’ll no doubt know that the Legacy Blanket a design by Pam Knighton-Haener from ‘A Yarn of Serendipity’. She designed this blanket as a legacy for her grandchildren. You can read the story about it here.
The quilt consists of 12 different squares and has a wide border. When Pam finished the instructions for the border last year, she also revised the instructions for the 12 squares. So I had the opportunity to test a few of them.
I started this project sometime in July or August last year. You might remember that I found it difficult to choose the yarn and colours. And I went through quite a few trials and errors when it came to arranging the colours too. In the end, I ended up crocheting more than one square twice because I wasn’t happy with my colour arrangement. To be honest, I still had my doubts when I was joining the squares … BUT – surprisingly – once it was finished, everything fitted perfectly. I think it’s turned out really well and I LOVE the result!
My blanket was finished by the middle of December, but unfortunately I had no chance to take some nice pictures. We had a VERY long period with lots of rain, dark clouds, a bit of snow, fog, lots of rain again, well, winter …, you get the picture …
But here, at last, is a brief summary and a few photos:
My Yarn and Colours
My final choice of yarn and colours was
Drops Lima – 65% Wool, 35% Alpaca (100 m / 50 g)
colour 100 – Off White
Drops Merino Extra Fine – 100% Wool (105 m / 50g)
colour 07 – Light Taupe
colour 15 – Light Sea Green
Lima and Merino Extra Fine are both DK-weight yarns (#3, Light Worsted). The fact that I mixed the two yarns was simply a matter of colour tones. Colour 100 – Off White looks slightly softer on Lima than on Merino, probably because of the yarn’s texture. And I preferred that
My Layout and Colour Placement
I used Drops Lima in Off White as main colour and only added a few accents with Light Taupe and Light Sea Green. So, in my notes below, I just listed the rounds with the accent colours – all other rounds are worked in Off White.
If you are interested in my colour scheme you can also download it here
My squares and the border are worked with a 4 mm hook throughout. Only for the Zipper Join and the last round of the border I went up to a 5 mm hook.
Each of my squares measures about 25 cm (about 10”). The final size of the blanket is about 90 x 115 cm ( 35,5 x 45 inches).
I’m sorry, but with all the changes and re-starts I’ve made, I didn’t keep track of how much yarn I used. In total, I used just over 900 g of yarn. As a very rough estimate, I’d say you’ll need almost 50 g of Off White for each of the squares, plus another 100 g or 150 g for the border. On top of that, you’ll need 2 or 3 balls each of Light Taupe and Light Sea Green. But that’s just a rough guide.
The patterns for all these lovely squares and the border are available in Pam’s Ravelry store.
In case you missed my previous posts about this project, you will find them here
See my finished Magic Winter Mosaic CAL blanket, including yarn amounts, colour placement and my thoughts on this beautiful overlay mosaic crochet design.
Updated on 09 August 2026
The Magic Winter Mosaic CAL run throughout November and December 2023.
In my last post, I introduced Ana’s new design, the Magic Winter Mosaic CAL where I explained my colour choices and the inspiration behind them.
At the time, I was still working on the border of my blanket. Now it’s finished, marking the end of another big project for me.
I opted for a two-coloured double border – using only Vintage Peach for the back layer and a combination of Silver and Vintage Peach for the front layer.
Made with a 4 mm hook, my blanket measures about 121 x 146 cm (48 x 57 inches).
All in all, I think I captured the sunrise-on-a-frozen-winter-morning look quite well. And I am totally happy with the result!
My yarn amounts
In total I needed 12 balls of Stylecraft Special DK.
My colour placement
If you like my colour scheme and would like to recreate it, you can download my colour placement guide at the end of this post. It lists the colours used row by row.
My thoughts about Magic Winter Mosaic
Magic Winter is a lovely winter-themed blanket design that can, of course, be crocheted in all sorts of colour combinations. The pattern uses the overlay mosaic technique and, for smaller sections, a combination of overlay mosaic and tapestry crochet. Of course, both techniques are explained in the pattern.
Although I found that the blanket was quick and easy to crochet, the tapestry sections took me a bit longer.
Combining tapestry crochet with overlay mosaic takes a bit of practice. Especially when working the double crochet stitches, you’ll need to get the hang of carrying the yarn.
But the special tapestry technique is only used in a few rows of the snowmen section. Besides, you can also choose to skip it altogether and just crochet the sections in standard overlay mosaic. It’s entirely up to you!
But before you decide against it, just look at the scarfs and hats of the snowmen and those little hearts in the trees… it’s definitely worth a try!
My Magic Winter blanket is still one of my favourite blankets and gets plenty of use during the colder months.
My colour palette for the Magic Winter Mosaic CAL, inspired by frosty winter mornings, with photos, row-by-row colour notes and yarn choices.
Last updated: 09 July 2026
A little note before you start:The Magic Winter Mosaic CAL run throughout November and December 2023. I wrote this article back in 2023 when I was part of the team that tested the pattern before its publication.
If you’re discovering Magic Winter just now, you can still get the pattern and use my colour placement as inspiration for your own blanket.
Have you seen Ana‘s1 new CAL yet? Magic Winter Mosaic starts on Friday, 17 November 2023. The introduction file containing all the key information is already available on Ravelry.
I had the pleasure of testing this wonderful pattern and also translating it into German.
The Magic Winter blanket is made using the overlay mosaic technique. And it also features a small section created using the tapestry mosaic technique. Of course, the instructions explain how to work both techniques.
When Ana showed me her new design for the first time, I immediately pictured a clear, cold and frosty winter’s morning, with the sun rising in a rosy glow.
“Look, the angels in heaven are baking,” my grandmother would always say on mornings like these when I was little.
Right then, I knew I wanted my blanket to capture that very moment: the quiet beauty of a frosty winter morning as the first rays of the rising sun turn the sky soft pink.
With that image firmly in my mind, the colour palette almost chose itself. White, Silver and Vintage Peach captured exactly the quiet beauty I remembered from those frosty winter mornings.
For me, white symbolises the cold, the snow, the frost – perhaps even the icicles hanging from the roofs. Silver, with its slightly bluish undertone, reflects the cool, diffuse light just before sunrise. And Vintage Peach brings the first warm, rosy glow of the rising sun.
The angels are baking…
I’m still very happy with how these colours capture the atmosphere I had in mind.
My work in progress
My colour placement
If you’re interested in my colour scheme, I’ve already noted down the colours I’ve used for each individual row in Part 1 of the CAL.
My complete colour placement guide is available as download in the follow-up post. There you’ll also find the detailed yarn amounts I used.
YAY! It took a while because I spent so much time thinking about the colours and how to arrange them … But finally … all 12 squares are finished! All tails are worked away and all squares are blocked.
These are the last three squares that were missing from my collection.
Lauren Rose
Brood of Angels
Macey Ann
I’ve just prepared the first squares to be joined together and spent a while working on the layout.
After arranging and rearranging the squares a few times, I settled on the layout shown on the left. I hope it will look nice!
The Zipper Join
In the Justyce Destany Border pattern for the Legacy Blanket Pam recommends to use the Zipper Join for joining the squares.
I have to admit, I’m no expert when it comes to joining squares. I once used the ‘join-as-you-go’ method to join a few granny squares – but I think that’s about it. So, for the Justyce-Destany border, I’m trying my hand at the zipper-join for the first time. The pattern includes a useful link to a video tutorial showing how to do this join. But if, like me, you prefer written instructions, I’ve also found a very clear and helpful guide from Raffaella from Raffamusa Designs. Nevertheless, the beginning is a bit fiddly – at least I think so … But I am slowly getting the hang of it. I experimented a bit with the crochet hook size at first and eventually settled on a 5.0 mm hook. I crocheted the squares using a 4 mm hook. However, with the larger hook, I find it easier to crochet even stitches when joining, which don’t end up too tight. So far, I’m happy with the result. It’s a very neat and flat join. Now on to the next squares!
Progress with my Legacy Blanket. The joining comes closer, 11 of 12 squares are finished now. All tails worked away and most of them already blocked! I also revised some of my colour placements and am happy with the result!
I was happy to help testing the border pattern. Even though my blanket isn’t finished yet, I can already give you a little sneak peek at the border.
For testing purposes I used two of my ›old‹ squares which I made right at the beginning of this journey: Drops Merino Extra Fine #50, Light Beige as main colour, #06 Brown Mix and #07 Light Brown for contrast. I discarded this colour scheme after I had worked the first two squares – somehow I didn’t like it. But – advantage – it gave me some ›leftovers‹ for testing the border.
And here some of my finished squares
Madux James
Brixton Carter-Lee
Marley Mae
Jalen Miles
Carter Jude
Olivia Grace
So far so good! Lauren Rose (one of the revised ones) and Brood of Angels are still on the blocking board. The last one to finish is Macey Ann. Actually, Macey Ann was the very first Legacy Square I made. So it still has the ›old ‹ colour scheme and – besides now being part of my border patch – needs to be redone.
All patterns for the Legacy Blanket are available in Pam‘s Ravelry store.
I don’t want to miss the chance to show you my Em Cabal Square. I tested this pattern – designed by Pam Knighton-Haener from A Yarn of Serendipity – a few weeks ago. The Em Cabal Square is a special design for the Ravelry BAMCAL2023 – Block-A-Month Crochet-A-Long, a group on Ravelry. Every month, three different Afghan crochet squares are featured in this group. The designs are chosen by the moderators and/or group members, and you can decide whether you’d like to crochet one (or all) of them. By the end of the year, you’ll have a beautiful blanket. What a brilliant idea!
Em Cabal one of the squares for the month of October. It is a 12 inch square with 39 stitches per side. The skill level is beginning advanced. Like all of Pam’s patterns, this one also includes detailed stitch descriptions and helpful pictures for each round.
For my test version I used Drops Safran (160 m / 50 g) and Cotton Kings 8/4 (170 m / 50 g) and a 2,75 mm hook. Both yarns are 100 % cotton – soft and nice to work with.
I followed Pam’s colourway and used
A – Drops Safran, # 60, Moss Green
B – Cotton Kings, # 41, Spring Green
C – Drops Safran, # 71, Marzipan
D – Drops Safran, # 11, Strong Yellow
At first, I wasn’t sure whether the two shades of green would go together, but I’m really pleased with the result. That said, the square looks great in a single colour too!
Somehow, the pattern reminds me a bit of Florentine Tiles. What do you think?
The year flies by … – it‘s already October! Only a few more weeks until Halloween … But still time to make some decoration …
Ana from One Skein of Love just released a new pattern which is available on Ravelry (and of course all her other shops): BOO!!!Licious. (Link below) It is a Halloween themed pattern and combines overlay mosaic with tapestry crochet. The pattern is written to make a blanket but it is also suitable for many other things, such as cushion covers, table runners, bags, etc.
Photo credit Ana Morais Soares / One Skein of Love
I had the pleasure of testing (and translating) BOO!!!Licious. I created some wall hangings, similar to the ones I made with Wintry Forest.
I love the colours Ana used for her sample! The yarn is Durable Comfy, and the orange tone (Caramel) is just gorgeous. However, I wanted to showcase something different, with slightly more muted colors – foggy and spooky…
That’s why I decided to use very little orange and focused on different grey tones and a soft purple.
My Yarn
I used some yarn from my stash – a combination of Stylecraft Special DK and King Cole Baby Comfort DK – with a 4 mm hook.
Stylecraft Special DK (100 g – 295 m / 322 yds)
1063, Graphite – a little bit over 2 balls
1807, Hint of Silver – 1 ball
1836, Vintage Peach – some left overs
King Cole Baby Comfort DK (100 g – 310 m / 340 yds)
1731, Mulberry – 1 ball
My Panels
All of my panels are worked over 1 pattern repeat plus border stitches. Each one starts with a foundation row and ends with one final row of single crochet in the back loops. I followed the pattern layout of the BOO!!!Licious blanket, just splitting it into 3 parts. I have only omitted the last repetition of pattern 2 and 1 in panel 3. Otherwise, it would have become too long. The panels are framed with a double border, just like explained in the pattern. Their finished width is about 29 cm / 11,5 inches.
Panel 1 – The Ghosts
It is worked over 79 rows in total and measures app. 48 cm / 19 inches, including the border.
Panel 2 – The Pumpkins
The panel has a total of 56 rows and measures about 41 cm / 16 inches. Due to my different colour placement, I had to add an additional row of single crochet between patterns 1 and 4, respectively 4 and 1.
Panel 3 – The Spiders
Again, I had to add 2 rows of single crochet to make my colours match. This time they are a separation between patterns 1 and 6, respectively, 8 and 1. The whole panel has 73 rows in total and measures app. 45 cm / 18 inches.
If you are interested in the details of my colour placement, I have listed them in a separate file for you to download.
I revised this file in July 2026 and listed my colour placement row by row. I have also listed all the changes I have made to create the wall hangings compared to the original blanket pattern.
Of course, you can also use the colour scheme to create the blanket. For this simply follow the pattern arrangement in the blanket pattern. However, you still have to insert the additional rows (a row of single crochet stitches worked in back loop only), otherwise the colour sequence will not work.
You will find a download link at the end of this post.
BOO!!!Licious, decorated in my living room over the couch …
Happy Halloween 🎃 🎃 🎃
Download the colour placement guide
Download my row-by-row colour placement guide for the Winter Wonderland blanket.
Do you love crocheting squares? I’ve only just discovered my great love for them! A square is usually finished in no time and – something that’s very important to me – you see results quickly. That also makes them great ‘in-between projects’. What’s more, they’re lovely to crochet when it’s still warm – you’re not stuck under a big, warm blanket. However, that’s not so important to me at the moment as it’s suddenly turned cold and autumnal here.
You may know that Pam Knighton-Haener from ‘A Yarn of Serendipity’ designed a very special blanket some time ago as a legacy for her grandchildren. It consists of 12 different squares, each symbolising her grandchildren and her family. The instructions for joining the squares and for the border are currently being tested. She has also revised the instructions for the squares, and I’ve had the chance to test a few of them. A great opportunity for a new blanket. It will only be the second one I’ve ever crocheted from assembled squares. Unbelievable!
So far I have already made 9 out of 12 squares. Unfortunately ›made‹ does not mean that they are actually finished. Only 3 of them are blocked with all the yarn ends worked away. For another 3 I am currently rethinking my colour placement and 3 squares still have a lot of loose ends that need to be done.
I’m afraid that’s one of my bad habits: I only weave in the loose ends once a square is finished. Yes, I’ve tried to change that! Yes, I know it’s much easier and less frustrating to do it straight away! The only problem is: if I weave in the loose ends straight away, I often spot a mistake afterwards (again, yes – of course I know I should check it beforehand – but still…). By now, I’m almost convinced that weaving in the loose ends straight away might bring bad luck – so I just let them live a little longer. Good things take time, as the saying goes.
Nevertheless, I love working on this blanket and I love my finished squares.
I am using a combination of Drops Lima and Drops Merino Extra Fine – both DK / Light worsted yarns – with a 4 mm hook. Drops Lima consists of 65 % Wool and 35 % Alpaca. It has 100 m per 50 g. Merino Extra Fine is 100 % Wool with 105 m / 50 g. My main colour is Lima #100, Off White. The accent colours are Merino Extra Fine #07, Light Taupe (Light Brown) and #15 Light Greyish Green.
I hope the blanket will wash well. Lima can only be hand-washed, but I really like the feel of the yarn. And I decided to combine the two yarns because of the colours. Colour 100, Off White, is identical in Lima and Merino Extra Fine, yet it still looks slightly different. Probably due to the structure of the yarn, the contrast with my accent colours looks softer in Lima. And I much preferred this look.
My finished squares are about 25 cm / nearly 10 inches.
Landyn Tahj
Kinnedy Nichelle
Jalen Stanley
All patterns for the Legacy Blanket -some paid, some free – are available in Pam’s Ravelry store.