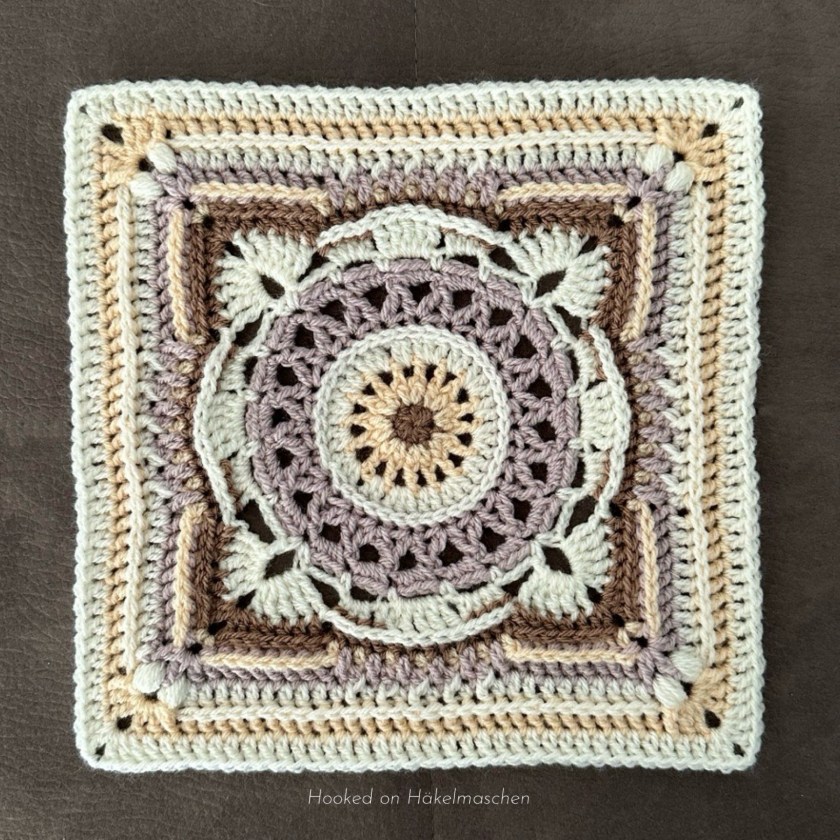
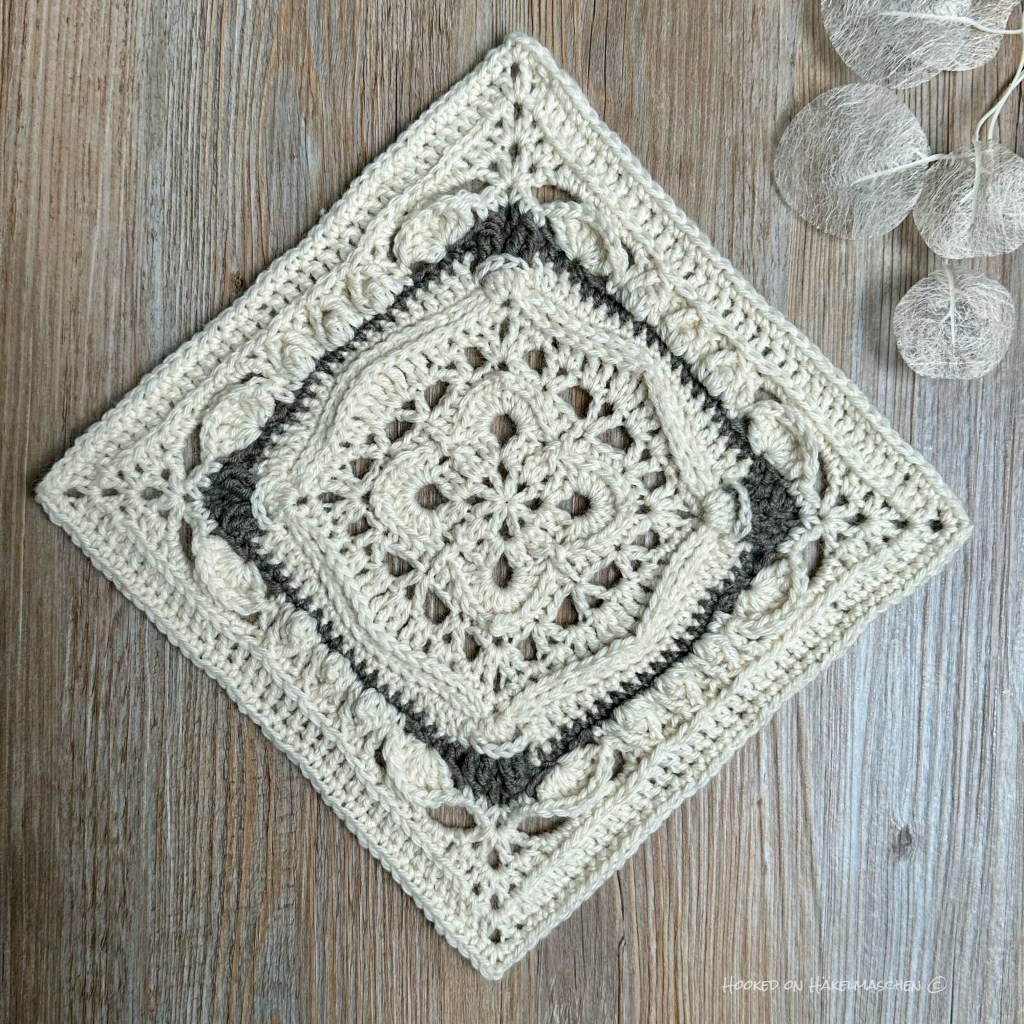
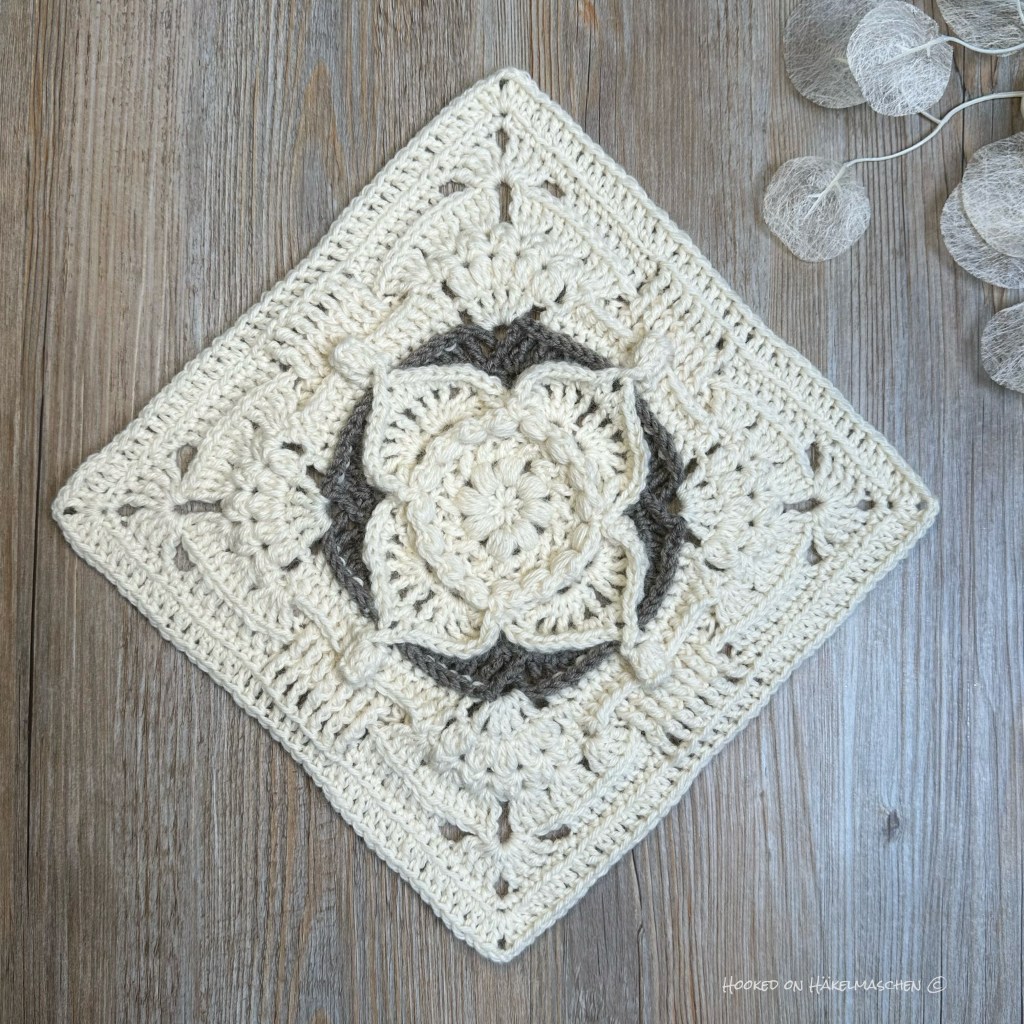
I’m happy to finally be able to show you my version of the Mystified Square.
It is the new design from Pam Knighton-Haener / A Yarn of Serendipity. The pattern has just been published. AND: it has been chosen by the Ravelry BAMCAL group as their block of the month for November.
Ravelry BAMCAL
Have you heard of BAMCAL on Ravelry?
If not, BAMCAL stands for Block-A-Month Crochet-A-Long. This is a Crochet-Along organised every year by a special group on Ravelry.
The CAL runs throughout the year. Each month 3 different Afghan squares are featured. Two squares, a 6 inch and a 12 inch, are chosen by the mods. A third is chosen by the group members in a poll. All patterns are free – at least for the month they are chosen for.
You can choose to do one or all of them – it’s up to you. At the end of the year you can combine all your squares into a blanket. Or make anything else you can think of.
I absolutely love this idea! Maybe I should join in next year?
Mystified Square – The Pattern
The Mystified Square is designed for Aran / worsted weight yarn (#4). But it will also work very well with other yarn weights. Of course, using a different yarn weight will affect the final size.
With worsted weight yarn, the finished square will be 11 or 12 inches (28 or 30,5 cm). This depends on whether a 4.5 or 5 mm crochet hook is used.
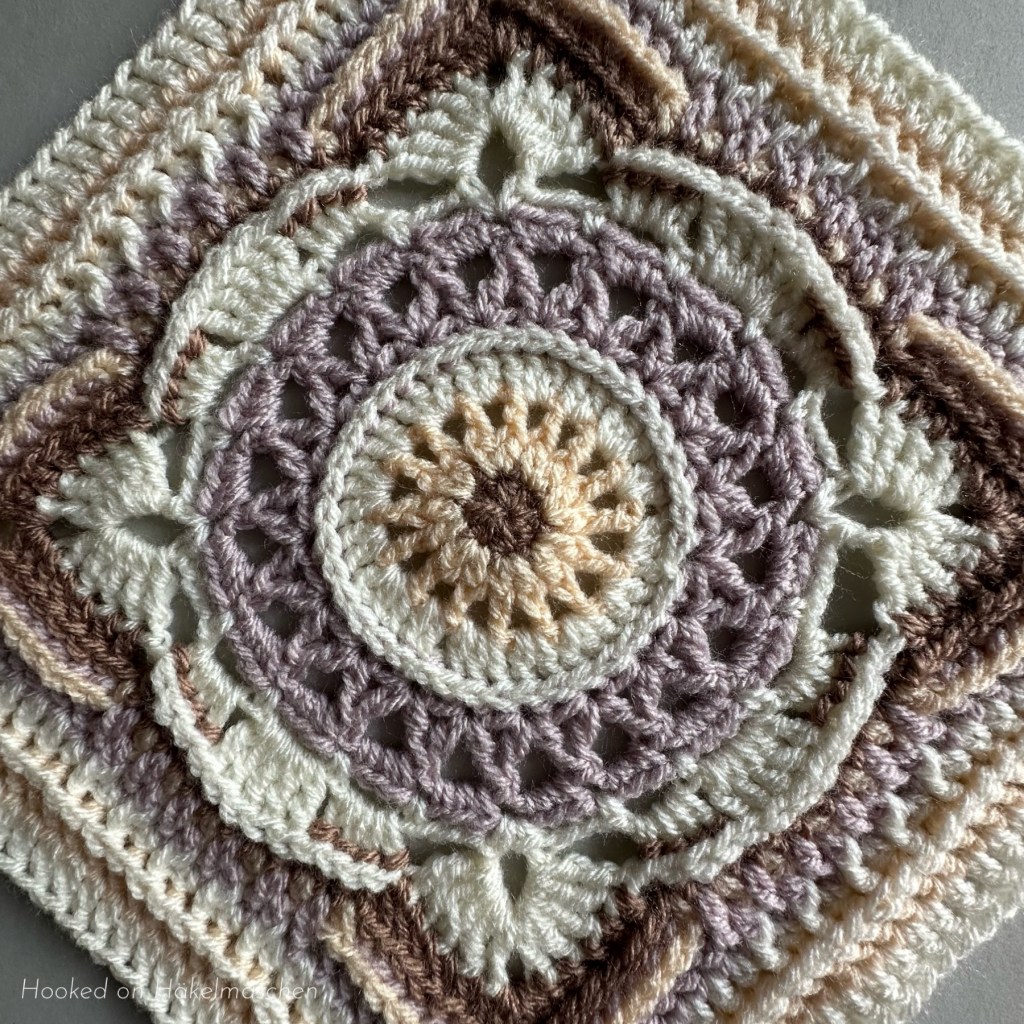
The pattern is classified as mid-intermediate. It uses various stitches, including some special ones. But no worries, they are all very well explained. And a picture tutorial helps with each round.
The design comes in two colourways, each with 5 different colours. Of course, you can also create your own colour scheme. I bet it would also look great in just one colour!
The pattern is available on Ravelry.
My Test Version

I already tested this pattern for Pam some weeks, or rather months, ago. I think it was in early August.
Of course, everything had to be kept secret until the pattern was finally published. Hard time :-)
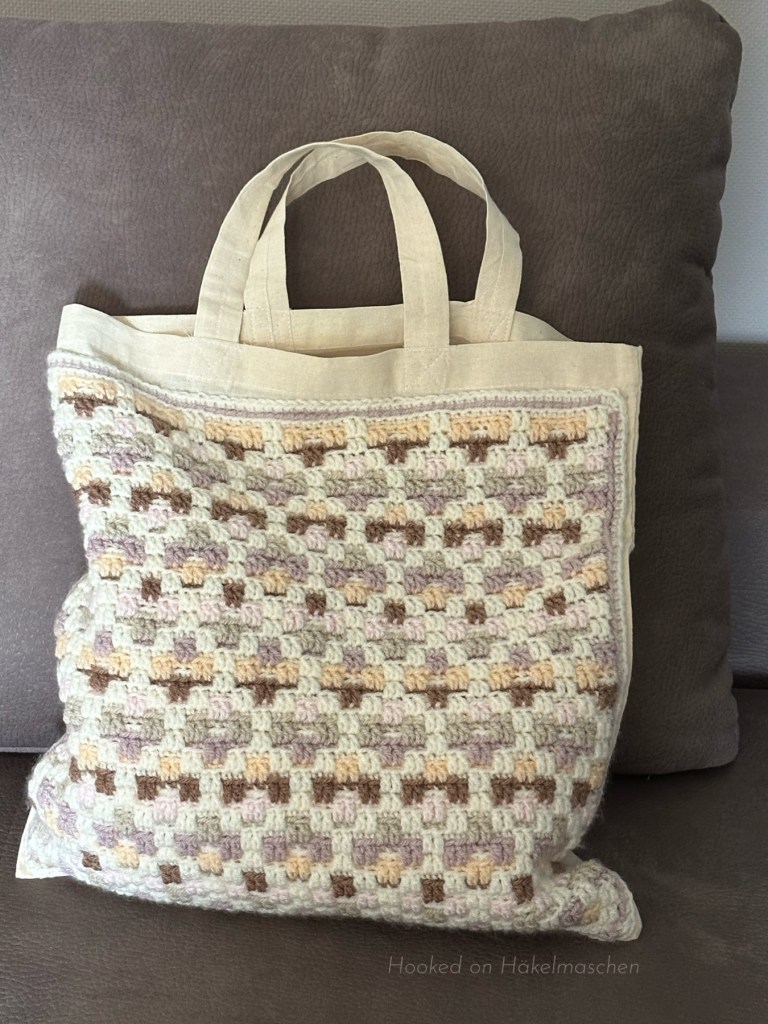
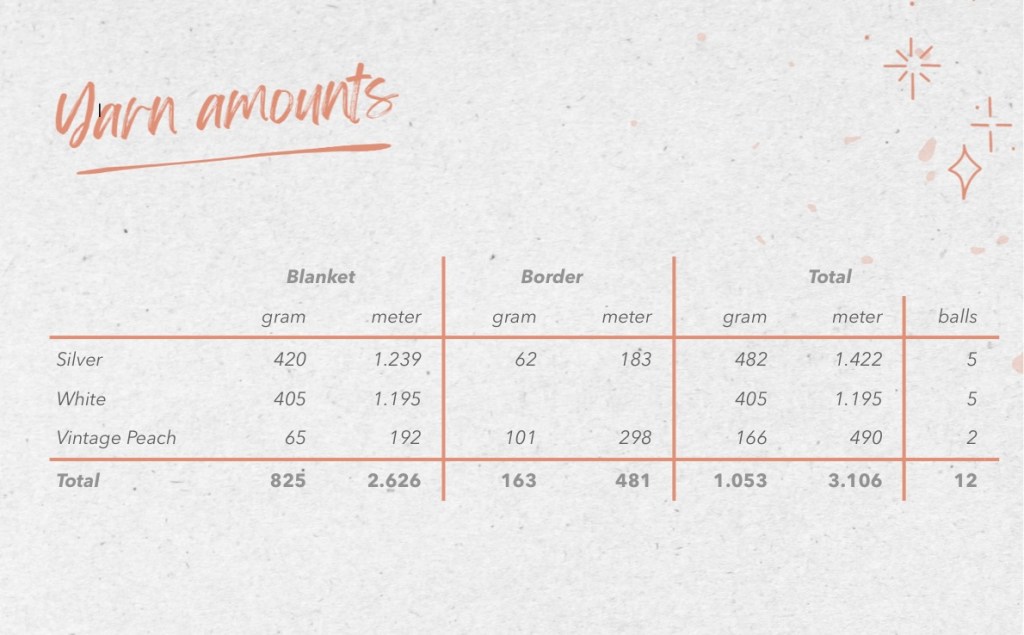
As always, I did not use the suggested Aran yarn. I still don’t like working with it and feel a bit uncomfortable using a 5 mm hook. So, this time I decided to use up some Hobbii Rainbow Cotton 8/6 (a #3 yarn) from my stash.
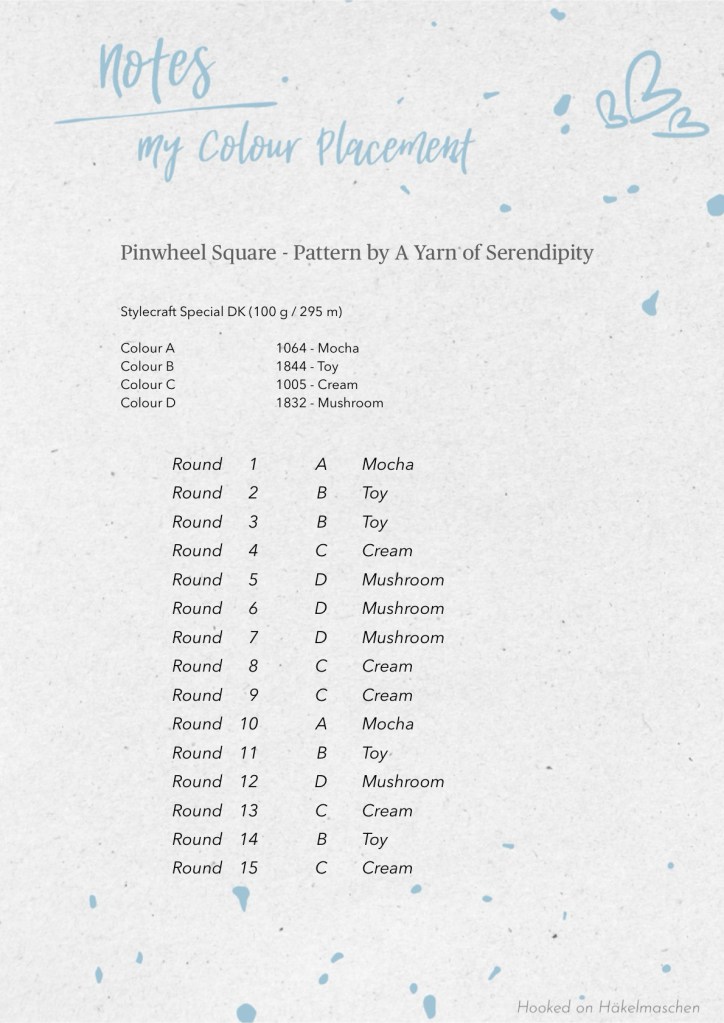
I used colourway 2, but replaced the colours as follows
- Hobbi Rainbow Cotton 8/6 (50 g / 105 m)
- A – 065, Apricot (discontinued?)
- B – 73, Pearl Gray
- C – 047, Dark Old Rose
- D – 049, Peach (discontinued?)
- E – 012, Volcano Gray
Unfortunately it looks like two of my colours are already discontinued. At least I couldn’t find them in the actual Hobbii shop.
I like the way the colours come together. I just noticed that they are a bit difficult to capture in a photograph. The Dark Old Rose in particular is a little reluctant to show its true beauty…
Using a 3,75 mm hook my square turned out to be about 25 cm / 10 inch.

I really enjoyed working on this pattern and am happy with the result!
Are you going to try the pattern? If so, have fun 💕