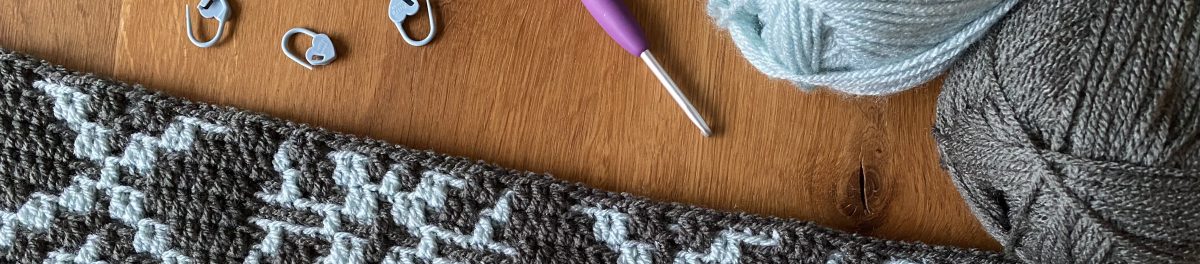
I just want to show you the new pattern by BebaBlanket that I was able to test earlier this year
Caramel Chocolate Cake
You have to look at the photos from BebaBlanket, her original blanket looks just YUMMY.
Mine is more a Blueberry Cream Cake but it was absolutely fun to test this pattern. The skill level for this pattern is upper intermediate. There are a lot of interesting stitches and stitch combinations.
I used King Cole Baby Comfort Dk in the colours Pebble and Jeans. Here some impressions of my test piece
Where has this year gone? Now it’s already August and I have the feeling that I can’t really finish any of my private projects. My Seashell Dudes, my When Summer turns into Fall blanket are still WIPs. My new blog is still not completely finished, let alone that I have already decided on a hosting provider.
But I have finished the test for Pam Knighton-Haener / A Yarn of Serendipity. It was quite a new experience because this time I checked the written instructions and also the videos she made for certain rounds. But more on that later when the pattern is published.
And I am working on a really big project: I am testing the pattern for a CAL that will probably start at the end of September! It will be a blanket in Overlay Mosaic technique but I can‘t reveal more yet …
I don‘t know how it is with you, but in Germany the summer 2021 is very changeable. It almost reminds me of the summers in my childhood when the climate crisis was not felt as clearly as it is now. We have quite a lot of rain and so far the heat waves that we had in the past few years have not materialized. Last year we had between 30 and 35 degrees Celsius around this time. I remember it so well because back then I tested Mosaic Christmas for BebaBlanket. That was a crazy feeling to test a Christmas pattern at 35 degrees!
Mosaic Christmas
was my second pattern in Overlay Mosaic. My first one was a placemat made with Chevron Apache Waves.I already mentioned it in this post. Mosaic Christmas is a pattern designed by BebaBlanket. It has charts for 4 different motifs, Christmas Trees, Snowflakes, gifts and an ornament that can be used as a separation.The main repeat goes over 45 stitches so the size is easily adjustable and you can create a lot of different items.
Mine was meant to be either a wall hanging or a table runner, it became a table runner.
I used Stylecraft Special Dk in Cypress and Cream. My Christmas Decoration is mostly red, so Green and White/cream is always a perfect match.
I only worked two repeats in width using the following layout
Ornaments / Christmas Trees / Gifts Snowflakes Gifts / Christmas Trees / Ornaments
I didn‘t work a border but crocheted over the tails. Today I would just do a double border because I think it is a great finish but since it was only my second Overlay pattern I was just scared about all the tails. :D
So, as it is already August, if you are looking for a nice Christmas project, here some more pics
Phew, another pattern test is finished: No Limits, the new pattern by BebaBlanket.
No Limits is an Overlay Mosaic pattern worked in rounds but the pattern has also an option to work in rows. There are different charts for pattern variations, 3 for working in the round and 1 for working side to side. The best is: all variations can be combined with each other. And, when working in the round you don‘t have to cut the yarn after each round. All colour changes are made in one corner and you just carry the yarn along.
My No Limits is based on pattern variation No 2. It is made with King Cole Comfort DK in the colour Truffle (colour A) and Stylecraft Special DK in Cream (colour B) with a 4,5 mm hook.
I worked according to the chart as it is drawn (up to round 30) and repeated the pattern starting with round 19. After 3 repeats I had to stop because I ran the risk that my Truffle would not be enough for another repeat. I finished the pattern with one more round 19 in colour A and a round of back loop single crochet, also in the colour A.
My finished No Limits measures 80 cm in a square, big enough to cover my knees and lap on a chilly day.
A lovely pattern that is also suitable to play with colors a bit. But I especially like the corners.
is the new pattern by Ana Morais Soares from One Skein Of Love. At the end of last month, Ana asked me if I could test this pattern. As she wanted to release the pattern in the middle of July I didn’t have enough time to make a complete blanket. So I first tested just one repeat by crocheting a small swatch with 45 stitches and 44 rows and started the blanket afterwards.
Oh So XOXO Pattern
Oh So XOXO is an Inset Mosaic crochet pattern. For Inset Mosaic two rows (front and backside) are worked with one color. The yarn is not cut at the end of a row, so no tails to deal with.
The pattern is a repetition of two stripes with two different motifs. One repeat comprises 28 stitches and 44 rows so the size is easily adjustable.It is Ana’s fist inset pattern and has written instructions with detailed row by row pictures and also a chart.
My Oh So XOXO journey
I mostly use DK yarn for blankets and I absolutely love to use It for Overlay Mosaic. So of course I used Stylecraft Special DK for my test swatch… And made a new experience! For my taste DK yarn might be a bit too thick for Inset mosaic, at least for my taste. My swatch didn‘t have the fluffiness that Overlay has and felt pretty stiff even when working with a bigger hook …
Although I actually wanted to use yarn from my stash I made up my mind and ordered some thinner yarn, Drops Love You 7. The same quality that Ana used for her design.
Drops Love You 7 is a 100 % cotton yarn. A sport weight with a yardage of 170 m per 50 g.
My swatch in Stylecraft Special DK was made in the colours Grey and Cream. I really liked this combination! To get something similar for my final blanket I choosed the Drops colours Dark Grey and White. Of course the white is brighter than the Cream was and the Dark Grey is darker than the Graphite. Nevertheless I think it’s a beautiful and strong combination!
Drops Love You 7 is smooth and soft and I enjoy working with it. I am using my 3,00 mm Clover Amour hook.
My blanket will have the full size over 185 stitches and 286 rows (6,5 repeats). Without border it measures about 93 cm / 36,5 inch in width. I am currently working on the second pattern repeat, so still some way to go. But I love it! The pattern is easy to follow and very relaxing.
is my first test for Ana Morais Soares from One Skein of Love.
Gretchen is a lovely blanket made in Overlay Mosaic technique. The original blanket measures about 110 x 130 cm big and is made with 4 different colours. It is a written pattern with row by row pictures, but it also contains charts. The blanket has a plain double border and some nice tassels.
Ana‘s original Gretchen / photo credit: Ana Morais Soares from One Skein of Love
My version of Gretchen
As I joined the test relatively late and didn’t have much time to complete it, I only made a small version: 4 repeats in width and 4 repeats in height, plus the 3 final rows. My finished blanket is about 58 x 80 cm including the border.
I used Stylecraft Special DK in only two colours, Pistachio and Meadow. Originally it was Ana’s idea to combine these two . This is a combination that is definitely out of my „comfort zone”! But – surprise -I absolutely love the result!
I replaced the main color, C1, with Meadow and the colors C2, C3, and C4 with Pistachio. Following the pattern, the complete border should be done in color C1. I was a bit afraid of running out of Meadow, so I decided to do the back layer of the border in Pistachio and only the front layer in Meadow. My slip stitch round for the border is done in Pistachio.
The slip stitches and the first round of the border really were the hardest part. You have to concentrate and look very closely so that you don’t skip or miss a stitch. Not so easy if you don’t use a high-contrast color. My eyes almost started to water. But the result made up for it completely.
As my test piece is really small, I made some changes to the tassels. I only used two strands of yarn, one in each colour. Otherwise, they probably would have become too dominant.
To me, this was a relaxing project, and as one repeat goes over 30 rows, it didn’t get boring at all!
It is kind of strange, but when I do Mosaic crochet, there are some patterns where I prefer to follow the written instructions and others where I love to follow the charts. For me, Gretchen was definitely was a pattern to follow the chart! Don’t ask me why …
But no matter wether you work according the written instructions or the chart, in some rows it can be helpful to mark the end of a repeat with a stitch marker.
Impressions of my test project
The first repeat
Ready for the border
My finished Gretchen
I really loved testing this pattern!
I am sure Ana had very special memories whilst designing this pattern and some special memories have accompanied me too:
My great-aunts name was Gretchen. In Germany this is an affectionate form for Margarete.
Aunt Gretchen was born at the end of the 19th century and was the younger sister of my Grandma. After the Second World War, they lived together in a little house with a huge garden. So I was back in my childhood, sitting in the yard, playing with the wooden toys my Grandpa made for me, and having some fresh peaches or currants… sigh*
In April, I was able to test another design by Pam Knighton-Haener from A Yarn of Serendipity.
She designed this lovely square for a person who had a decisive influence on the course of her artistic career: Margaret!
My test version
For my test version, I used a combination of Drops Paris and Drops Love You 8. Both yarns are 100% cotton and classified as #4, Aran / worsted weight yarns. The yardage is between 75m and 85m per 50g.
Edit, May 2026: it looks like Drops Love you 8 is discontinued, but the colours are still available in the Paris range.
I followed Pam’s colourway 1 and only replaced the colours:
Colour A / 17, Off White
Colour B / 30, Jeans Blue
Colour C / 62, Sage Green
I love the result! Especially the combination of Blue and Sage. It’s kind of calming and one of my favorite combinations.
Using a 4,5 mm hook my blocked square is about 30 cm / 12 inch.
I thoroughly enjoyed testing this design. Pam’s patterns are always incredibly detailed and well-thought-out!
The skill level of this design is intermediate but every stitch is explained clearly. Plus there are helpful row-by-row pictures showing exactly where each stitch goes
If you like the Margaret square you should also have a look at at a series of squares she designed in legacy of her grandchildren. I was able to test one of them in September 2020, the Carter Jude Square.
The patterns are available in Pam’s Ravelry Store.
The Carnival Treat Dudes is the new pattern by misssBerlin. Candy Apple, Cotton Candy and Popcorn Dude. Another lovely Trio!
It was a great fun again to test this pattern! And this time it was also very educational to me. But that’s one thing I love with testing patterns. I not only get new ideas, but also learn a lot and improve my skills – not to mention the exchange with other crocheters.
The Candy Apple
I started with the Candy Apple. It was love at first sight! I like the round caps anyway, but this one is not only round, it really has the bulbous shape of an apple. Even the small pit, where the stem and leaf normally sit, is shown. And of course the Candy Apple has a Candy Cane and a little leaf for decoration.
And sometimes you are lucky enough to have exactly the right color in your stash. My Candy Apple is made with Scheepjes Catona, no. 516 – Candy Apple.
The Cotton Candy
The Dudes and their caps are mostly made with a Cotton sports weight yarn, but for the Cotton Candy it is recommended to use an Acrylic DK yarn. The instructions for the cap are specially written for slightly thicker yarn, using a slightly thinner hook. I used Stylecraft Special DK with a 3,5 mm hook. It worked pretty good and the cap fitted perfectly. But it was a personal drama to me in other ways: I wasn’t happy with the shape at all. In Dana’s (the person behind misssBerlin) photos the shaping was very smooth and soft and mine didn’t look like that at all. Dana tried to calm me down and told me that brushing will ease the shape …
… Well, she was so right! But I only got that after a series of tests of my own.
As I know that the look of a crochet piece depends a lot on tension, stitch height and so on I tried to make little changes to improve the shaping of my Cotton Candy cap … I ended up doing three caps, but wasn’t really satisfied with any of them. So I took the chance to make another test.:
To get the fluffy look the finished cap is brushed with a pet slicker brush or something similar. Until now I’ve always been very cautious with brushing, being afraid to damage the whole item. Now, having three (unloved) caps to choose from I could be a little braver. So I decided to try how hard the yarn can be brushed before it breaks completely. What shall I say … it withstands quite a lot! The result is even better if you are not too careful …
Now, look at my finished cap…. I am so happy with it! Oh, do I have to mention that this is the cap I did first and the one I liked the least? Well, quite a learning curve I guess! By the way, I used a small wire brush from the hardware store for “pre-brushing” and gave it a „finish“ with a hard clothes brush.
The Popcorn Dude
Making the Popcorn Dude needs a lot of concentration and some time. But it’s so worth it! As the popcorn box should fit snug I chose a smaller hook (2,25 mm) and went up to my regular 2,25 mm hook for the popcorn kernels. Doesn‘t it look yummy?
In the picture the cap is worn by my new Dude that I made during the test. I think so far he is my best one! What practice can do…
For the yarn, colors and hooks I used in detail please see my Ravelry Page. And you also should have a look at the Ravelry page of one of my fellow testers. She tested two of the caps using a 0,75 mm hook and size 40 thread. So cute!
is another pattern test for BebaBlanket. She just released the pattern for this lovely chevron blanket in her Ravelry store.
I love chevron patterns. I have just dealt with this topic, so I know that there are a lot of different variations. But isn’t it amazing how you can influence the look of a simple chevron pattern by combining it with mosaic crochet?
I started with this test at the end of November last year, but I had a very slow start. I can’t say how many color combinations I’ve tried and discarded! Finally I decided to go with Stylecraft Special DK in Graphite and Duck Egg and I think this was a good decision.
The pattern is similar to the Chevron Apache Waves pattern that BebaBlanket released last year. Only the technique is different. Apache Waves is done Overlay Mosaic technique and Mosaic Chevron is worked in a technique that – in some places – is called Inset Mosaic.
In short words, the difference between both is, that Overlay is worked only from the frontside and the yarn is cut and the color is changed after every row. With Inset two rows are worked with the same color and the yarn is carried along the sides. (There are even more differences, but that is perhaps worth another blog post.)
I had the chance to test Chevron Apache Waves last year and made a place mat with this pattern.
It was my first pattern in overlay mosaic technique and so I didn‘t know much about the different border options. I just left all the tails as a fringe, which is one of the various options, and that works pretty good for a place mat or coaster.
In the meantime I have already done several mosaic patterns, both Inset and Overlay. I think Mosaic Chevron is my third blanket made with Inset mosaic technique. The result is a nice lap blanket. It measures about 74 x 102 cm.
Mosaic Chevron – pattern
Except for the mosaic double crochet the chevron pattern is done completely in single crochet and therefor I used a 4,5 mm hook. I was afraid that otherwise it would get too tight and I don‘t like blankets that feel hard and stiff.
As color A I used Duck Egg and color B is Graphite.
I started with 166 chains, that are 7 repeats in width and mixed the pattern with plain chevron sections.
Mosaic Chevron – My Layout
My layout looks like this:
3 pattern repeats
plain section consisting of
6 rows color B
2 rows color A
2 rows color B
2 rows color A
6 rows color B
3 pattern repeats, starting again with row 1
plain section (as above)
3 pattern repeats starting with row 1
The pattern states to start with row 3 after the plain section. And when I write that I started with row 1 that‘s just a different way of writing. It means, that I did two more plain rows in color A, just to get the same color scheme I started with.
Mosaic Chevron – My border
Compared with my Apache Waves place mat my Mosaic Chevron had only a few yarn tails. But of course on one side the carried yarn is visible. So I was looking for a plain and simple border, just to hide the threads.
I decided to go with just one row of single crochet in Graphite, worked with a 4 mm hook.
Here my scheme:
Top: following row 1 of the chevron pattern
Left side: one single crochet in every row
Bottom: following row 1 of the chevron pattern but without skipping stitches and the „tips“ worked in the chain spaces
Right side: one single crochet in every row
3 single crochet in each of the four corner stitches
I really enjoyed working on this pattern. It is easy to memorize and relaxing! And the graphic result is great in my eyes!
I am happy that I had the opportunity to test for misssBerlin again! Also at the risk of repeating myself: I LOVE her patterns and especially her little Dudes. Meanwhile they are spread all over my house.
Her request came at just the right time for me. It comforts me a little bit over the fact that our vacation, planed for mid-march, was canceled due to Corona. The test was about three new caps only. But of course the final pattern will also contain the instructions for the three cute little Dudes.
The recommended yarn for these little creatures and their different caps is mostly a level 2, or sport weight, cotton yarn. My favorite yarn is Scheepjes Catona, which is hardly available in Germany, or Schachenmmayr Catania. Due to the ongoing lockdown my choice of cotton yarn is slowly shrinking. And I noticed again that I seem to have only a small selection of red shades. But it always seems to me as if I don‘t have the right colors when starting a new project. Do you know this feeling?
I listed the colors that I used in detail on my Ravelry project page. My favorite color for the Dudes themselves is Catona, Linen No. 505, it is a bit lighter than Linen No. 248 from Catania. The Dudes on my photos below are made with Catona.
“They are bald and shy, so they cover their heads and half of their faces with whatever they find in their surroundings …”
misssBerlin
….. writes Dana, the person behind misssBerlin, about the Dudes in the intro of her patterns
This time you have to take care, that they don‘t hide on the coffee table. But that would probably not be a good idea. The Suga’ Dudes look so delicious that they definitely would fall out there.
They come along with some yummy decoration, like Ganache, Candy Sprinkles, Whipped Cream, and a topping of raspberries, strawberry and cherry.
Everything is explained very well in the pattern. But it‘s always advisable to read first, otherwise you will be like me.
The Cupcake Dude
…has a topping of Ganache, Candy Sprinkles and a little red cherry …
The Sundae Dude
… makes me drool with his fresh, velvety raspberries
The Waffle Dude
… comes with a topping of Whipped Cream and strawberry
and here the complete trio
Aren‘t they cute and yummy? I really love this pattern and enjoyed testing it!
This is my preliminary result of the lastest test from BebaBlanket, Mix and Match. I still have to decide about the border, but so far I am very happy with the result.
Tiramisu yarn
The yarn for this blanket was sponsored by Stenli yarns, a Bulgarian company. I am very glad about that! Thank you!
Tiramisu is a Cotton Merino Mix and comes in 450 g bobbles. I already used it for my Greek Islands blanket and fell in love with it. It is soft and smooth to work with. (And I am NOT saying this because it was sponsored) It is considered to be a DK weight. Personally I think it is a bit thinner, so I used a 3,5 mm hook.
Both blankets I made with Tiramisu have a comfortable weight and a nice drape.
My Mix and Match journey
The pattern alone makes Mix and Match a good match to my Greek Islands blanket. Therefore I wanted to use not only the same yarn but also similar colors. For my Greek Island blanket I used Denim (my favorite color) as main color. The second color (it had no name, sorry) was color changing from beige to brown. So for my Mix and Match I decided to go also with Denim combined with the color Sea Shore, a combination of brown, creme and light blue.
Stenli yarns are not available in any shops here in Germany. You have to order online, directly from the web-shop located in Bulgaria. That means: orders always take some time … I really was happy when my yarn arrived in November.The disappointment couldn‘t have been greater when I started with the test. What I didn’t realize when placing the order online was the fact that the color Sea Shore has not only color changes from blue over beige to brown. A white thread runs through each of the colors and therefore the brown in particular becomes very “busy”. It distracted the geometrical shapes of the pattern completely.
I had no choice but to reorder yarn – this time a harmless, solid beige – and started again at beginning of December.
Like in my Greek Islands I wanted to use Denim as base color (color A), but then the next problem arose: especially with design 3 there was kind of an optical illusion for me that drove me mad.
The upper stripe shows my first attempt with Denim as color A. Even triple-checking the pattern didn’t help, my eyes kept seeing mistakes. I had to switch the colors and to restart for the second time. Does this only happen to me?
So, admittedly my start was not the best! But the tide has turned! And t was worth the whole effort for me!
Mix and Match crochet pattern
Mix and Match is done in Mosaic Crochet, the so called Inset Mosaic. I don’t know if this in an official name or just a creation by the Facebook group, where I first read about it. In contrast to the Overlay Mosaic technique two rows are always worked in one color. The work is turned after each row – so worked from front- and backside – and there is no need to cut the yarn.
The pattern includes 4 different designs (squares) with identical stitch counts, so you can combine them any way you want. Or just follow one of the 5 suggested layouts that are also part of the pattern.
I choose layout 4, consisting of 3 designs arranged in 3 different ways. The complete layout has 6 squares in width and 9 in height.
My blanket turned out about 98×117 cm without border, and I used about 500 g Denim (color B) and 465 g Beige (color A) so far.
The pattern is easy to follow but challenging. You have to work very carefully, otherwise you might mix up the designs. I often had to go back two rows to correct a mistake.
But again: the result was worth the effort! The pattern is available on Ravelry.