Today is Granny Square Day! And, this year I thought about it in time!
I am a little proud! Normally it seems that I tend to completely forget about Granny Square Day, only remembering it when I see all the lovely posts on social media.
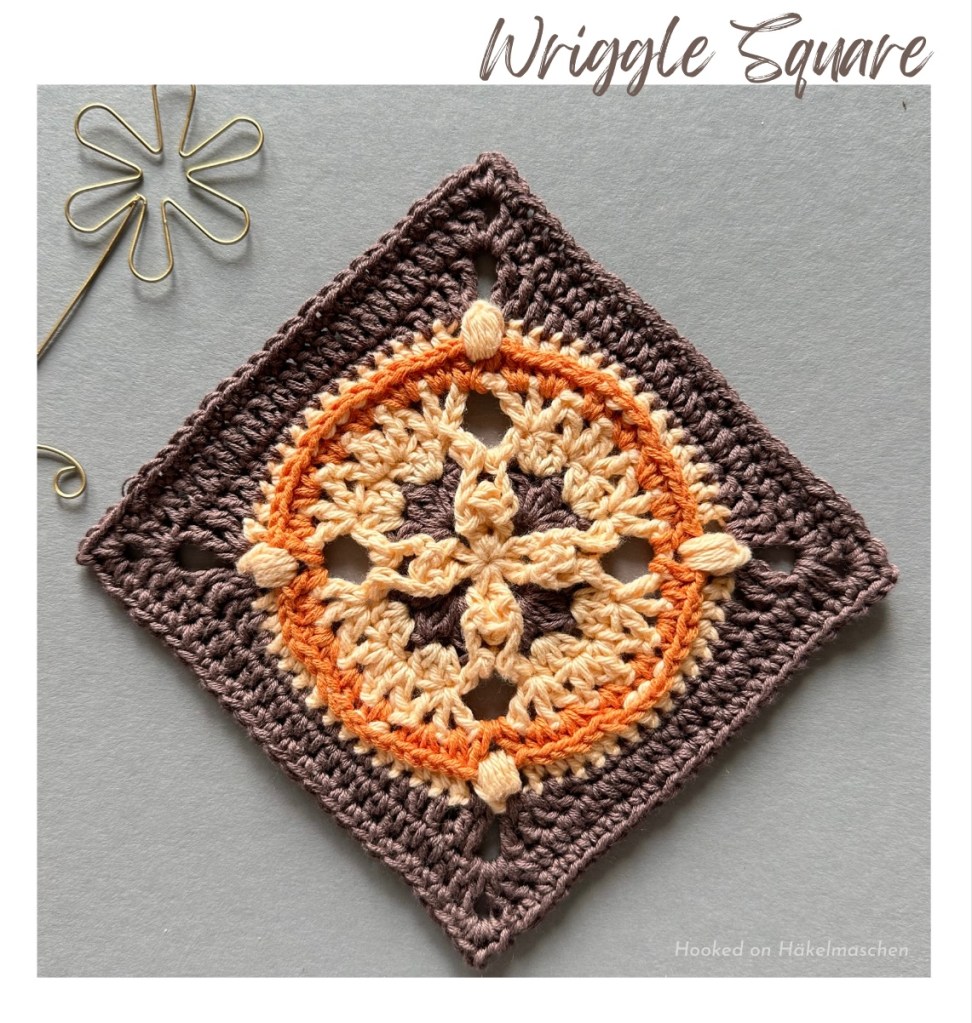
But this year I designed another small square especially for this day – just in time!
If you’re not familiar with the Granny Square Day— what it is, what it means, and its history, I made a quick Google search about it. Here is an extract from the Google AI summary:
„Granny Square Day is an annual, global celebration of the crochet granny square, held on August 15th. It’s a day where crocheters worldwide share their granny square creations online, particularly on Instagram, to form a virtual blanket. The event was started by Susan Regalia in 2014 and later taken over by Simply Crochet Magazine. It’s a chance to showcase creativity, connect with other crocheters, and contribute to a larger, collaboration.“ (copied from Google).
I’m excited to see what beautiful creations there are this year!
My contribution is
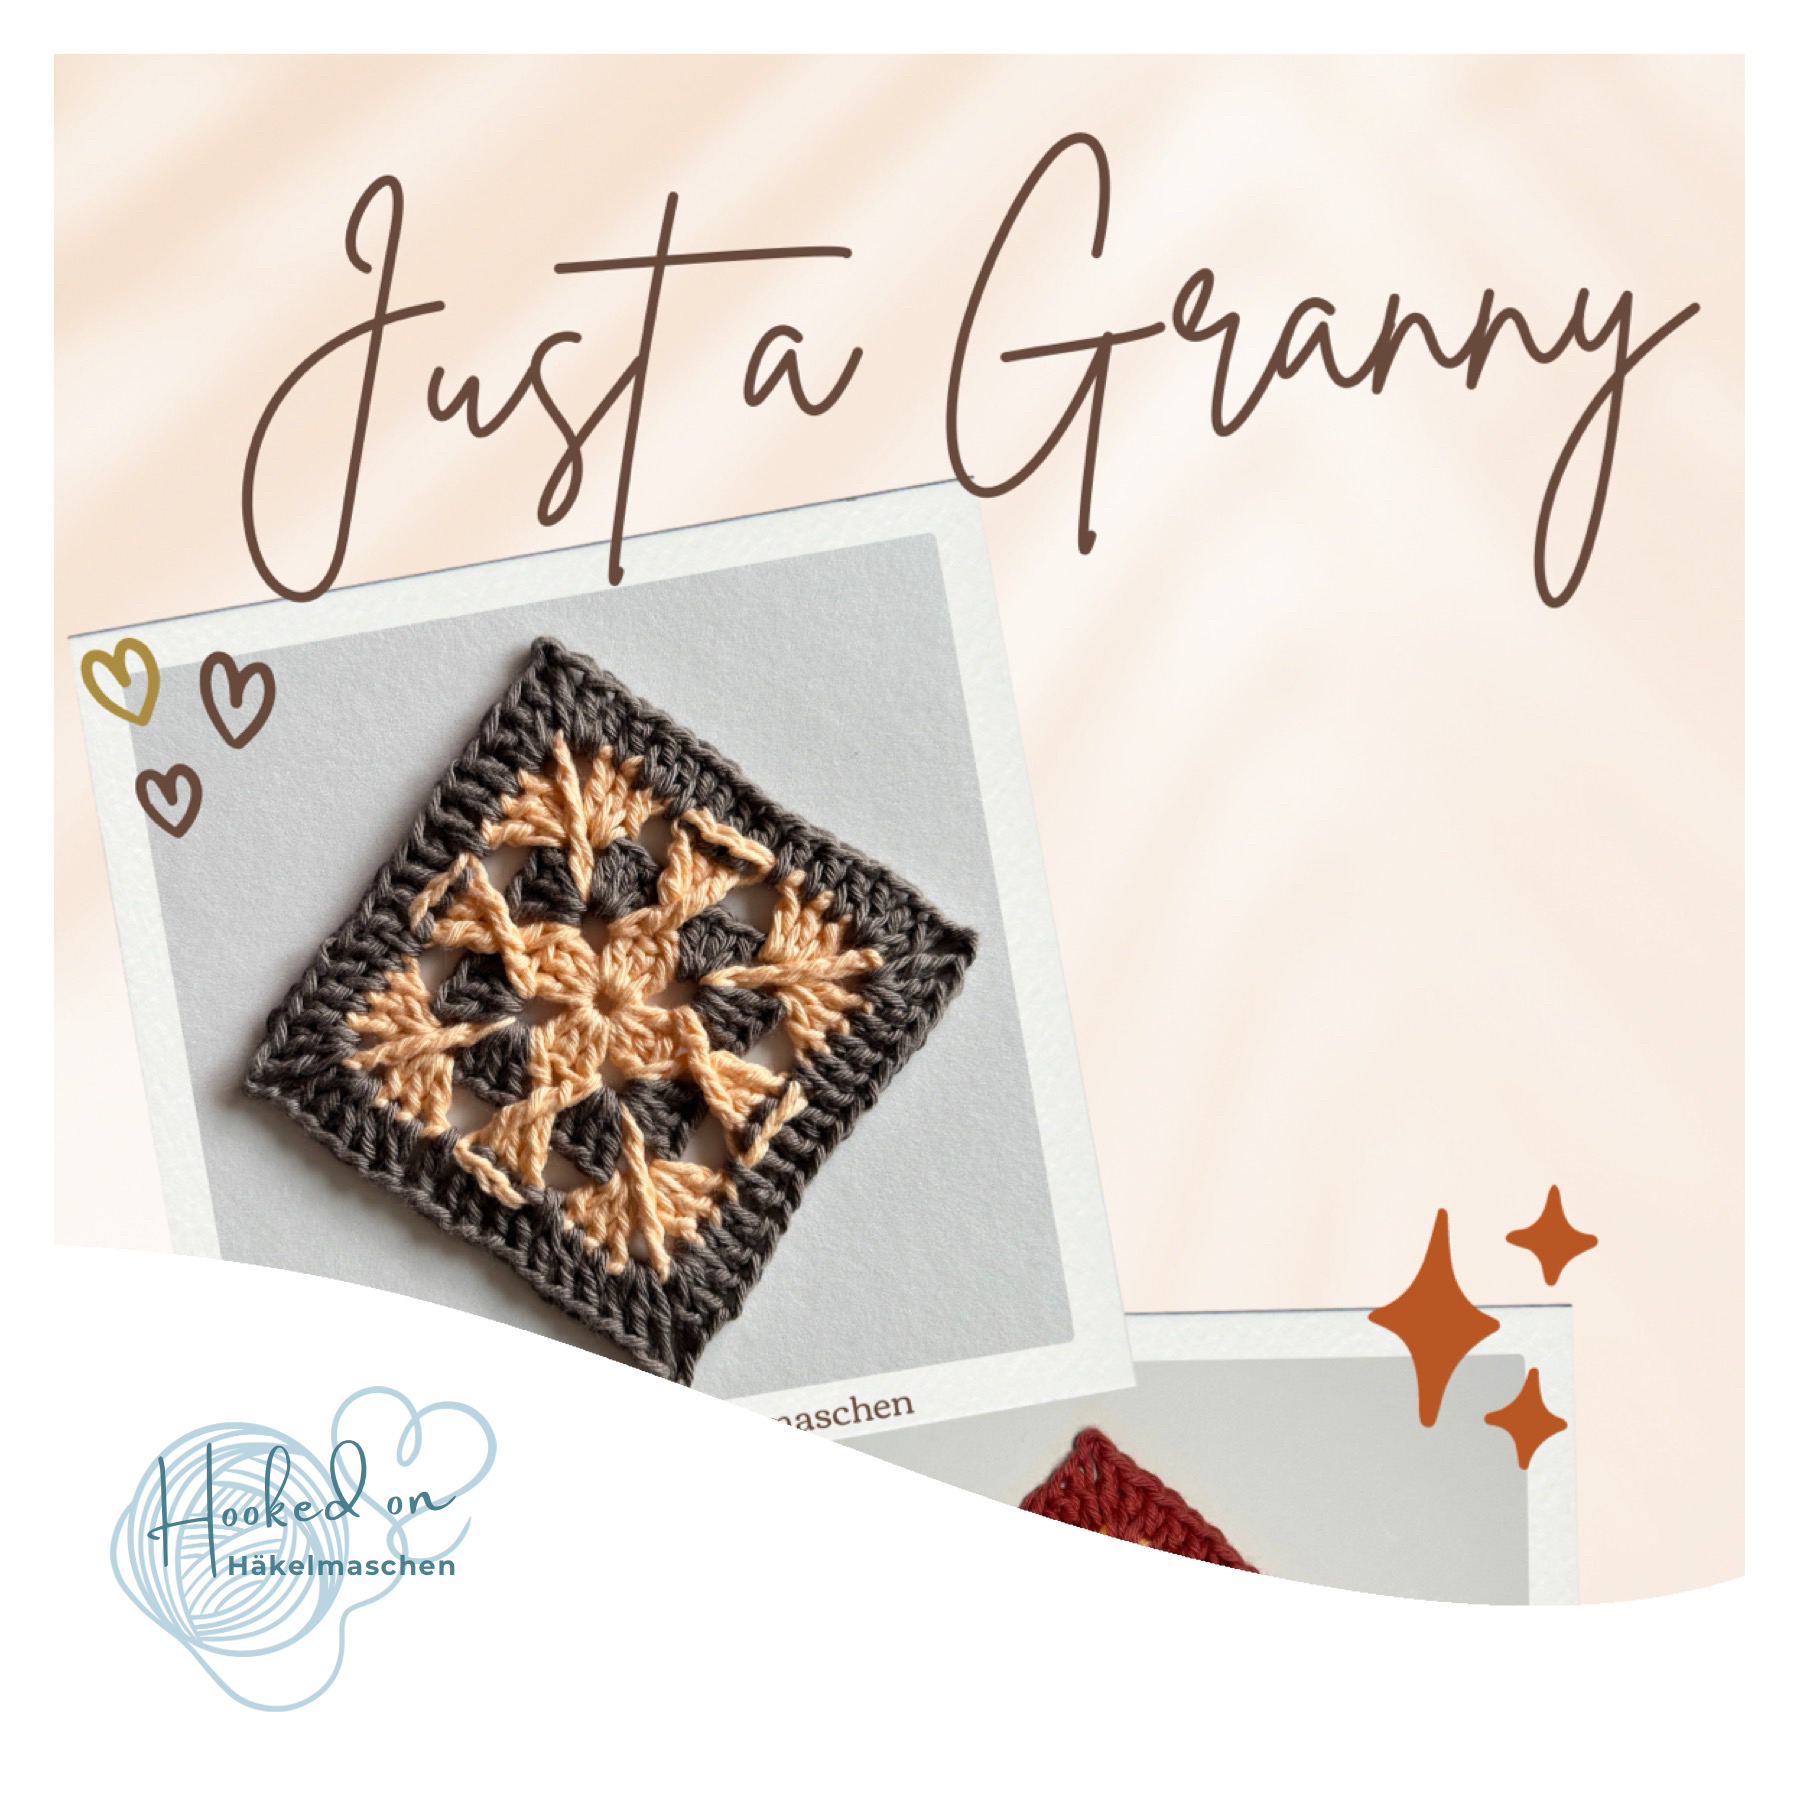
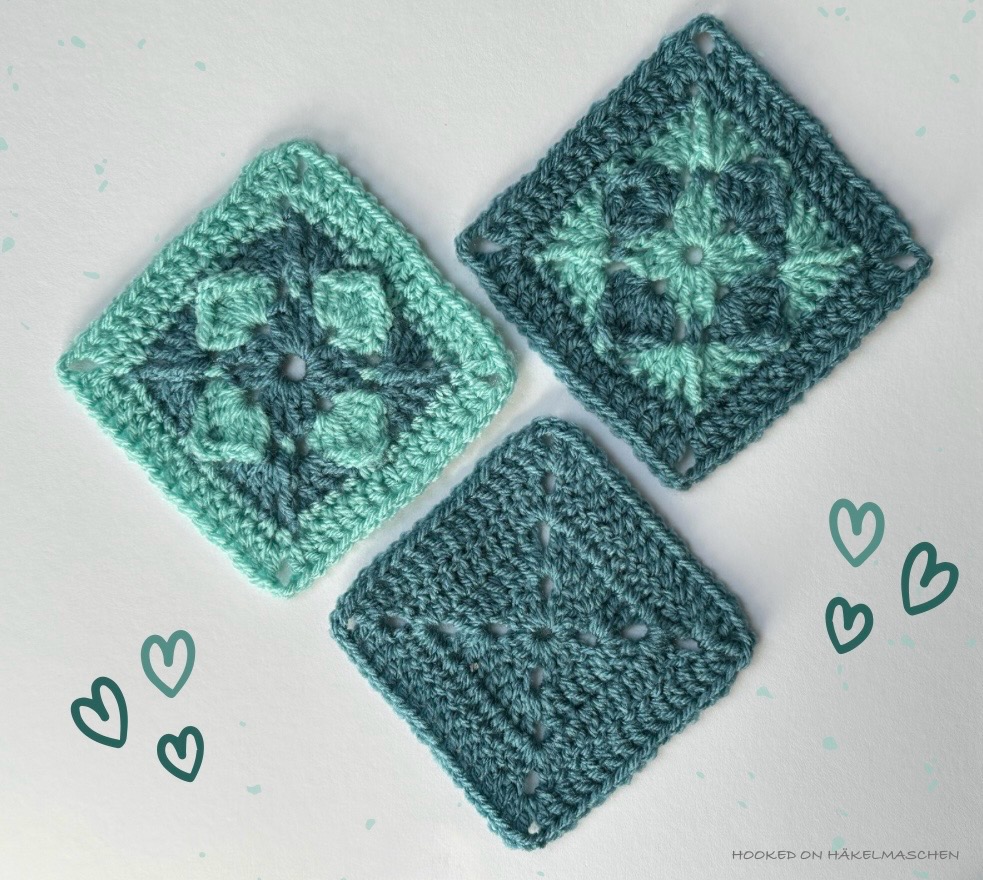
Simply Petals
a reminiscent of stylised flower petals. It is easy to crochet and perfect for a quick, fun project.
My samples are made with DK / light worsted yarn (#3) and a 4.0 mm hook. The finished squares measure about 10 cm (4 in).

I chose just two colours, but you can, of course, use as many as you like!
My colour combination:
# 1722 – Storm Blue and
# 1842 Spearmint
(both Stylecraft Special DK)
The pattern is written in US terms and uses mainly basic stitches: chain, single crochet, double crochet and treble crochet. In addition, it incorporates back post single crochet and front post treble crochet. This makes it perfect for those who enjoy crocheting but prefer patterns without too much complexity. I also think it’s ideal for adventurous beginners with a little experience.
Each square is worked in 5 rounds and has 15 stitches per side, making it easy to combine with a simple, plain square in double crochet.
I hope you like it as much as I do!
You can download the free pattern here

And, since it is not included in the pattern, here a few tips for beginners:
- Some of the chain spaces can be difficult to identify in the following round. So it can be helpful to mark at least some of them with a stitch marker. Here my tips
- Round 2 – place a stitch marker in at least one of the chain spaces that is crocheted before a single crochet. This makes it easier to identify the starting point of round 3 and the placement of the first group of double crochet. (There is no need to mark the chain spaces besides the trebles as you won’t work in these later)
- Round 3 – put at least a marker in a chain space worked directly after a front post treble. This will mark the start of round 4. Note: in round 4 you will be working in all chain spaces
- Round 4 – I would suggest placing a stitch marker at least in the chain spaces before and after the single crochet that is worked into the front post treble. As in round 4, all chain spaces are worked in round 5
- Depending on the yarn used and your personal tension the square might look a bit wonky at the end of round 3. Just smooth it a little with your fingers, the problem should be solved after round 4
- You can find explanations of how to work all the stitches used here.
I am curious about all your creations with Simply Petals!
Please use #SimplyPetals if you share them on social media.
Have fun and happy hooking 💕