

Can you imagine that I never have done a traditional Granny Square? I only noticed this in summer when I was looking for a project that could be easily done in the heat. I was thinking about finally starting the Beach Walk Blanket by Marion Mitchell. I purchased this pattern over a year ago but never started.
It is a blanket made of Granny Squares and I was caught by the colours she used which reminded me of my holidays at the North Sea. Due to all the different colours you need a huge pile of yarn. So before putting the whole yarn together I wanted to try a Granny square first to see if I like it at all.
Of course the technique of doing Granny Squares is explained in the pattern. Nevertheless, I was a bit hesitant because the work was turned after each round and I normally don’t like that. I always think that the stitches look much neater from the front side . That’s why I love mosaic crochet or working in the round without turning. So I wondered whether it is really necessary to turn the square after each round and searched the internet.
I was amazed by the result. I didn‘t know that there are so many variations of making a Granny Square! You really find a lot of different ways: starting with a chain and forming a ring or starting with a magic ring. Turning the square after each round or working in one direction only. Starting a round always in the same corner space or starting in different corner spaces Starting a round with a 3 dc group or starting in the middle of a 3 dc group. Working a ch2 in the corner spaces or working a ch3. Working a ch1 between the dc groups on the sides or not … and so on – phew!
So I had to try some of the different ways myself to see what works best for me. The results were astonishing.
Normally, when working in the round, I start each round with a standing stitch and end with an invisible join, regardless of what is written in the pattern. Surprisingly this doesn’t work for me in a Granny Square. So I start with a chain 3 and join with a slip stitch to the top of the ch3. Except for the last round, there my invisible join works perfect. Also a chain between the dc groups doesn’t work for me, neither does a ch3 in the corner spaces.
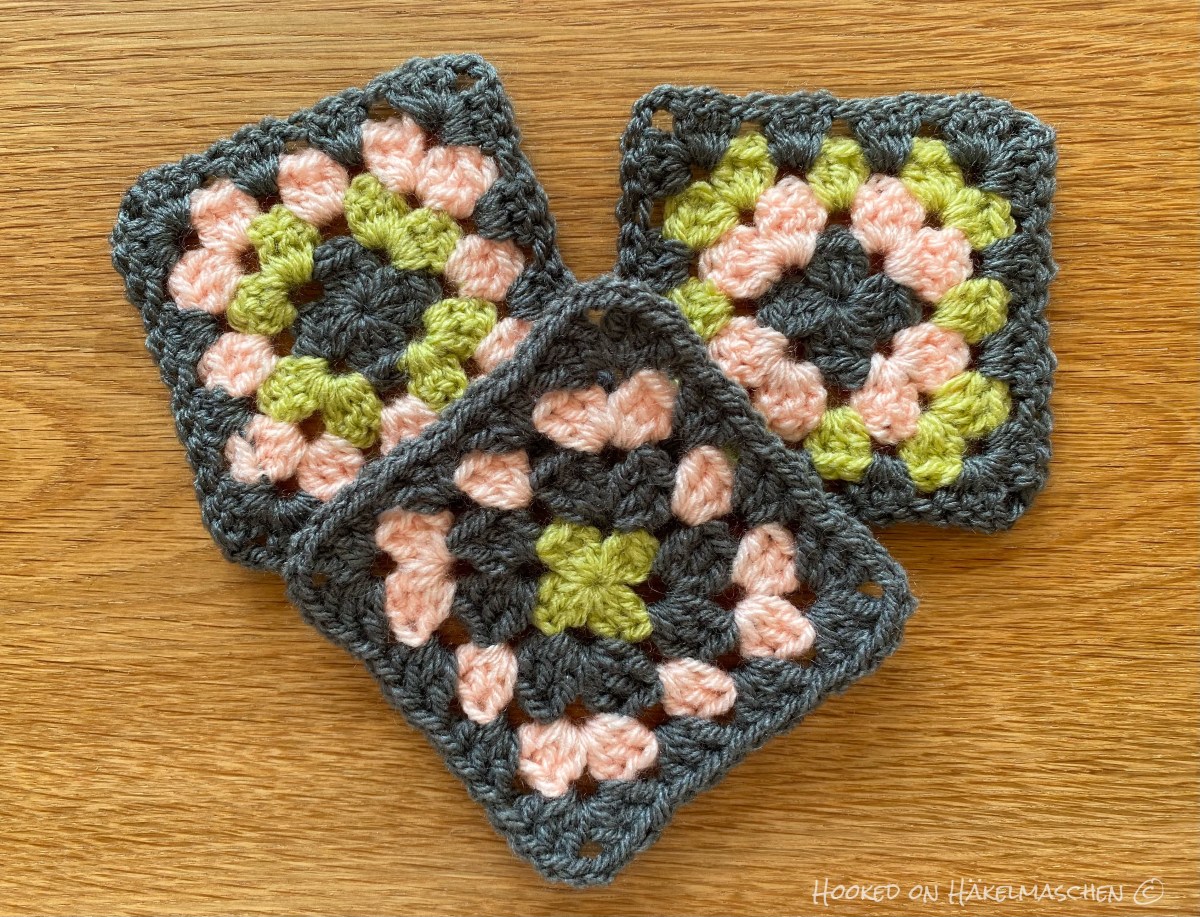
And the main point, turning the square after each round or not? Well … The reason for turning the work is to prevent the stitches from leaning to one side. And damaging the shape. This easily happens when you only work in one direction. I don’t think turning is necessary for a four round Granny or even the smaller ones. It might cause a problem with bigger ones tough – I haven’t tried it yet. Of course the look is different, depending on wether you turn your work or not. The left one in the photo below is made with turning the work after each round, the right one without.

And guess what? I never thought I would say this, but somehow I like the left one better.
So here is
My way to do a Granny Square
(US Terms)
Round 1:
- In a Magic Ring: ch3 (as first dc), 2 dc, (ch2, 3 dc) 3 times, ch2 and sl to 3rd ch of the first ch3; cut yarn, turn
Round 2:
- start in any ch2 corner space, ch3 (as first dc), 2dc in same corner space
- (3 dc, ch2, 3 dc ) in next corner space, repeat 3 times omitting the last 3 dc
- slip stitch to the top of the ch3, cut yarn, turn
Round 3:
- Start in any ch2 corner space
ch3 (as first dc), 2 dc in same corner space - *skip 3 dc, 3dc in the little space between the dc groups of previous round, skip 3 dc
- 3 dc, ch2, 3 dc in next corner space*
- repeat from * to * 3 times, omitting the last 3 dc, slip stitch to the top of the ch3, cut yarn, turn
Round 4 and ff.
- Start in any ch2 corner space
ch3 (as first dc), 2 dc in corner space, - *skip 3 dc, 3dc in the little space between the dc groups of previous round, skip 3 dc; repeat until next corner space
- 3 dc, ch2, 3 dc in next corner space*
- repeat from * to * 3 times, omitting the last 3 dc, slip stitch to the top of the ch3, cut yarn, turn
Repeat round 4 until you reach the desired size and finish the square with an invisible join. Bring all yarn tails to one side and work them away. Depending on the join you are going to use this should either be the right or the wrong side.
Be careful – it can be addictive!


