Pattern Testing Explained

Curious about crochet pattern testing? Learn what pattern testers do, what skills you need, how the process works, and how to get started yourself.

Cover image created with AI assistance

A few weeks ago, I wrote about my very first pattern test – that was back in 2019, seven years ago by now. In this post, I talked a little about my motivation and the fears I had when I started testing, as well as my experiences. If you missed the article, you can read it here.

While that previous article focused on my personal journey, this time I’d like to take a more practical look at pattern testing itself.

Would you like to try testing a pattern yourself, but aren’t quite sure how to get started? What skills you need and what you need to bear in mind?

I’ve been asked these questions many times in the past, and I’m happy to share my experiences here. However, these are my personal experiences, which are by no means necessarily universally applicable.

What you should know before applying as a pattern tester

Firstly, you need to know that testing crochet patterns does not usually involve any financial compensation. (As far as I know, the same applies to knitting patterns.)

Most designers will thank you with a copy of the finalised pattern.

So, before starting, keep in mind that you are effectively investing your own resources, such as time, yarn and other supplies. Speaking of time: you should be aware that testing a crochet pattern will require more time than if you were simply following a pattern to crochet a blanket, an Afghan square, an amigurumi, or whatever. I’ll explain why that is later.

The fun of being a pattern tester is getting access to a pattern before other people do, being part of the creative process and meeting like-minded people from all over the world.

Do you need special skills?

I’d say no, there aren’t any specific ones! At any rate, not as long as the test call doesn’t require specific skills.

Of course, you should already know how to crochet and have mastered the basic stitches. And you should be able to read, understand and follow a written pattern.

But mostly there is no need to have an intermediate or advanced skill level.

In my experience, it’s actually helpful for designers to have testers with varying levels of crochet skills. This makes it easier for them to assess whether the instructions are clearly worded and whether all the stitches are described properly.

What does a pattern tester actually do?

Post-it showing the basic tasks while testing a crochet pattern
Essential Tasks while Pattern Testing

Essentially, testing a pattern involves checking

  • wether the instructions in the pattern work in practice
  • wether they can be followed without struggling
  • wether the described result occurs
  • or wether there are any points where one gets stuck or might misunderstand something

However, designers often specify additional criteria that are important to them and which should be checked as part of the test. That may just be specific points that need to be read particularly carefully for clarity. But often it’s also about looking out for typos and spelling mistakes and / or checking the stitch counts.

Here, the requirements of a tester overlap with those of a technical editor. Checking stitch counts and correcting spelling mistakes are, strictly speaking, tasks of a technical editor.
On the other hand: in order to assess how clear a pattern is, a tester has to read the entire pattern anyway. In this context, you can also flag up spelling mistakes if you spot them (whereas a technical editor would look for this specifically). The same applies to the stitch counts. You should check them after every row or round in any case and in your own interest. Although, I must admit, I myself often don’t (and mostly regret it 3 or 4 rows or rounds later).
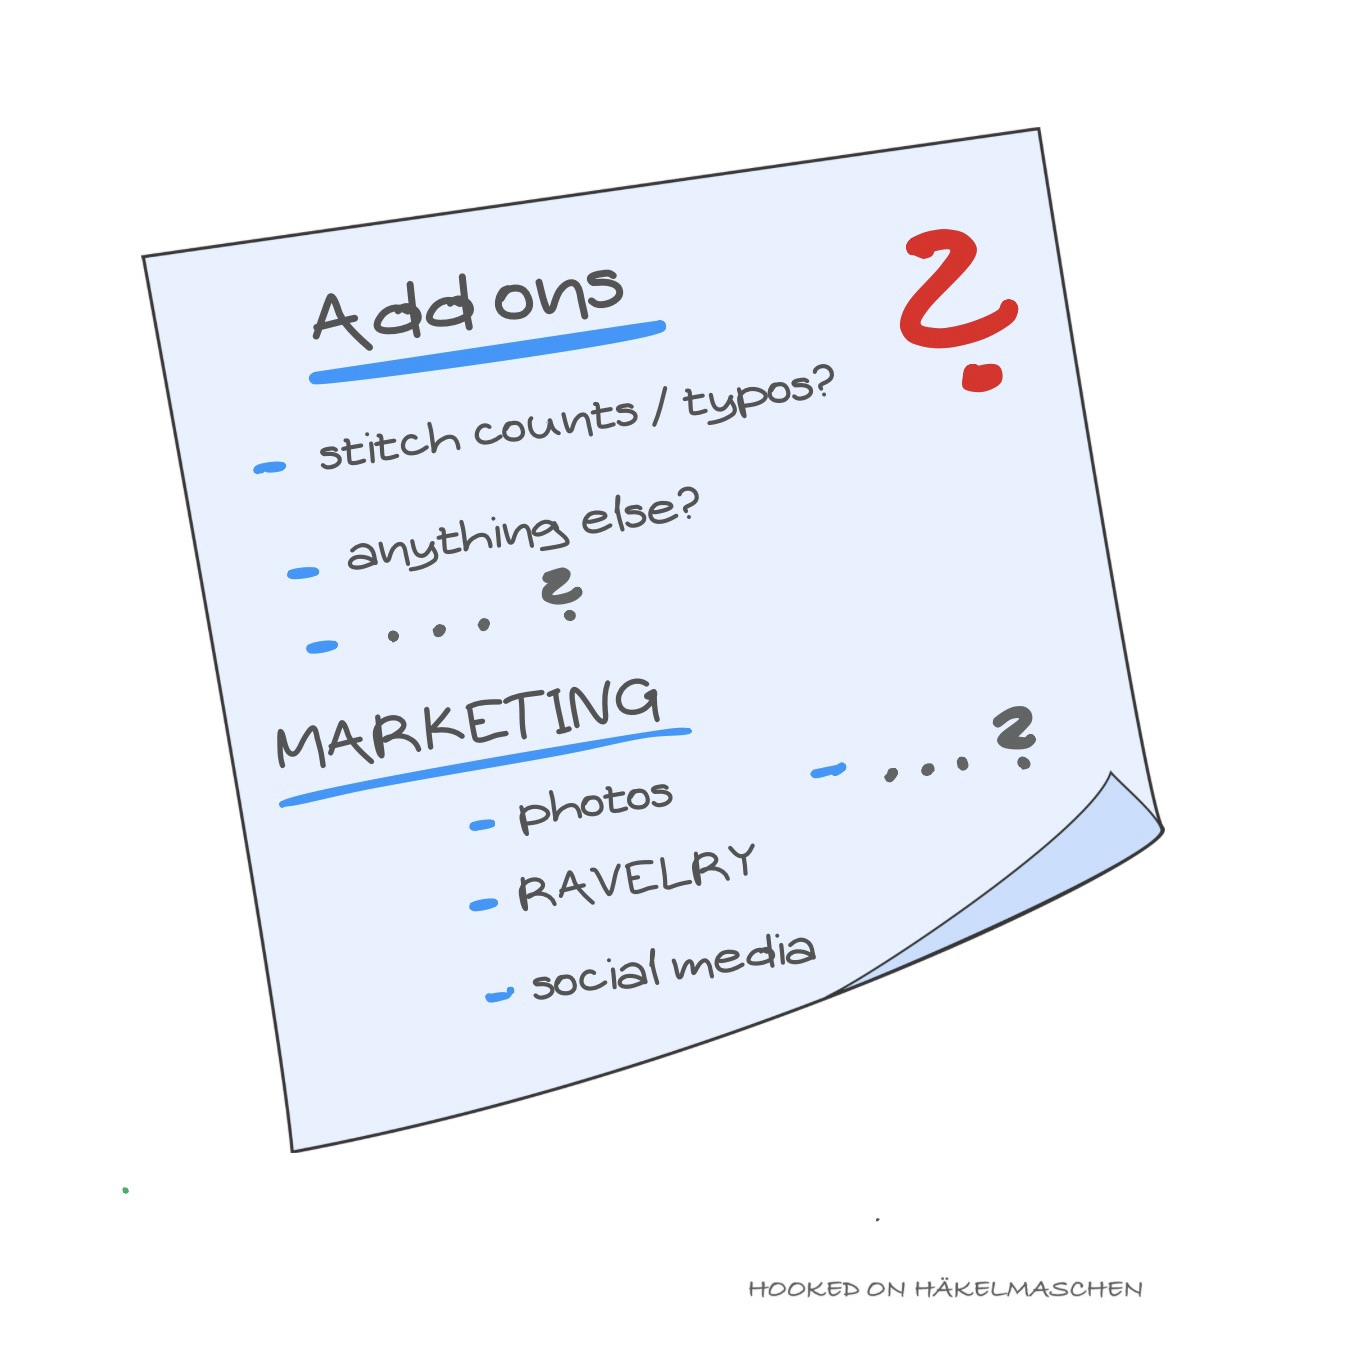
Post-it showing the add on tasks while testing a crochet pattern
Add On Tasks while Pattern Testing

Additionally, the demands are increasingly moving into the fields of marketing and social media.

So you may also be asked to

  • create a project page on Ravelry and link it to the pattern, once it has been published
  • provide at least one attractive, high-quality photo of the finished project
  • give the designer permission to use your photos for marketing purposes
  • post your finished project yourself on social media (Instagram, crochet groups on Facebook etc.) and to help spread the word about the pattern

A designer usually sets out their requirements and expectations in what is known as a ‘test call’.

It all starts with a test call

A designer uses a test call to recruit testers for a specific project. This is when they present their new design for the first time and state how many testers and what skills they are looking for.

It should contain all the information you need to decide whether you would like to take part in the test or not.

Besides at least one picture of the design, there should also be some basic information about the pattern. Such as the final size(s) of the project, yarn and yarn amounts required, skill level and so on.

Based on this information you can roughly estimate how long the project will take you and decide wether you can use yarn from your stash or wether you’ll need to buy some first.

All this is important to determine whether or not you can meet the deadline of the test. The deadlines is the date by which the test must be completed and should, of course, also be defined in the test call.

In addition to all this information, the test call should also provide an insight into the communication channels and how, and to what extent, the designer would like to receive feedback.

If there are any points you’d like to know about in advance but which aren’t covered in the test call, just ask. I think, communication is one of the most important things when it comes to testing.

Dos and Don’ts – How the testing process works

Once you’ve applied for a test call and been selected as a tester, the designer will send you the pattern. Then you’re all set to get started!

As you’ve seen, the requirements in a test can vary greatly. In my opinion, however, there are a few very general rules:

Two post-its listing the dos and Don’ts while testing a crochet pattern
Dos and Don’ts while Pattern Testing

Stay focused

From my own experience, I can say this: however excited you may be to start to work on a brand new design, and however keen you are to present your results, stay focused!

It’s surprising how easily a mistake can be overlooked in a pattern. Especially if you already have some experience with crochet, you might automatically work the correct stitch or sequence of stitches, even though there’s a little mistake hidden in the pattern.

Take notes

Make notes on everything. Whether it’s mistakes, wording you find hard to understand, or special stitches you might have struggled with. But also make a note of things you really like, e.g. clear, easy-to-understand explanations, particularly attractive design elements, etc. It’s best to also note down details about the yarn, the colours, the amount of yarn used and the crochet hook you used. Especially if you’re planning to post on social media later, you may well be asked about these things.

Meet deadlines

The most important deadline in a pattern test is the date by which the test must be completed. Depending on the project, there may also be other deadlines during the testing phase – dates by which a specific part should be completed or on which interim feedback is requested. You should meet these deadlines wherever possible. If, at any point, you realise that this will not be possible for whatever reason, you should inform the designer immediately.

Give constructive feedback

In my view, it is best to address errors and inconsistencies straight away. That way, any discrepancies can be resolved immediately.

If the designer has asked for final feedback, please provide them with honest and constructive feedback. Look at your notes and list what you liked about the pattern, where you might have struggled, and do mention any areas where you see room for improvement.

I know it’s not always easy to talk about the things that perhaps weren’t so positive. You just might not feel confident enough. Phrase it politely and constructively! And just keep in mind: the designer probably wouldn’t have asked if they weren’t genuinely interested. Your feedback can be incredibly important. It gives the designer the opportunity to improve their pattern writing. But don’t be angry or disappointed if they don’t take your suggestions on board. That’s entirely their decision.

Take nice photos

Once you’ve finished crocheting the project, you should at least take a nice photo of it and send it to the designer. That way, they can see that you’ve actually finished the test.

If you plan to post pictures on social media later, it is usually also a good tip to take pictures of the ‘Work in Progress’ (WIP) for larger projects. These photos are often ideal for ‘sneak peeks’ (if the designer wants this in the run-up to the pattern’s release). And these WIP photos often go down better on social media than posting the finished project with the caption “Look, I’ve tested pattern xy”.

What a tester shouldn’t do

I’ve been talking at length now about what a tester should do. But there are also a few absolute no-gos. Actually, though, these are things that should go without saying.

Of course, do not share the pattern. You should never do that anyway, even if it’s a pattern that’s freely available. Every pattern is protected by copyright! Of course it is ok to post a screenshot in your test group, just to mark a mistake or points where you are struggling. But don’t post it outside this group.

The same applies to photos of your test piece. You shouldn’t publish those until the pattern is released. The exception, of course, is if the designer asks you to post a few sneak peeks to promote the pattern ahead of its release.

Personally, I only upload my photos to Ravelry once the pattern has been published. Even though a pattern search on Ravelry won’t return any results until then, anyone who visits your profile will be able to see the photos.

However, the absolute no-go is simply to stop the test without letting the designer know. Of course, there may be times when something comes up in your life and you can’t finish the test. In that case, just let them know. I’ve never come across anyone who didn’t understand that.

Why a tester is more than only a crocheter

By now you’ve probably realised that a tester does much more than simply crochet a project.

You need to study the pattern in detail, clarify any issues, keep track of deadlines, document your work and formulate feedback.

The tasks continue if the designer would like you to help promote the pattern. To do this, you’ll naturally need some lovely photos, and you’ll need to come up with a description that includes all the key information about the pattern, post it, monitor the post, and reply to comments and questions.

So you’re not just a crocheter, but also a tester, a photographer, a content creator, an advertiser and a community manager.
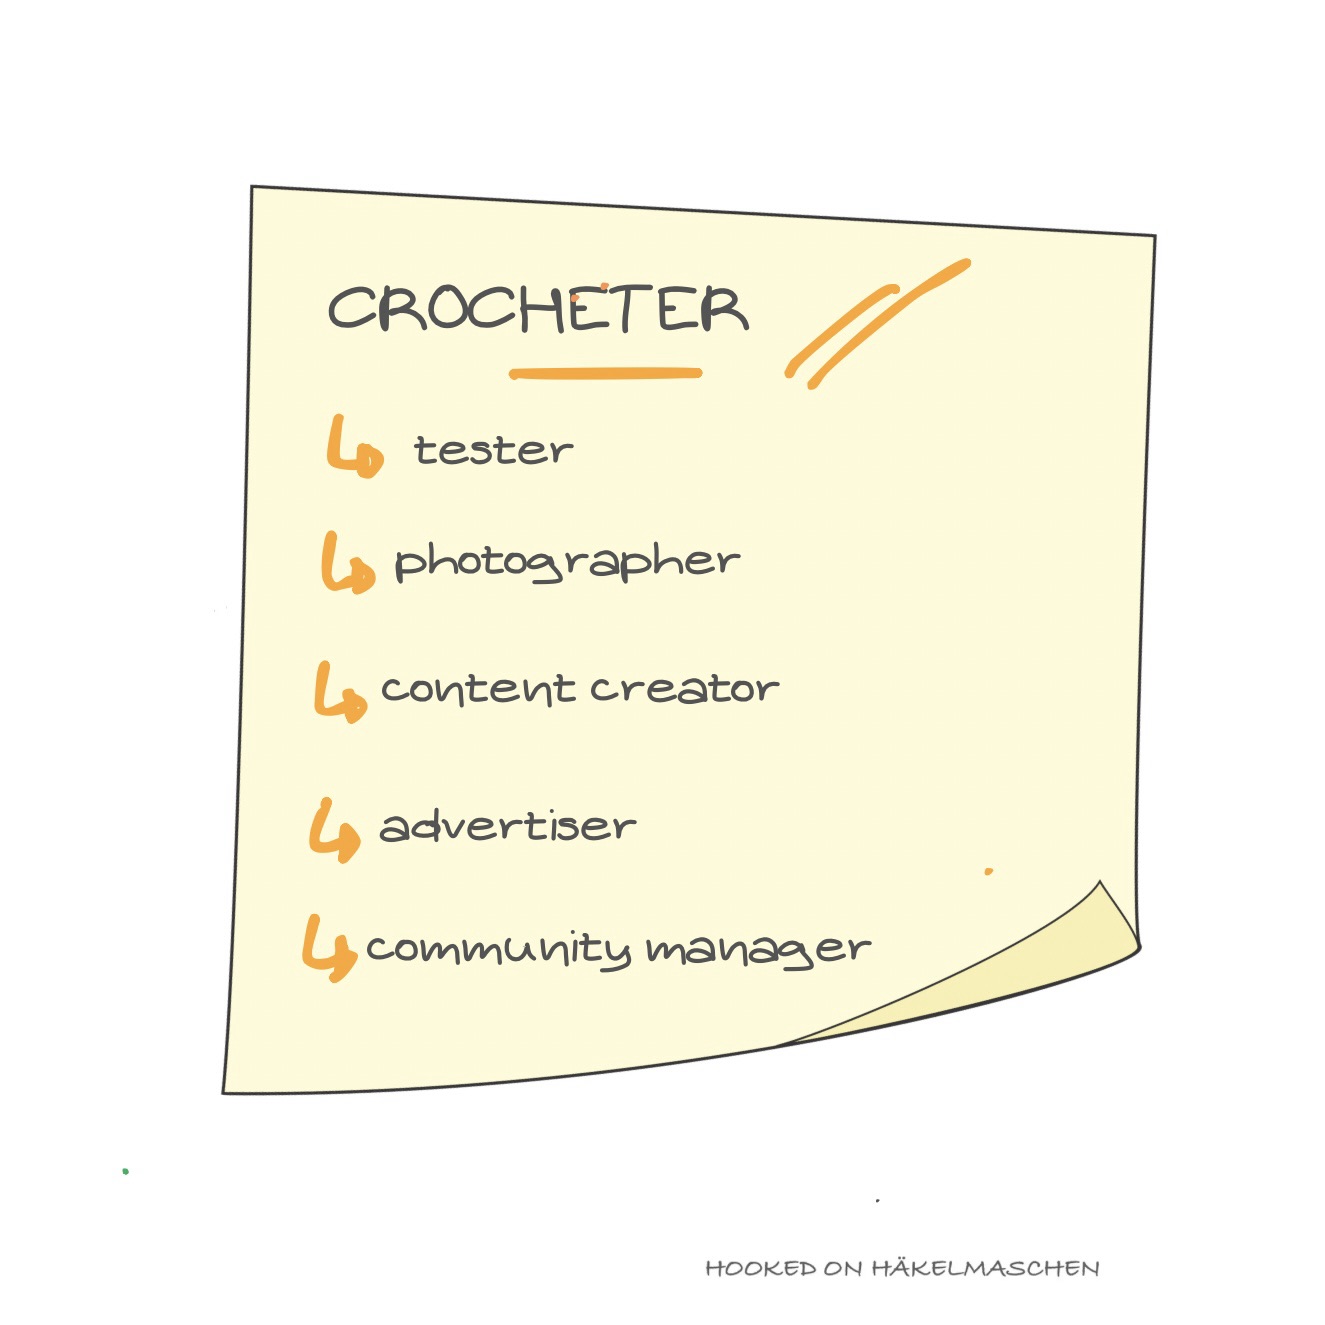
Post-it listing the roles of a crocheter while testing a pattern
Roles of a Crocheter while Pattern Testing

All of this takes extra time. That’s why I said at the start that testing a pattern will need more time than simply crocheting the pattern.

Are you still interested in becoming a tester?

How to become a pattern tester

There are various ways to become a pattern tester.

For instance, on Ravelry there’s a forum where designers share their patterns for testing. Unfortunately the focus there is mainly on knitting patterns, but there are also some lovely crochet patterns included.

Many designers also post their test calls on social media. Just keep an eye out.

Other designers have their own regular testing groups. This means they mainly work with the same people. However, they are often looking for new members too. So watch out designer specific crochet groups on Facebook.

Do you have a favourite designer you’d like to do a test for? If so, why not get in touch with them and let them know that you’re interested to work with them?

With all these various options, it’s helpful if you have photos of your previous work. These pictures are a bit like your shop window and will help the designer get a first impression of you.

So, if you spot a test call somewhere, you like the design and you meet the requirements: just apply!

My conclusion

I hope you’ve now got a rough idea of what’s involved in testing a crochet pattern. It’s a lot of work! It takes commitment. But it’s also great fun!

Over the years, I myself have become more selective about the tests I take part in. The reasons for this are primarily down to time constraints and health issues. Even so, I wouldn’t have missed the last seven years for the world.

I’ve learnt a lot during this time. I’ve learnt new crochet techniques. I’ve gained an insight into the process of creating a pattern. I’ve improved my communication skills and gained self-confidence. And I’ve met some really lovely people from all over the world!

Oh yes, the free patterns!
Well, I’m actually delighted with every single one. But to be perfectly honest, in my opinion, that shouldn’t be the main reason why you test crochet patterns.

So, just give it a go – and decide for yourselves!

How I Organize My Crochet Projects with a Crochet Journal

Stay organized with a crochet journal! Track hooks, yarn, and progress while keeping all your crochet projects in one place.

The cover photo was created by WordPress AI

Effective Crochet Management: My Journey

I’m usually not a very organized person – sigh. And since I always need some variety, this definitely shows in my crochet projects. I often have several projects going at the same time.

Are you the same?

And do you always remember which hook or needle size you used for a special project, or which row or round you’re on? Well, I usually didn’t. When I came back to crochet I pretty quickly realized how important it is to keep track of my projects.

But it took some time until I discovered that a crochet journal (or crochet project tracker) can make all the difference.

Getting Started: My First Attempts to Organize Crochet Projects

At first – over 10 years ago – I simply noted the hook or needle size and the yarn used on my Ravelry project page. At this time I also used a printed copy of the pattern to make some notes. It worked quite well – for a while.

Over time, however, I printed fewer and fewer documents and switched more and more to my tablet. That’s when I started using a PDF reader – PDF Expert by Readdle. (I can definitely recommend it – in case you use Apple products)

From Ravelry to Digital Notes – My Early Crochet Tracking

My version of PDF Expert allows me to make marks and notes in a document. So, it was perfect to tick off the progress directly in a digital copy of the pattern. Or just make some short notes about the changes I made.

With PDF Expert, I also started to store all my purchased patterns in one place, in the cloud – including the ones from Ravelry. Believe me, it is much easier to find something when everything is together. My father always said that, and today I have to agree with him.

Why I Needed More Than Just Ravelry and a PDF App

When I started testing crochet patterns, however, that wasn’t enough anymore.

Testing isn’t just about recording your own progress. Sometimes you have to mark mistakes and note corrections. Besides it is helpful to keep track of details like yarn used, colours, or time spent. People love asking those things later when you show your finished work on social media!

For larger, more extensive projects, I also found it useful to record some basic information about the pattern. Such as assignment of colours, stitch counts, number of repeats or total yarn usage. Looking for that often meant scrolling back and forth or switching between documents. This was simply too time-consuming.

My Ravelry and my pdf app were no longer sufficient for this.

Pin it for later

The Start of My Own Crochet Journal

At first, I was looking for other apps that would allow me to record extensive notes on my projects. Unfortunately, none really met all my needs. The focus – at least at that time – was more on counting rows.

So I decided to create my own worksheet in Numbers (Excel or Google Sheets work just as well).

What to include in a crochet project tracker?

I took everything into account that was important to me:

  • Basic pattern information about
    • the designer and where I got the pattern
    • Special techniques that are used (such as overlay or inset mosaic, Tapestry or Tunisian crochet)
    • Wether the pattern is written in US or UK terms (very important)
    • Original yarn and colours used, including yarn amounts, hook size and gauge
    • Measurements like final size, stitch counts, number of repeats, rows or rounds in total
  • Information about my own, personal, version
    • Like, the yarn I used, including the hook size
    • Details about my colours
    • Finished meassurements
    • Yarn consumption
  • A sheet to take notes
  • And a sheet to document the progress of the project

Perfect! – It worked fantastic!

The only thing that bothered me was the constant switching between pdf (pattern) and spreadsheet (notes) to make the necessary entries – using the keyboard.

Using a keyboard feels kind of strange when you are crocheting …

Designing My Crochet Journal in Canva

Finally this led me to design a crochet journal in Canva (another one of my favorite apps).
I based it on all the contents that were already included in my Numbers worksheet.

I have also added a sheet for photos. And created a way to quickly sketch something. This visualisation often helps me to understand the instructions better, especially with complicated patterns.

And this is the result:

I exported the Canva file as pdf and saved it as a master. Now I just have to duplicate the file and rename it when I start a new project.

I love to scribble around in it with my pen and quickly jot something down. That feels much better than a keyboard- at least for me.

I use this journal whether I’m testing a pattern or just working on something for myself.

The file can, of course, also be printed out or imported into a notes app (if the app supports file imports).

Final Thoughts on Using a Crochet Journal

A crochet journal is the perfect way to organize crochet projects without feeling overwhelmed. I can note down the yarn, the hook size, my progress, and even add photos or sketches.

By consistently keeping notes, I can easily look things up later if a question comes up. I always know which yarn and colours I used and how much time I spent.

Tell me I’m not organized!

If you are interested in my journal you can download a copy here

So, that’s my way of keeping my crochet projects under control. How do you keep track of yours?

I needed a bit of colour – Colour Experiment Part 1

Experimenting with Random Colour Combinations in Crochet

Lately I’ve been having incredible difficulties putting together the colours for a project. Ok, that’s never really been easy for me. But I’ve never found it as difficult as at the moment. I thought about making a new Gretchen but I am not even able to find two colours that would work together ant that I like. It feels like I’ve already used every colour combination before – I can’t think of anything new.
Maybe I just need to step out of my comfort zone and opt for colours I don’t normally use? Yes, maybe, but that’s really difficult!

Anyway, this gave me the idea to experiment a bit with colours and try something I’ve wanted to try for a long time

Random colour placement

I’ve read about it several times, but I’ve never gone into it in depth.

If you crochet simple shapes – such as grannies, circles or triangles and so on – and work with a lot of colours, there are countless ways to arrange these colours. And – you have probably noticed that too – you can achieve different effects with the arrangement of the colours. In my eyes a colourful granny blanket, for instance, looks best, when the colours are randomly put together. But how to achieve this?

To obtain random colour combinations, you can of course first list all possible combinations of the colours you are going to use. The easiest and best way to do this is probably with an Excel, Numbers, or Google spreadsheet. But I am afraid this can also get complicated. For instance: assuming you make a motif with 3 rounds, each round in a different colour (which should only appear once), and you use 5 colours, then there are already 60 possible colour combinations. The more colours and/or rounds, the more complicated the list becomes.

I haven’t tried this yet, so it’s just theory. But beyond that, I wonder what would happen if I couldn’t use all the colour combinations for my project. I would probably choose the ones I like best. Would that influence the overall impression?

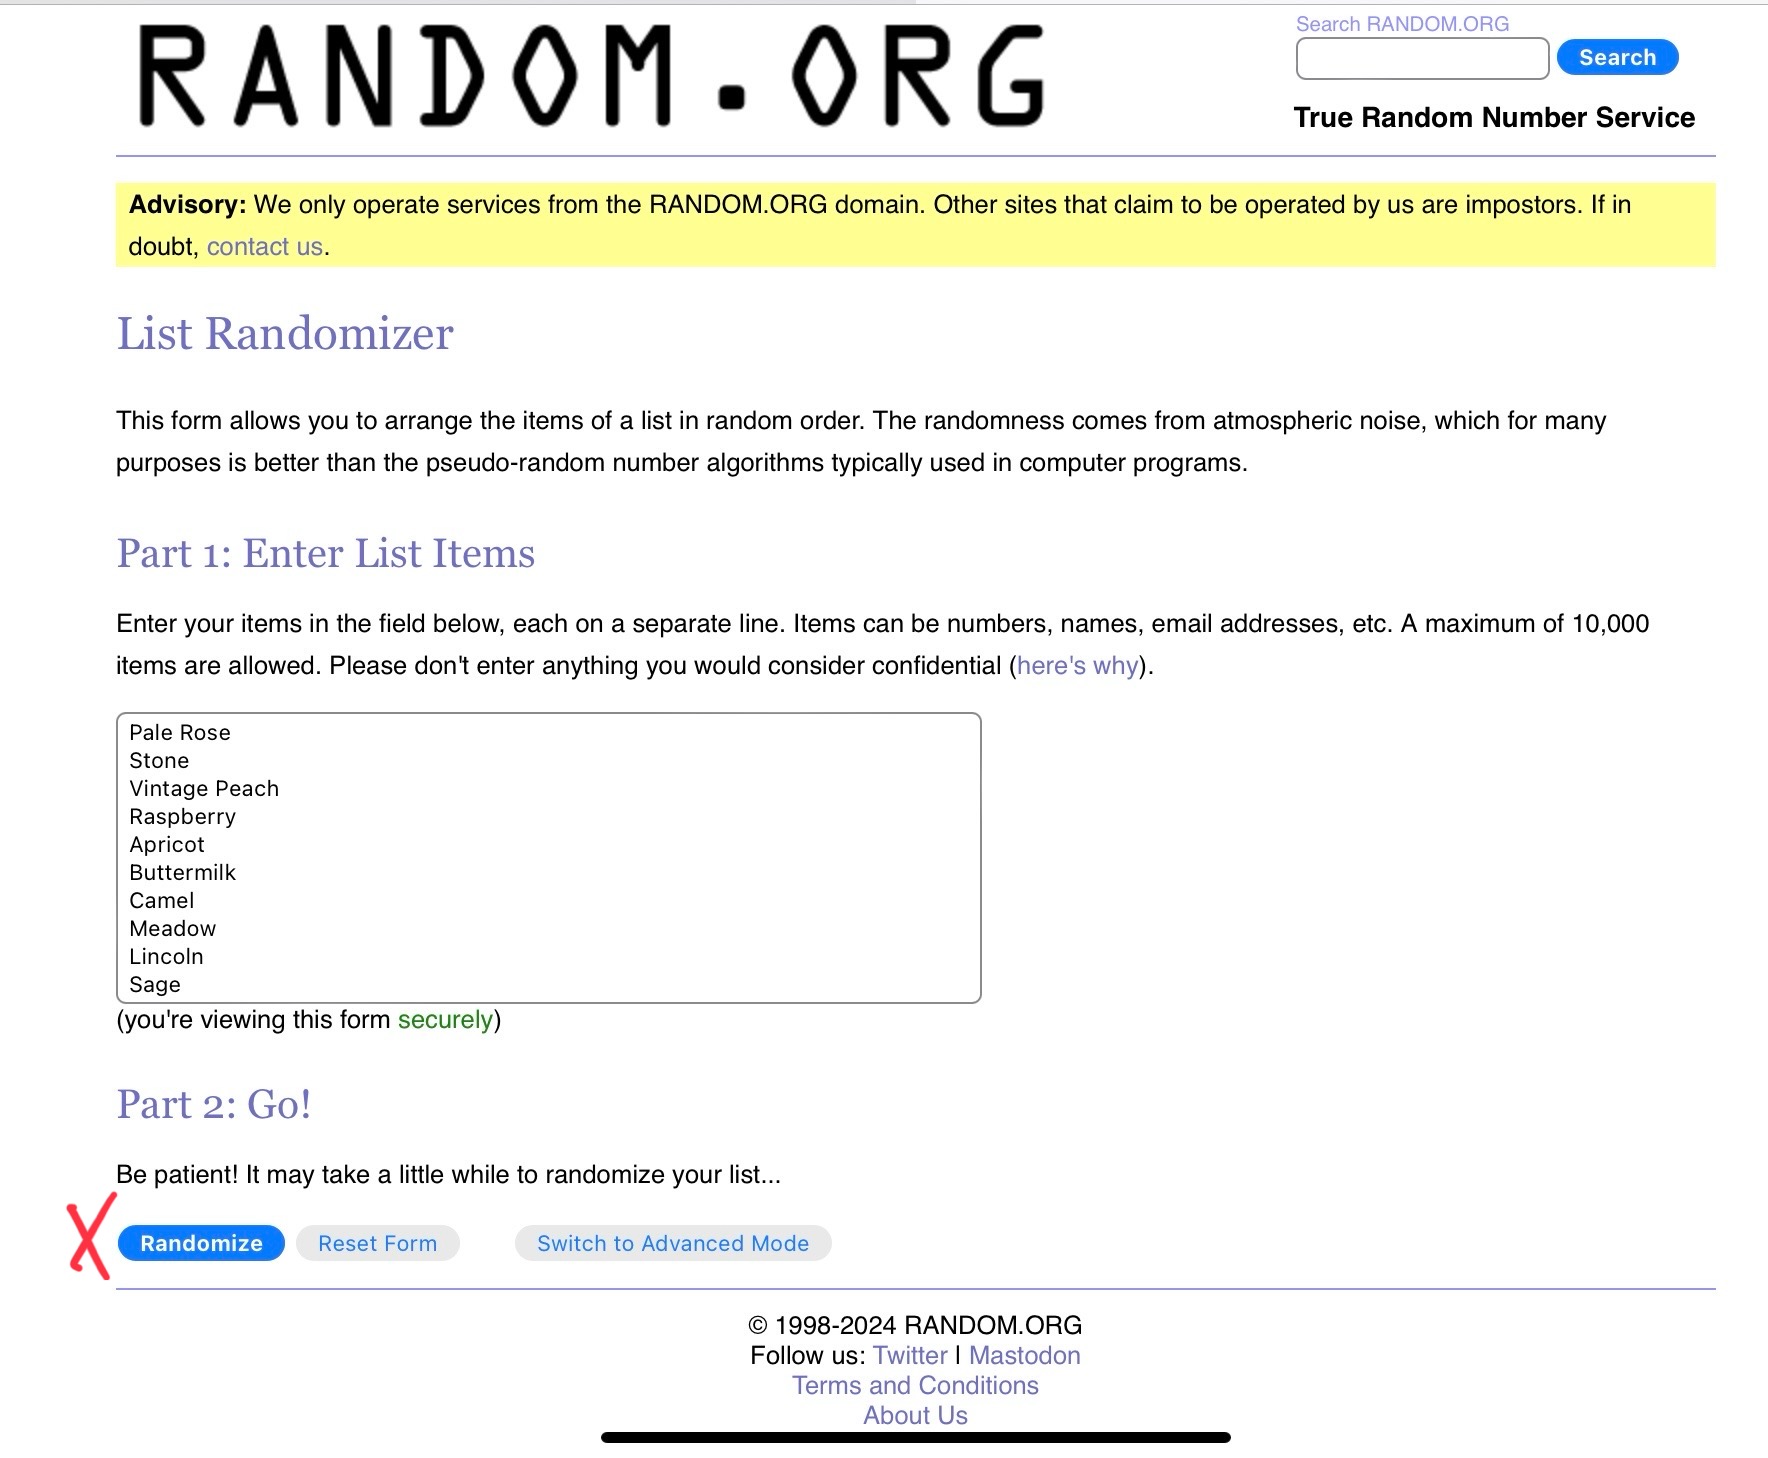
However, I wanted to try something different for a random colour combination. I had read about a website that has a random number generator: random.org. They offer different services, including a list randomizer.

For my colour experiment I had thought about crocheting circles. Each circle with 3 rounds in different colours.

My colours and the random outcome

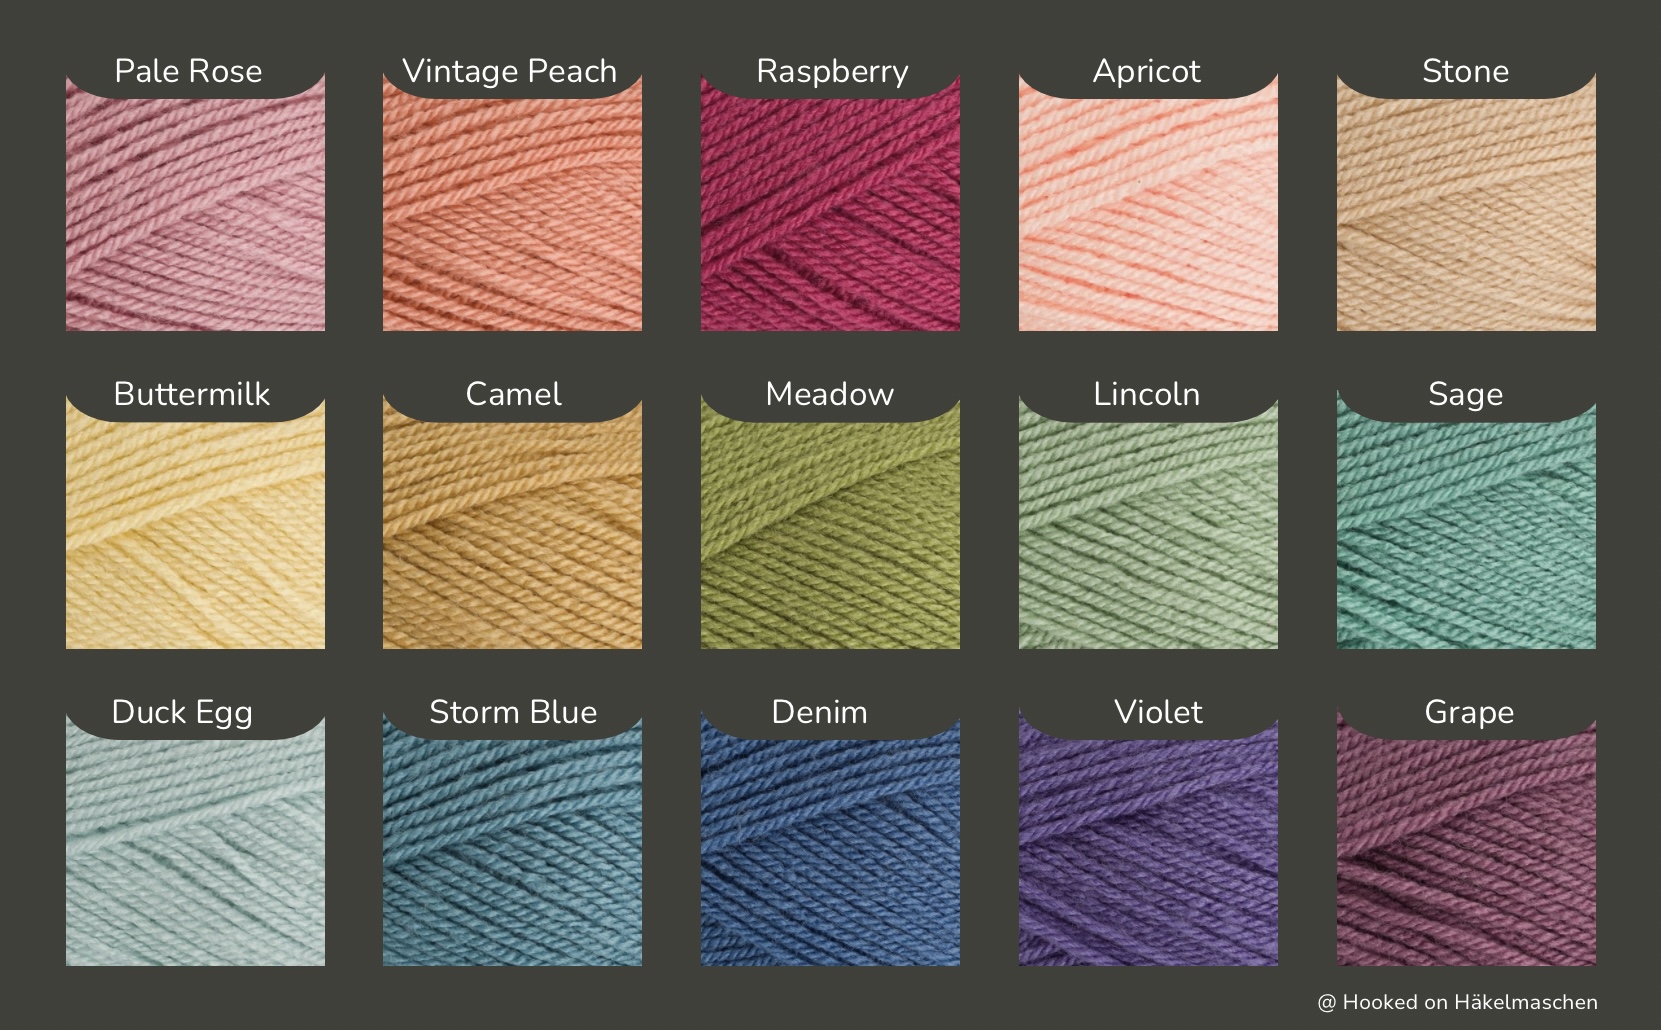
I picked up some of my little balls of leftover yarns and added some colours from my stash that I had never used so far, such as Stone, Camel, Lincoln and Violet. In the end I had these 15 colours that I thought might look good together.

All colours Stylecraft Special DK

I listed all colours in a Numbers spreadsheet (shown in the picture below, first column). Then I copied this list to the list randomizer in random.org.

After hitting the button ‘Randomize’ I had the first result in no time – all my colours listed in a random order.
I copied this result back to my Numbers sheet, filling the column for Round 1 (see picture below).

Hitting the button ‘Again!’ in the randomizer and gave me another random list of my 15 colours. I copied this result back to my Numbers table filling the column for round 2.

Then I repeated this step once more to get the colours for round 3.

This way I got 15 unique colour combinations.

Unfortunately I had to realise that, based on the result, some colours would appear twice in one motif. Since I didn’t want this to happen, I repeated the steps described above a fourth time and entered the result in the ‘Substitution’ column. Now I was able to replace the duplicate colour with the substitution colour.
For example: instead of Storm Blue, Violet, Violet I used Storm Blue, Violet, Raspberry.

My Numbers Spreadsheet

When crocheting, I strictly followed my list and this is the surprising result:

To be honest, I was VERY surprised at the result. There are colour combinations that I would never have put together myself. Nevertheless, I think every single one looks absolutely beautiful!

Afterwards I repeated my random selection – same steps as described above – and crocheted another 10 circles. You can see the result in the cover photo above. Here, too, I was not disappointed by a single one!!

My 25 circles are meanwhile all turned into squares. I used Stylecraft Special DK in Graphit as I thought a dark colour would showcase the colourful circles best.

Yep – a lot of tails to work away, but all done! My squares could do with a bit of blocking though. But so far I am very happy with my experiment!

Now I will have to think about the best way to join them AND what to do with them once they are joined. I can imagine either a wall hanging or a cushion cover. I’m not sure yet …

Anyway, I will let you know. And of course I will provide some information on how I made the circles / squares and what my layout looks like!

See you next time 💕

How do you choose colours?

How do you choose colours for a new project? Do you like to go to a yarn shop and hold the balls to each other? Do you have colour samples of your favorite yarns?

I love shopping in yarn shops but unfortunately the DK yarns I like to use for my blankets are not available in my local shop. So I mostly order my yarn online. But ordering online means that you never know how close the colours you see on the screen come to reality. Especially when ordering yarn for a specific project it is more than annoying when the colours are not as you imagined them. I often went wrong!

After several failures I got myself shade cards of my favorite yarns. They helped me a lot! I can now see the colours in reality! And above all I can now better assess how close – or far – the representations on the various websites are to reality.
The disadvantage of shade cards is that they quickly can become outdated as new colours are added (and others discontinued).

And unfortunately you cannot place the colours on a shade card next to each other like you would in a yarn shop. My imagination often doesn’t go so far that I can put several colours together in my head and say whether they look good together or not. With 2 or 3 colours it works quite well, but with 5 or more it is usually difficult.

Virtual yarn balls

With the help of my shade cards I found out that for example the display of colours of Stylecraft yarns is very good on their website (at least on my devices). This has opened up new possibilities for me. I downloaded the Special DK colour swatches from there and am now combining them in an app which I also use for collages.

It is great to play around with. You can easily try out colour combinations, move the patterns around, add or change colours. I love it.

This sample was inspired by a mood board of Pipin Poppycock. I used this combination of Stylecraft Special DK for a – still top secret – project and am very happy of how it turned out.

Stylecraft Yarns has kindly allowed me to publish these swatches, mentioning the brand.

„Hardware“

Unfortunately, it should not be underestimated how some colours change in combination with others. 
Silver, for example. In my Winter Wonderland blanket, in combination with white and other greys, it looks really silver. In the combination shown above, with different shades of apricot and rose, it looks more bluish. At least for me, these effects are difficult to predict on the screen. I can imagine them better when I actually have the colours in front of me, in reality … My lack of imagination again …

That’s why I looked around for other options.

I’m actually really keen on those beautiful yarn pegs that you see everywhere on the internet. But all the ones I’ve found so far are pretty expensive – not for the pegs but for the shipping costs to my country. So I came up with the idea of making a few swatches myself – initially with the colours from my stash.

First I got myself little plastic cards. They are about 3 x 4 cm . I like them, especially as they came in a small box where they can be safely stored.

Unfortunately they only offer little space for labelling. It is difficult to put all the necessary information such as brand, colour number and name on it. I therefore had to use abbreviations for the yarn brand. As my list of shortcuts grew longer and longer I decided to use them only for my thinner cotton yarn.

One day I saw a post by a lady who creates beautiful scrapbooks for her projects. I have unfortunately forgotten her name, otherwise I would credit her here. She had made little crochet squares that she could pin back and forth as she wished. This gave me the idea to do the same to put my colours together – without a scrapbook though.

These squares are also ideal for playing with, trying out and photographing colour combinations and so on. Without having a scrapbook the only problem is the allocation of details such as brand and colour code. At first I thought about labelling each square with a small label so that I could write down all the important details. But somehow that was too impractical for me.

So I switched to wooden sticks. I label them with shade number and name and wrap the thread around them. This is done in no time and there’s enough space on the back of the stick to write down the brand.
Some people might see this as “double”, but it has worked perfectly for me so far.

My pile is growing, even though I’m not finished yet. I had no idea  that I already had so many colours in my stash. Every very time I order yarn now, I pick an extra ball of one or two colours that I don‘t have yet but might use in one of my future projects. I’m well on my way to building up my own collection!

Good to know – How much yarn will I need if …?

Updated on June 30, 2026

I first wrote this article back in 2021 while I was working on my Winter Wonderland Blanket. At the time, I was answering the same question over and over again: “How much yarn do I need if I use a different yarn?”

So the title may be a little misleading. This article is about calculating the amount of yarn you’ll need when substituting one yarn for another. It does not explain whether a particular yarn substitution is suitable for your project.

I’ve updated the article to make it clearer, but the idea behind it is still exactly the same.

Before we get to the main topic, I’d like to tell you how I learned – more or less the hard way – what yarn weights and yardage actually mean.

Different yarn weights – my personal nightmare

The different yarn types, weights and yardages can be very confusing.

I still remember very clearly when I took up crocheting again around 2011. That was also when I began using English patterns. Most of them called for yarns that weren’t available in Germany. So I had to replace them with other brands.

Unfortunately, I had no idea what kind of yarn a pattern called for. I didn’t know what terms like DK, Aran, Sport Weight or Fingering actually meant, nor did I know what I should pay attention to when choosing a substitute.

At first, I thought that the crochet hook size stated on the label was the deciding factor. Believe me, it wasn’t. At least, not on its own.
When I chose my yarn based on that, I often ended up with too much or too little yarn and/or my crochet piece wasn’t the right size because my yarn was too thick or too thin. 

After making a few disappointing purchases, I started ordering yarn from overseas. That way, I was able to use exactly the yarn specified in the instructions.

And that’s also how I discovered that there’s a system abroad that classifies yarns into different groups or weights. Until then, I didn’t know that such a system existed in other countries.

I then looked up the Craft Yarn Council’s standard yarn weight system, and things became a bit clearer to me. Suddenly, terms like DK, Aran and so on started to make sense. They indicate the yarn weight, i.e. the thickness of the yarn. And this weight also affects the length of the thread. A finer yarn has to be longer than a thicker yarn to weigh the same. It sounds perfectly logical now, but it had never occurred to me before.

For example: DK yarn (#3) has a yardage of between 240 and 300 metres per 100-gram ball while Aran yarn (#4) offers only 120 to 240 metres for the same weight. The thread of a DK yarn is finer and longer.

Graph, showing different yarn weights and yardages

With this in mind, I have changed my personal approach to choosing a suitable yarn. When I’m shopping in Germany and the yarn label doesn’t include a yarn weight category, I simply rely on the yardage per ball.

No matter what yarn weight I’m looking for, I simply note down the corresponding yardage and crochet hook size and compare these with the details on the yarn label. If both match, I can be fairly sure that the yarn is suitable.

But the yardage is also useful if you want to use a different yarn weight to the one specified in the pattern.

Changing yarn weights

Before replacing one yarn with another, you should be aware that this may also affect the finished size of the project. Namely, whenever not only the yarn brand but also the yarn weight changes.

Your first instinct may be to buy exactly the same amount of yarn, simply by matching the total weight in grams. That can work if you’re simply changing brands. However, once the yarn weight changes, it usually doesn’t.

Let us say your are planning to make a blanket and the pattern calls for 11 balls, 1,100 g, of Stylecraft Special DK. The size of the blanket doesn’t bother you. You’d like the blanket to be a little heavier, so you decide to substitute Stylecraft Special DK with Stylecraft Special Aran.

If you buy 1,100 g of Special Aran, you will definitely have too little yarn.

Fortunately, experience shows that projects with roughly the same stitch count often require a similar total yardage, regardless of whether the yarn is finer or thicker. That’s why yardage is usually a much more reliable basis for calculating yarn substitutions than weight.

And you can easily work it out:

Step 1, look at the amount of yarn needed according to the pattern and calculate how many metres / yards this will be:

  • multiply the number of balls by the yardage of one ball. This will give you the total yardage needed.

Step 2, take a look at the yarn you plan to use. What is the yardage of one ball?

  • Divide the total yardage from Step 1 by the yardage of one ball of your chosen yarn. The result tells you how many balls you’ll need.

If you’re working with several colours, repeat these two steps for each colour.

To visualise this calculation, please just look at the picture below.

Graph, showing how to calculate yarn amounts based on yardage

So far, this method has never let me down!

At least it works for classically twisted yarns. Modern yarns with a completely different structure might be different.

Many patterns will list the yardage alongside the details of the yarn used.

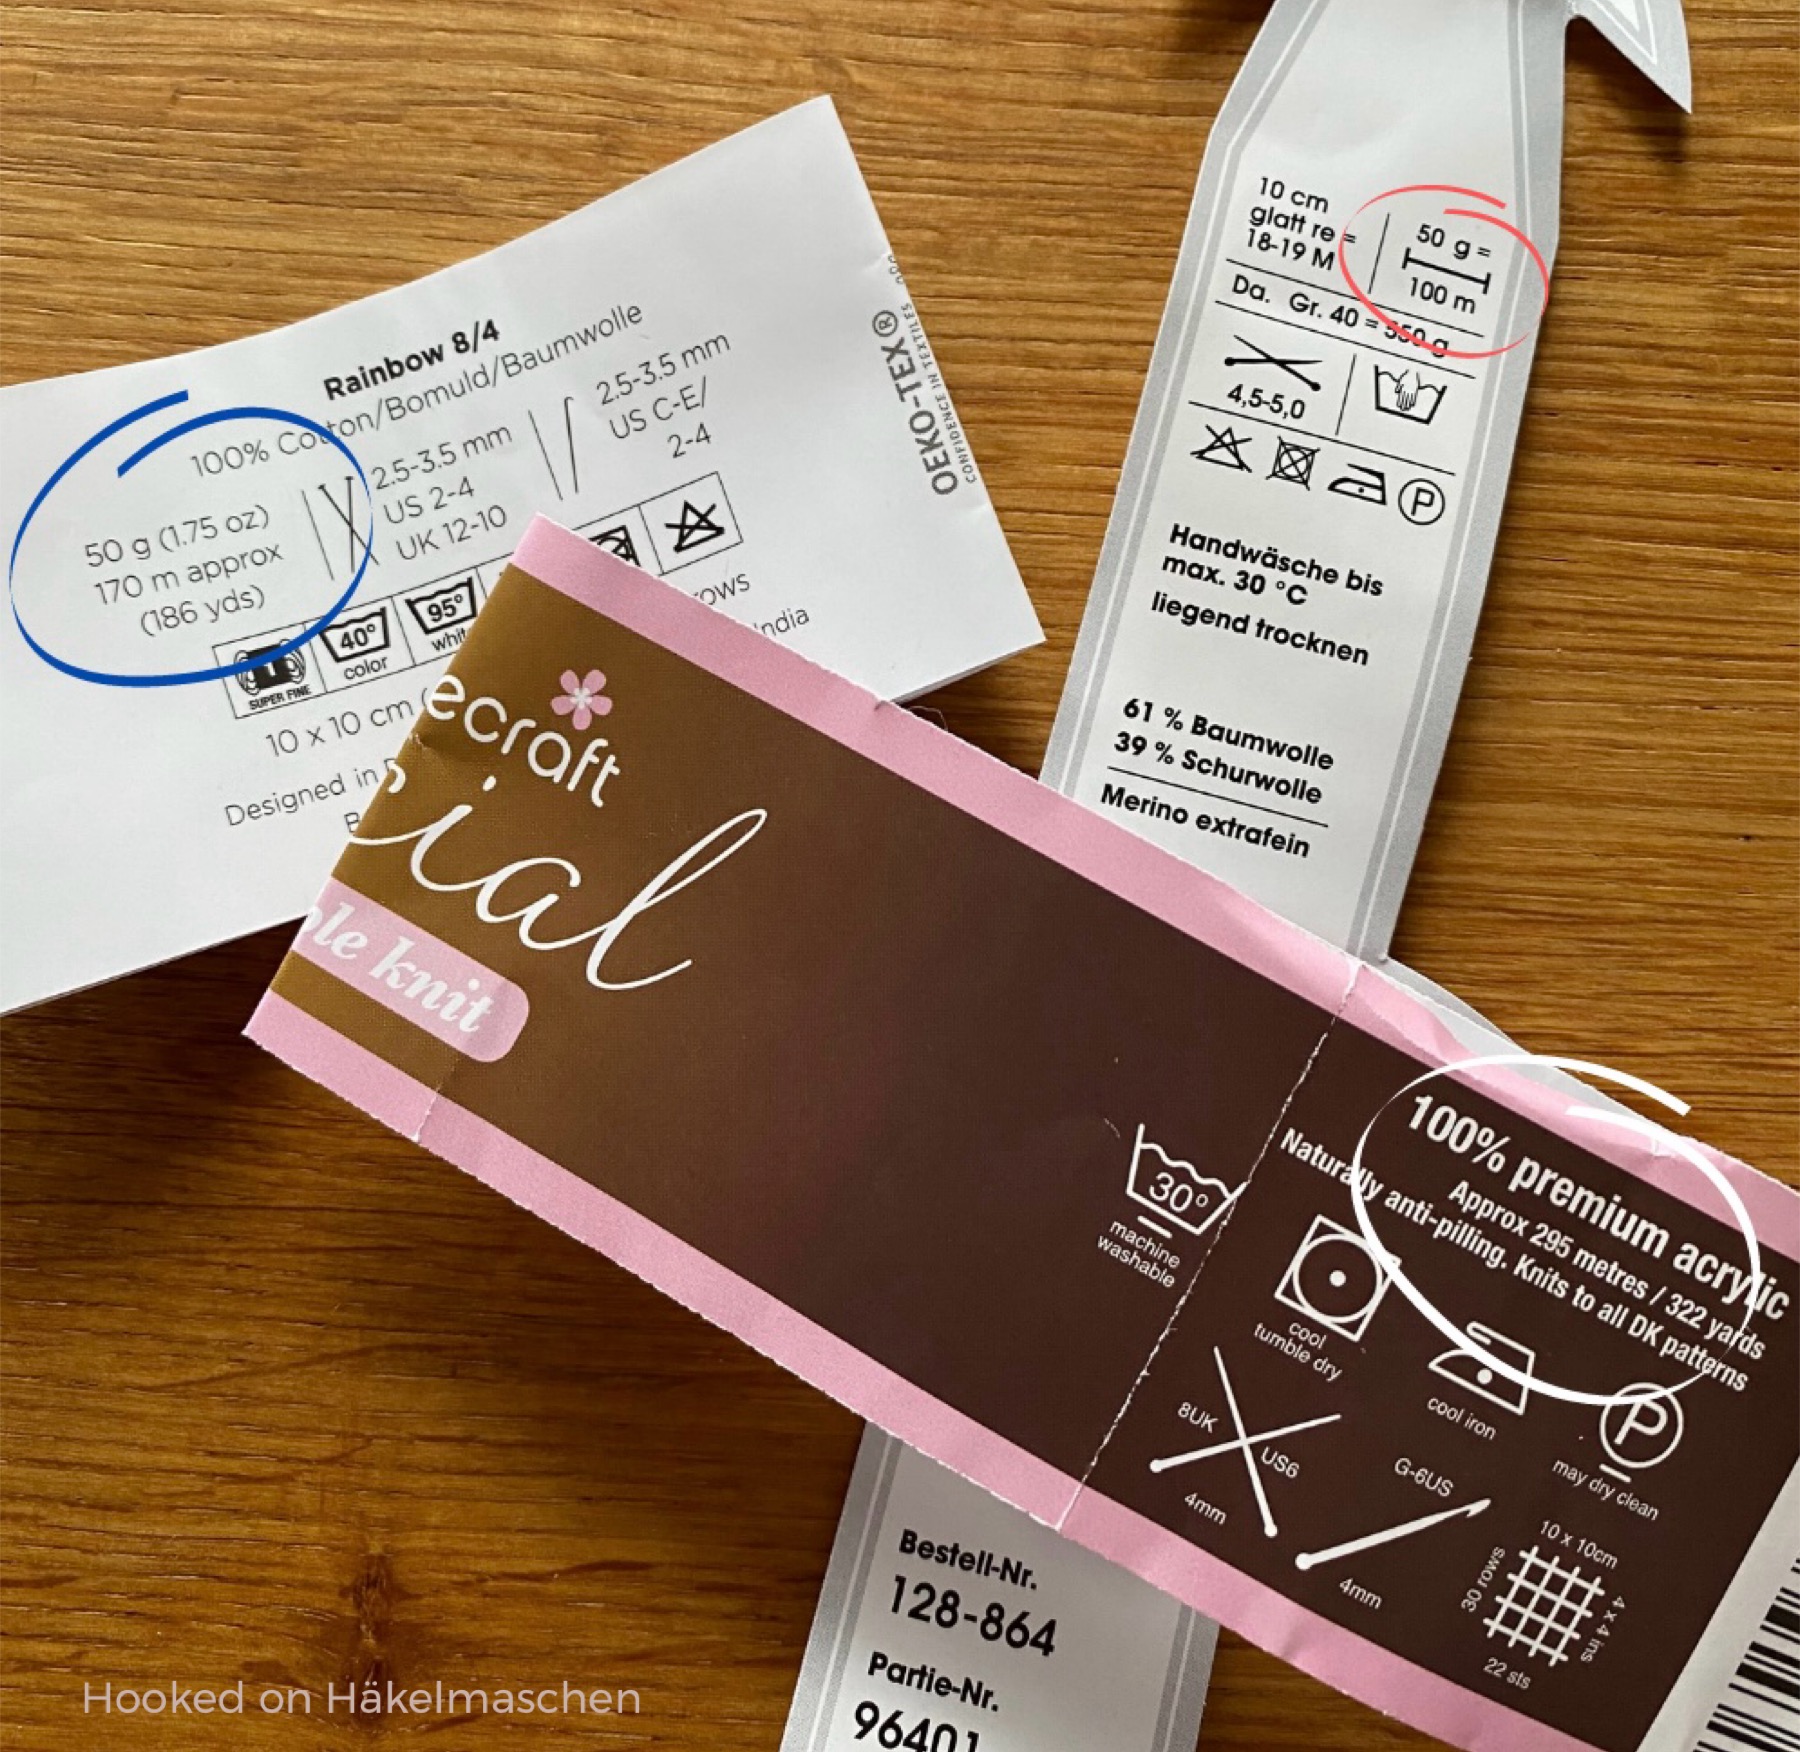
If this information is missing, the yardage is always indicated on the yarn label. Or simply search for the yarn online, either in an online shop or directly on the manufacturer’s website.

And finally, keep in mind that changing the yarn weight will almost certainly affect the finished size of your project. For projects where size really matters – especially garments – I wouldn’t recommend changing the yarn weight unless you’re also confident adjusting the pattern.

I hope this was helpful 💕