Are you looking for a cute and easy Easter decoration? Or a fun way to wrap a small gift?
Recently, I came across some adorable crochet patterns by Elke Eder that I just had to try: Sweet Little Chicks and Cute Little Baskets.
I found them as a bundle on Crazypatterns.net, but they’re also available separately there or on Ravelry.
Both patterns are quick and easy to make.
The instructions are very detailed and easy to follow. They include plenty of helpful photos covering stitches, assembly, and decorative details.
Besides basic stitches, both patterns use a special stitch called “Doppelmasche”, which is explained in a clear and easy-to-follow way.
Overall, the patterns are easy to follow and very beginner-friendly. That said, having a bit of experience with amigurumi is definitely helpful for making the little chicks.
The patterns are available in English (US terms) and German. You’ll find the pattern links at the end of this post.
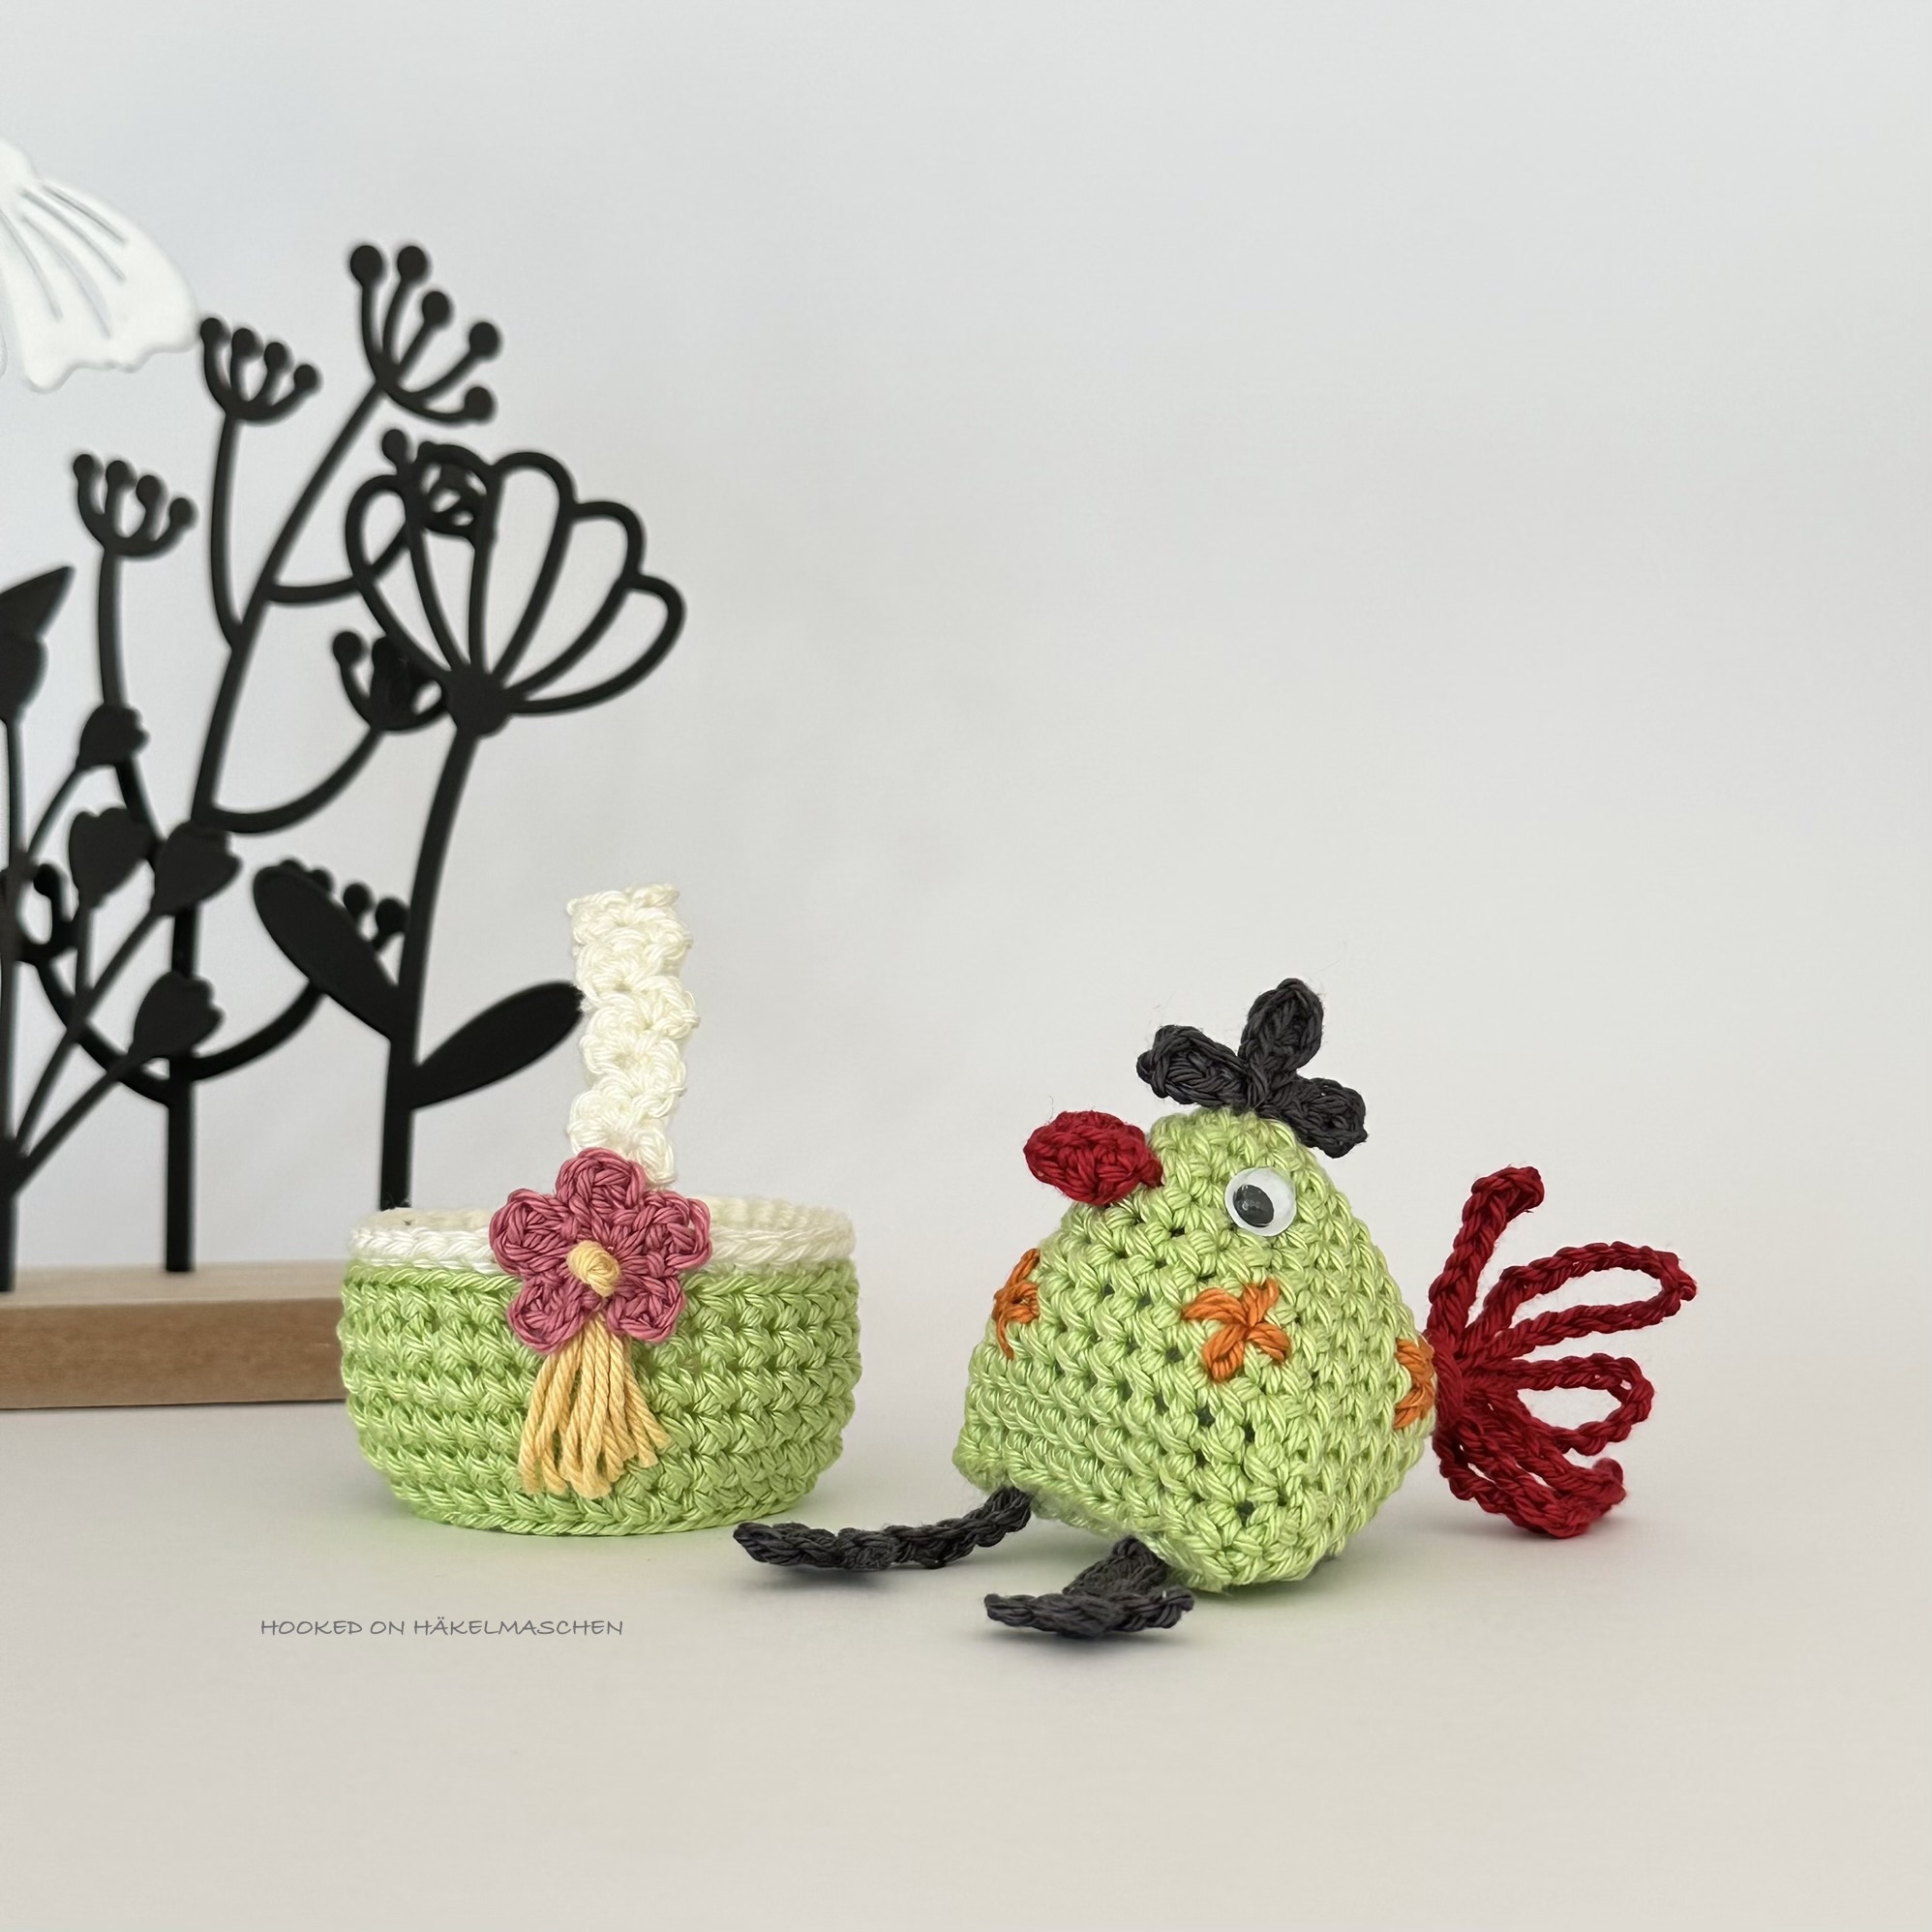
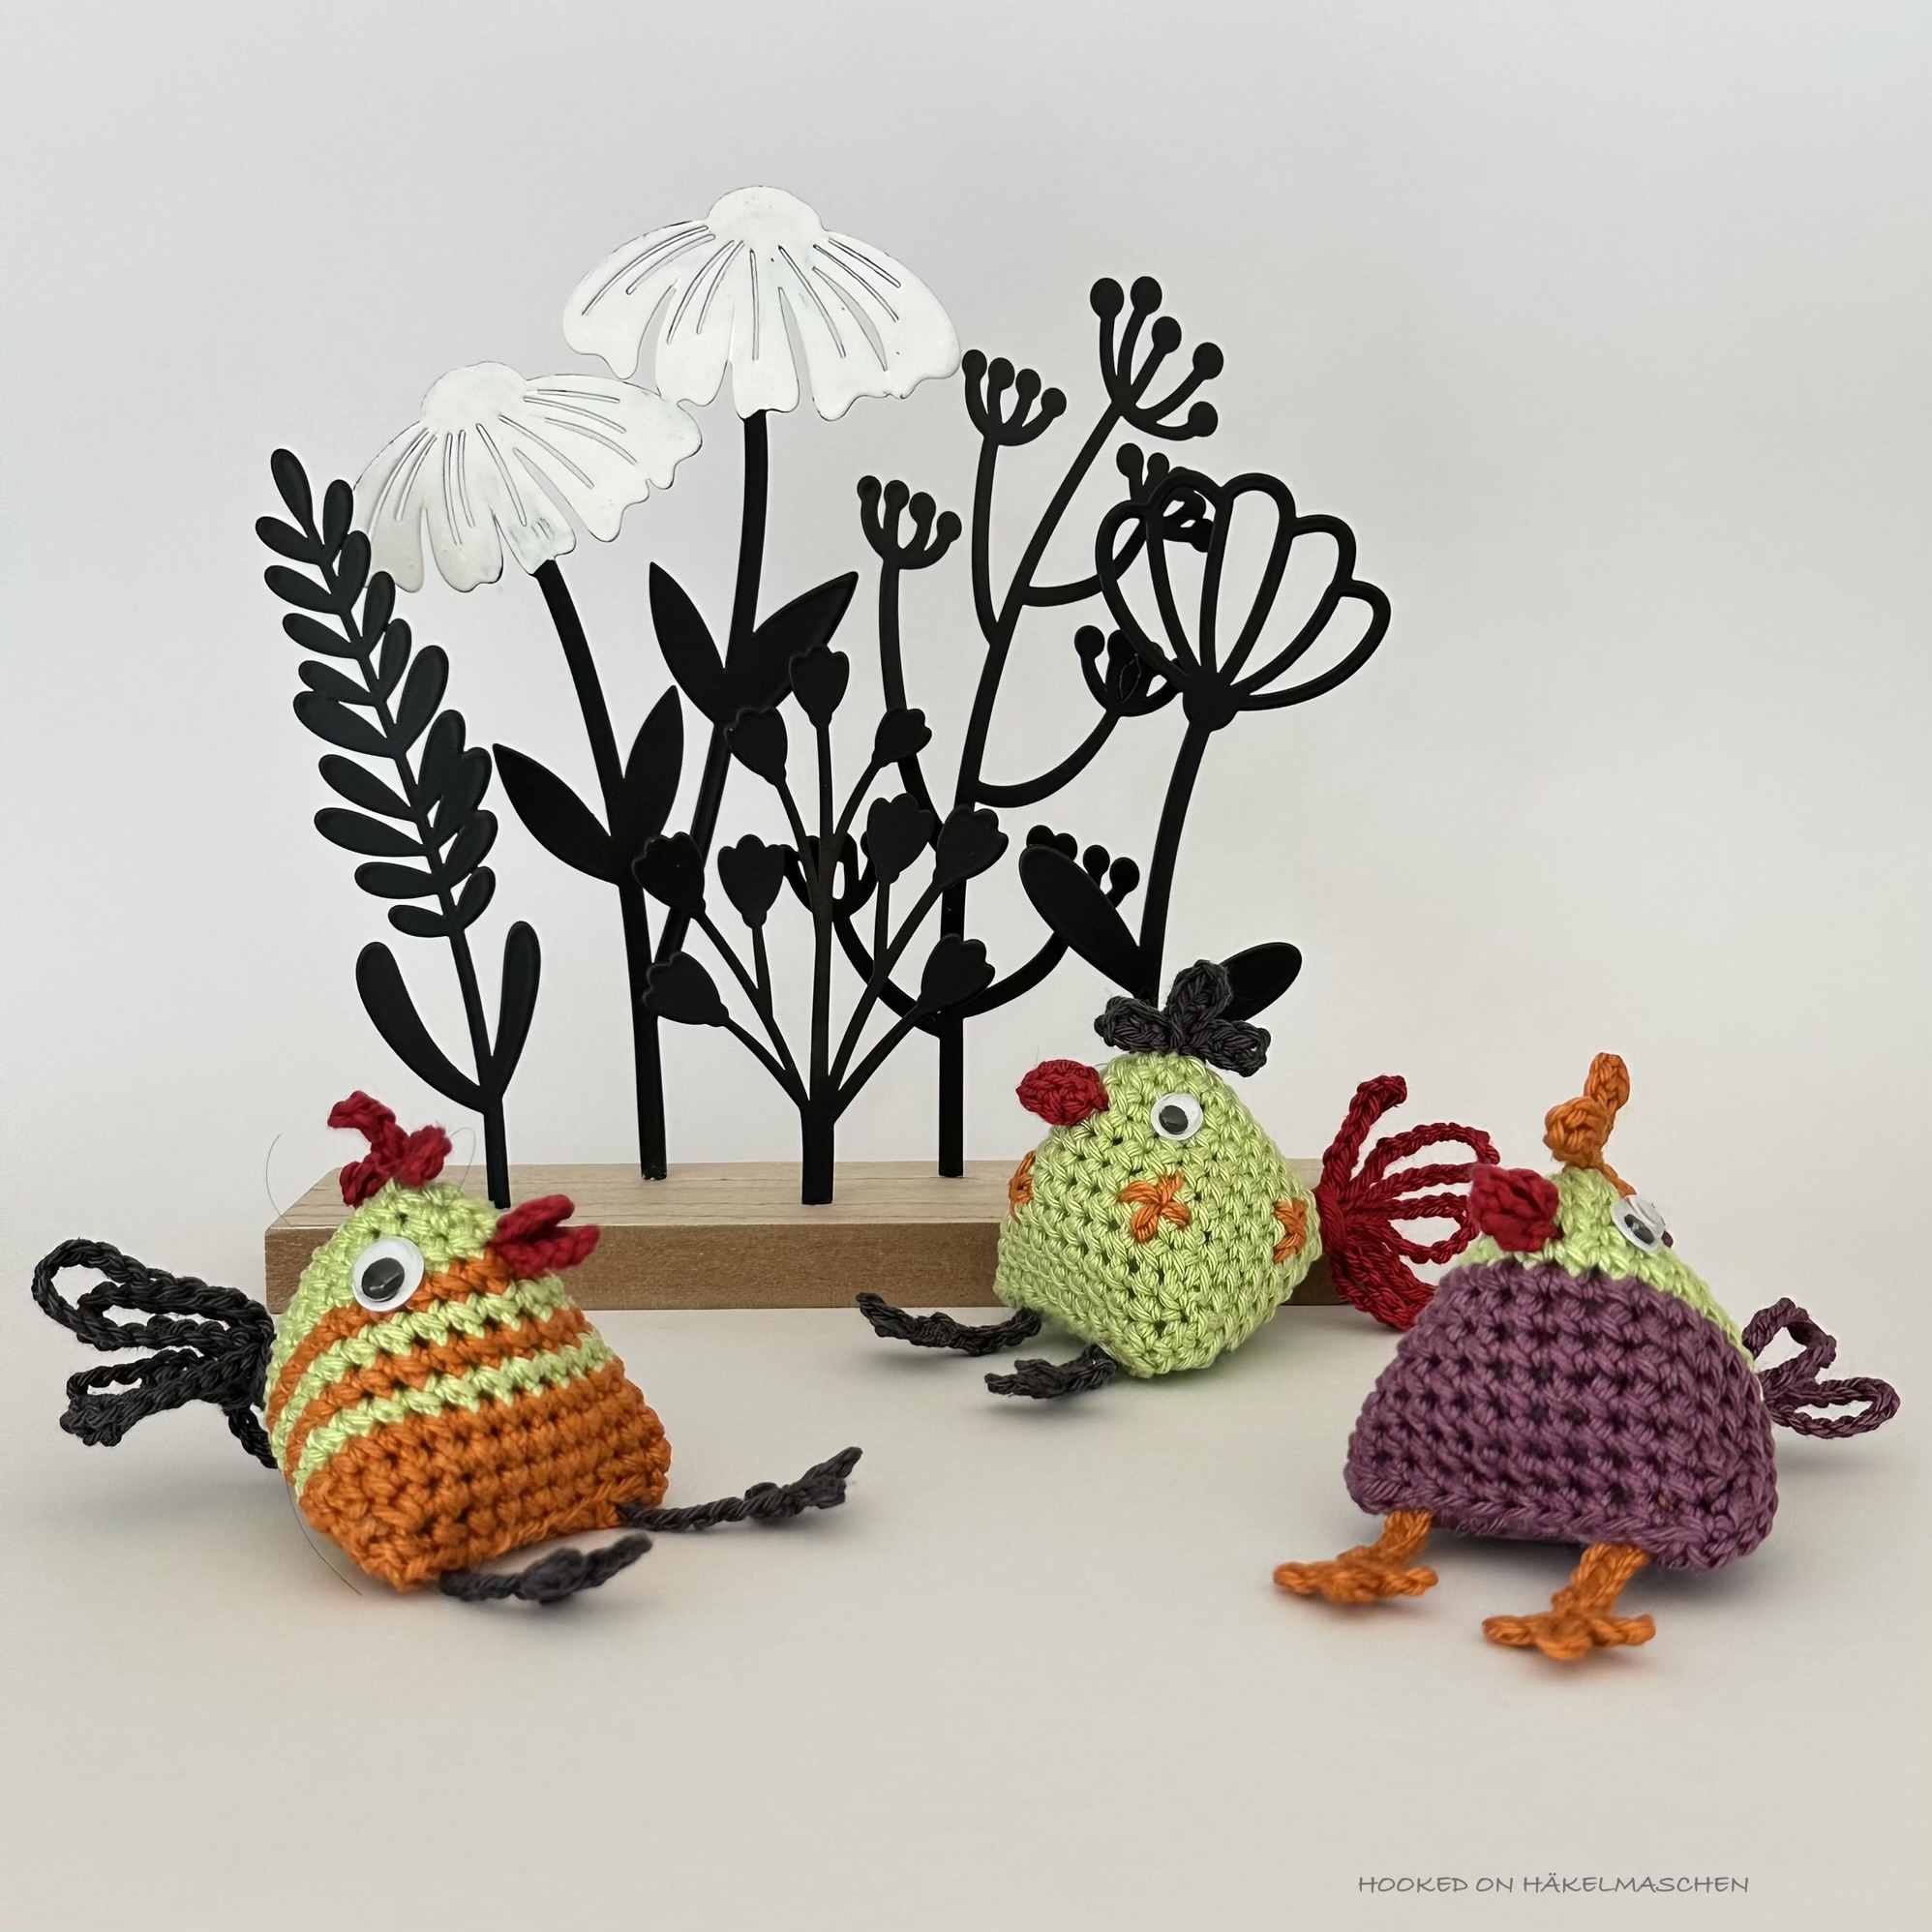
Sweet Little Chicks
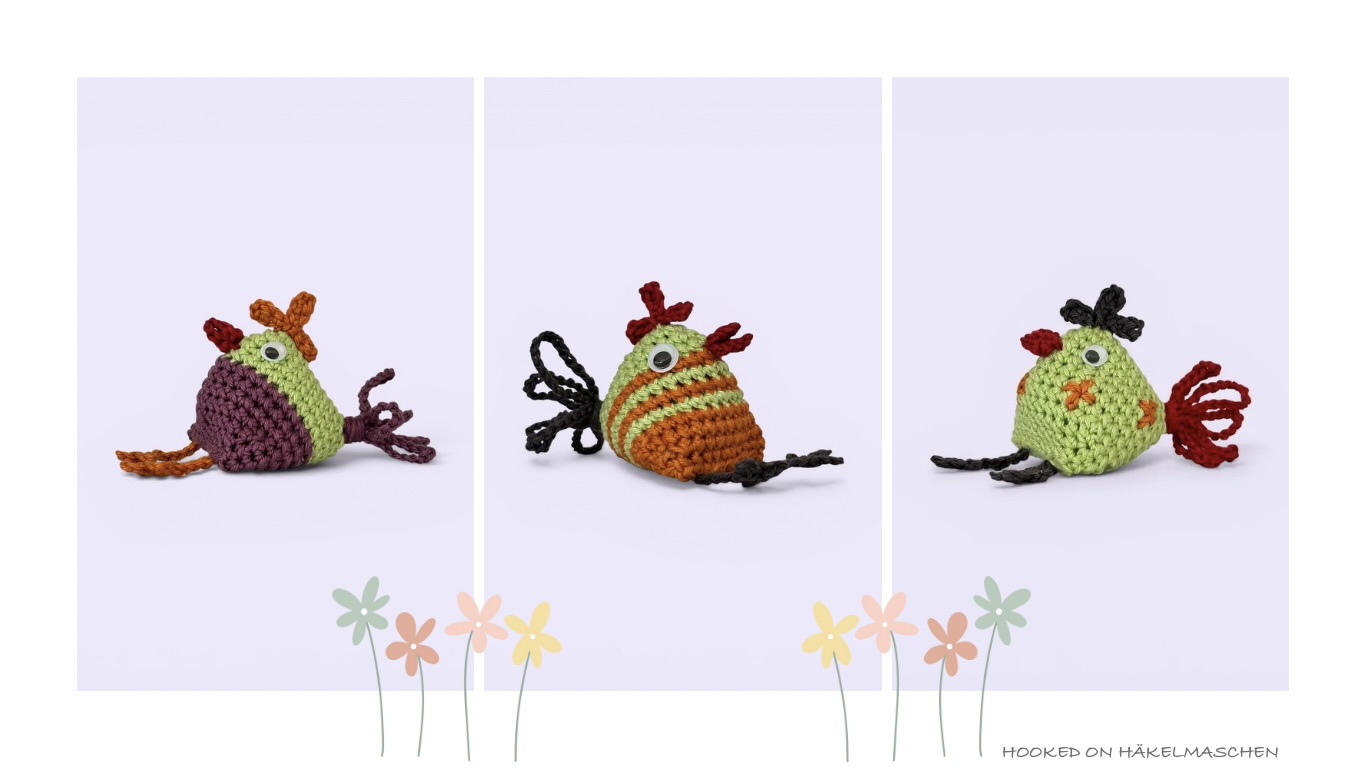
The Sweet Little Chicks are about 5 cm tall and have simple, slightly triangular bodies. Their bright colours make them look really cheerful.
The pattern includes various suggestions for colour placement – from solid colours to two-tone or striped designs – as well as ideas for embroidery. Of course, there are no limits to your imagination, so you can easily get creative with your own variations.
So far, I’ve made three of the designs from the pattern. I especially like the ones with embroidered details. As I’m not very good at embroidery, I’ve only tried it on one of them so far.
The tiny combs and beaks are a bit fiddly to make and do require some patience – especially when it comes to attaching the beaks. But it’s absolutely worth the effort, as those little details really bring the chicks to life.
For the eyes, I decided to use small googly eyes instead of crocheting them, which gives them a slightly playful look that I really like.
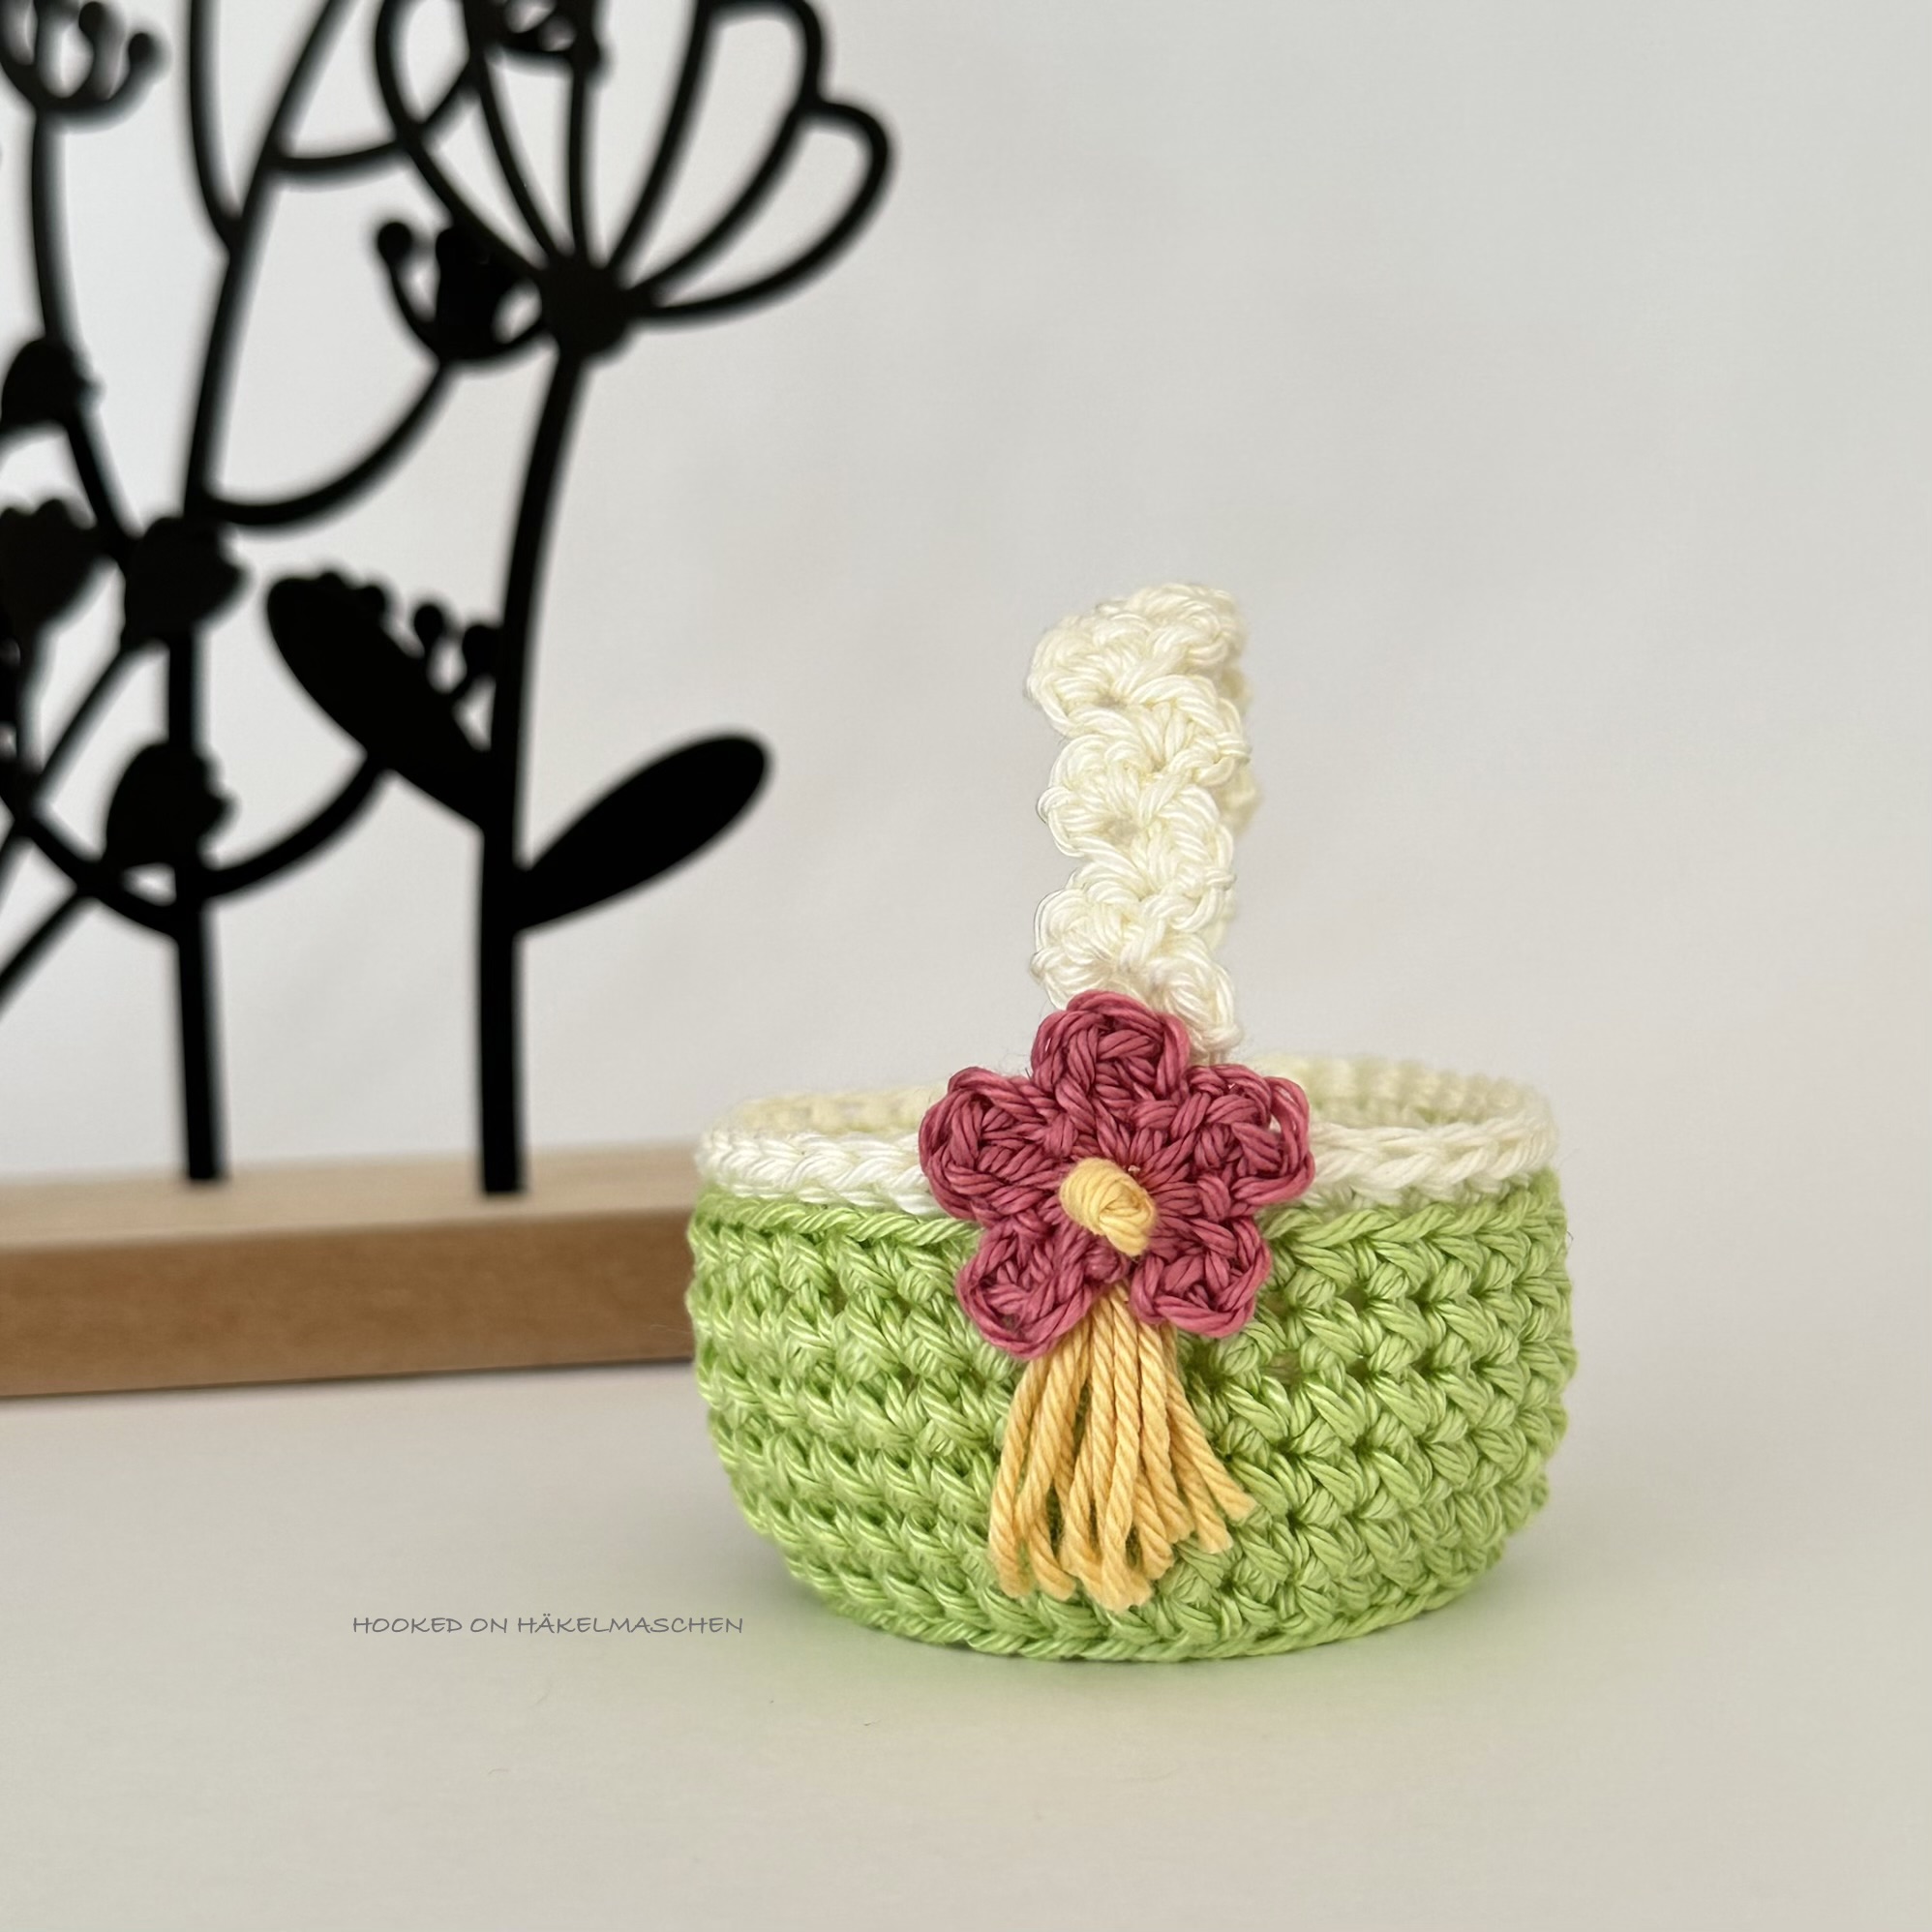
Cute Little Baskets
The tiny baskets from the second pattern are perfect for wrapping small gifts and also make lovely Easter table decorations.
This pattern also comes with several ideas for decorations, such as small flowers, butterflies, and embroidery details.
The baskets are made in two parts: an inner and an outer layer. Everything is explained and illustrated very clearly. While I was working on mine, I was briefly worried that it might not stand up properly – but that turned out to be completely unfounded. The finished basket is nice and sturdy and stands upright without any problems.
So far, I’ve only made one basket, but I’ll definitely be making more!
My yarn and colours
For my projects, I used various brands of cotton yarn from my stash:
- Schachenmayr Catania
- Schoeller + Stahl Limone
- Woll Butt Camilla (a German Brand)
All are 100% Cotton with 125 m / 50 g
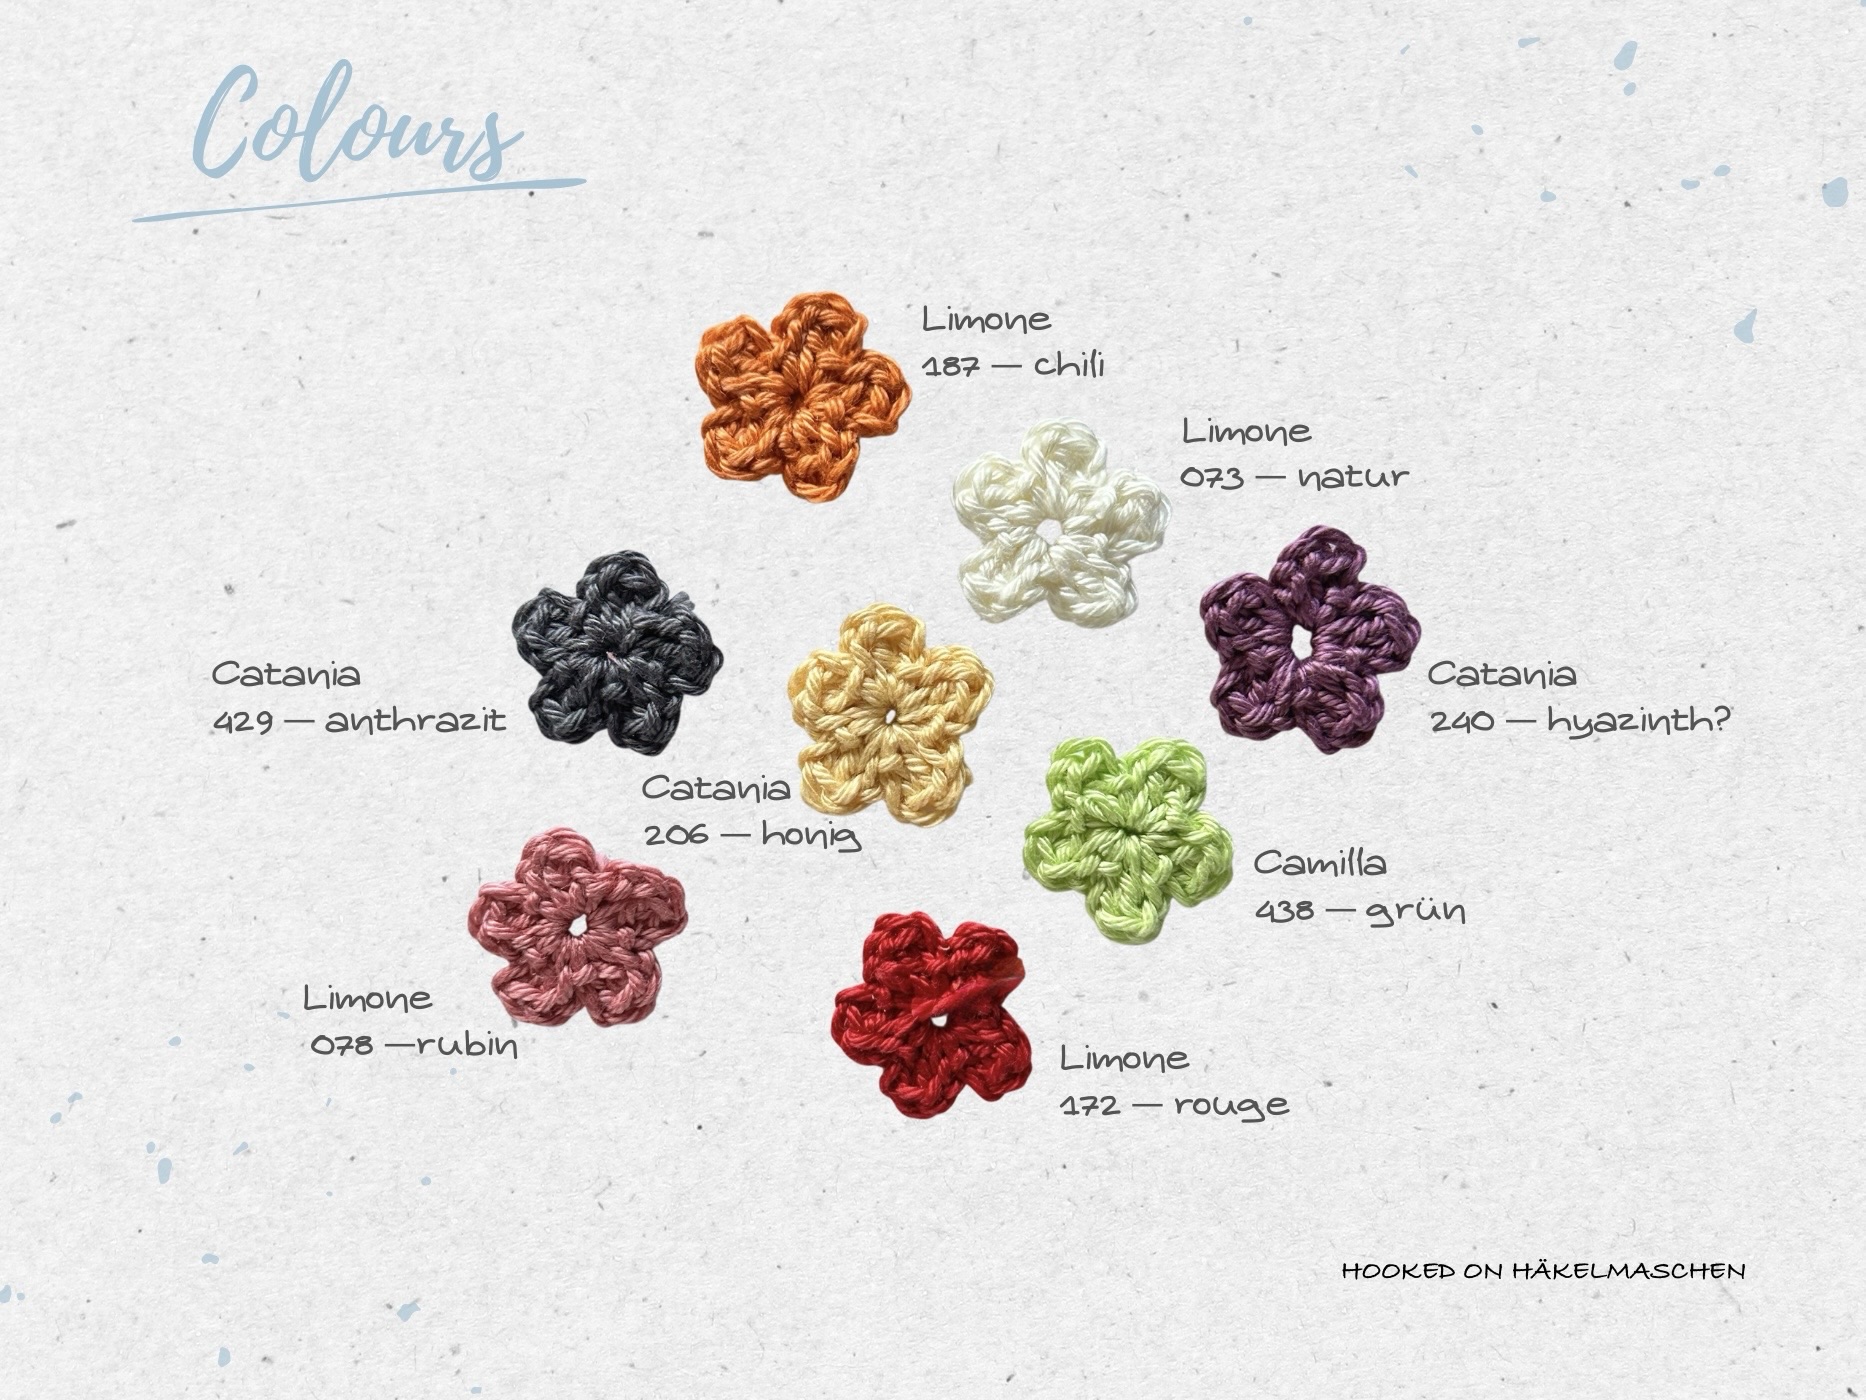
I used the hook sizes recommended in the pattern (2.5 mm and 3.0 mm). However, since I noticed that my Doppelmasche-stitches turned out a bit looser than my single crochet stitches, I switched to a 2.25 mm hook for that part.
Pattern links
If you’d like to try them yourself, you can find the patterns here:
Sweet Little Chicks on Ravelry
Cute Baskets for tealight and other little things on Ravelry
Bundle Sweet Little Chicks and Cute Little Baskets on Crazypatterns.net
All in all, I really enjoyed working with these patterns. They’re quick, versatile, and perfect for adding a small handmade touch to Easter – whether as decoration or for little gifts. I’m really happy with how my chicks and basket turned out, and I’ll definitely be making a few more soon.
Have a lovely time 🐣