


Exploring Random Colour Layouts
About three weeks ago (3 weeks already??) I told you about my experiment with random colour placement.
Originally, I had no particular purpose in mind when I started this journey. I had read about random colour placement and wanted to give it a try – that’s all.
But to be honest, I had my doubts. I had put together 15 colours. They all matched somehow, but there were still colours among them that I personally wouldn’t place next to each other. Raspberry, Duck Egg and Meadow for example is a combination that I would never have chosen myself.
So, looking at the colour combinations the random generator gave me, I couldn’t imagine to get nice results.
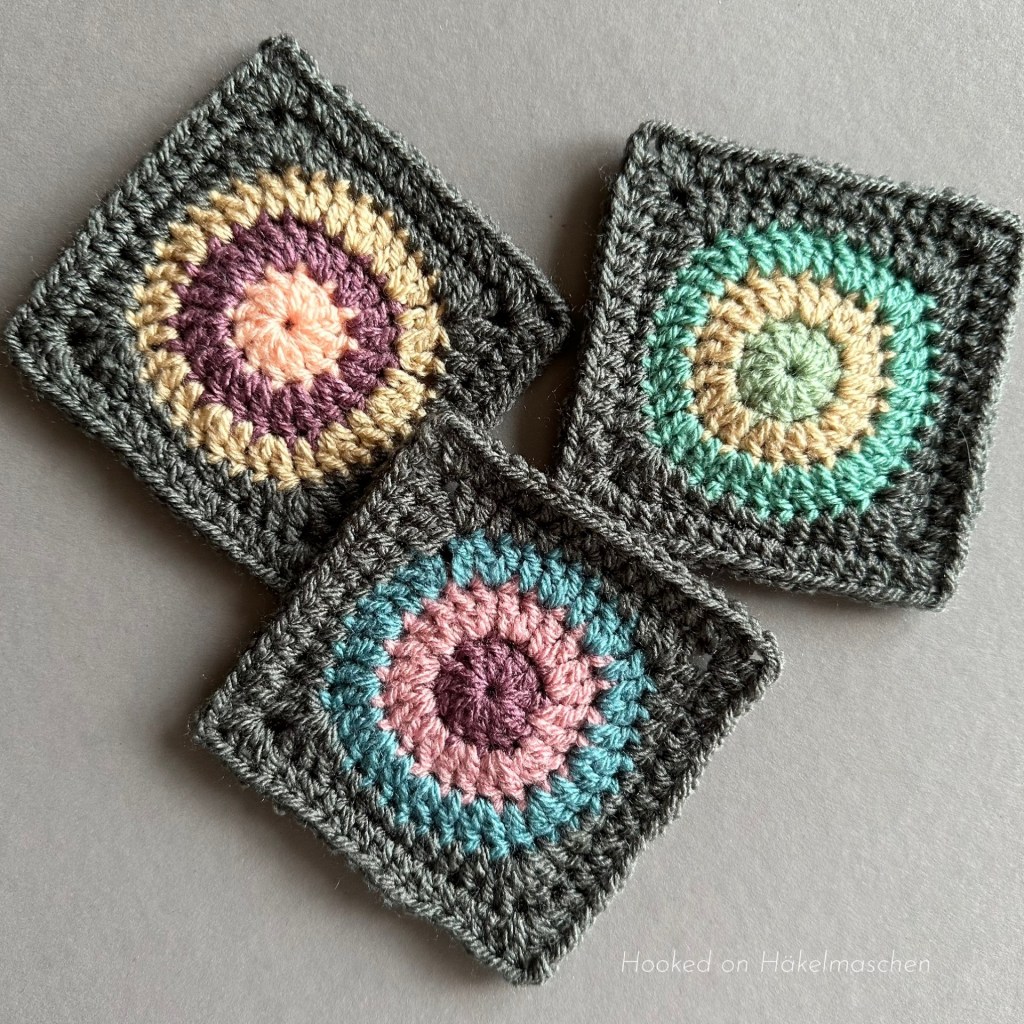
But after I had finished the first three or four circles, I was so amazed at the result that I really wanted to try out all the combinations. In the end I had 25 colourful circles. I turned them into small squares because I wanted to make something out of them.
In case you missed my previous post, you can read about it here. There you will also find details about the Numbers spreadsheet I am talking about below, the colours and randomizer I used, and so on.
I finally decided to make a small wall hanging out of the squares. I plan to arrange them in a 5 x 5 layout. Each square is about 10 x 10 cm, so that will make a panel of about 50 x 50 cm.
In the last few weeks, however, I have not been as fit as I would have liked to be. I have a pretty persistent cold that gets better from time to time but doesn’t quite go away. So, besides testing a beautiful square for Pam and checking and translating the final patterns for Ana’s Fall Sweet Fall Cal I didn’t have much time and energy to work any further on the hanging.
But at least I’ve managed to decided on a layout!
What about a Random Layout?
When I tried to arrange my squares in my 5 x 5 grid I didn’t really know where and how to start.
I usually have difficulties with such things. I’m hardly able to make it look random. I orientate myself far too much on what I think looks good together. So I end up with areas that look absolutely great, but also a rest that doesn’t fit together at all. Do you know what I mean?
That’s why I wondered if something like the random colour placement would also work for a layout. Could it work to arrange the squares in a random order instead of following some kind of „pattern”? It was at least worth a try!
So, again I tried the list randomizer from random.org and had a final layout in just a few steps:
1. Numbering my squares
Firstly, I assigned each square a number from 1 – 25.
This was just to make the entries in the randomizer a little easier. I didn’t have to type in all the colour combinations but only numbers.

I simply used my Numbers spreadsheet for this. I had created this table when listing the colour combinations. It therefore had no particular order, but was listed in the order in which the results came from the random generator. I have simply numbered these entries from 1-25.
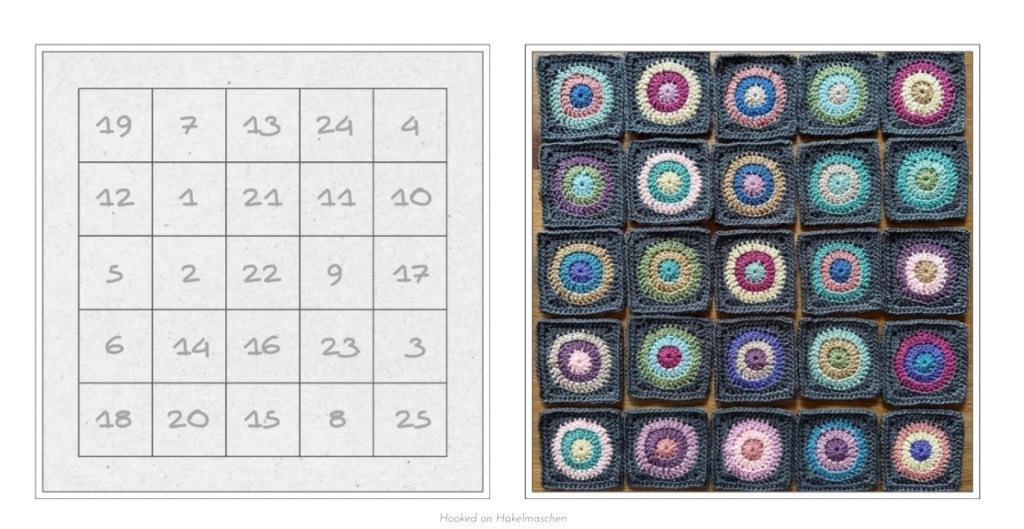
2. Drawing a layout grid
Secondly I created a grid showing my 5 x 5 layout and numbered the boxes from 1 to 25 as well. This served to clearly identify the location of my squares later on.
My grid is shown in the picture above.
You can just draw something like this on a sheet of paper. Or, if you are – more like me – the No-Paper-Type you can use Excel or Numbers. If you want to have square boxes, simply reduce the column width a little and increase the row height.
3. Randomisation
Afterwards I entered my numbers from 1-25 into the list randomizer.
If you use random.org, you can either make your entries directly on their website or copy them from an existing list in Excel, Numbers, Word, Pages, etc.
Then just hit the button „Randomize”. Wait a moment. Copy the result back to your Excel, Numbers, Word, Pages or whatever. That’s all!
As I have seen, there are also other tools that have a random generator. These, of course, may work differently.
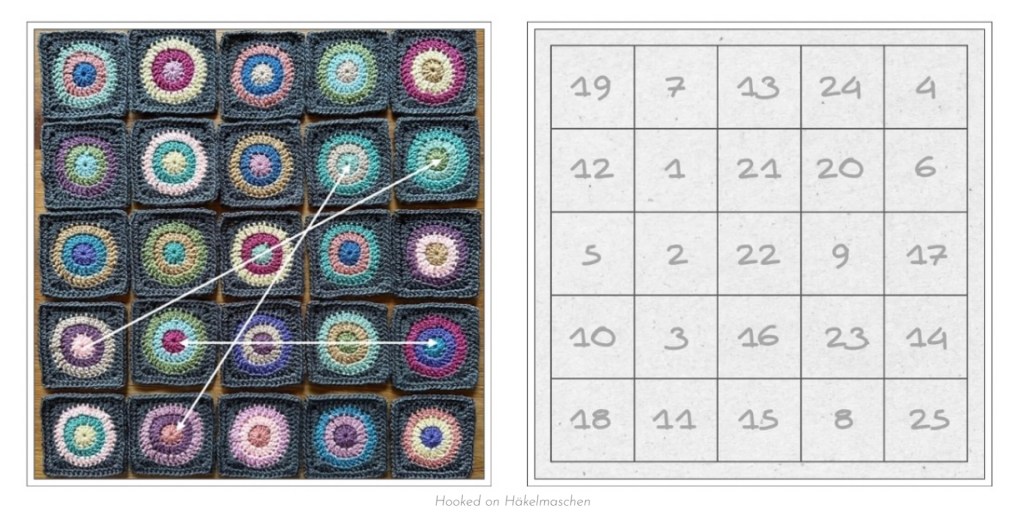
4. Arranging the squares
The result the randomizer gave me was – surprise – a list of the 25 numbers in random order: 19, 7, 13, 24, 4, 12 …
I arranged my squares exactly in this order.
I picked square #19 (from my list I knew it had the colour combination Storm Blue, Vintage Peach, Sage) and, following my layout grid, put it on place #1. Square # 7 (Pale Rose, Raspberry, Buttermilk) moved on place # 2, and so on …
Here is the result:
Left side the layout grid with the numbers in the order the randomizer gave me. And right side the corresponding squares.
Not bad, is it?
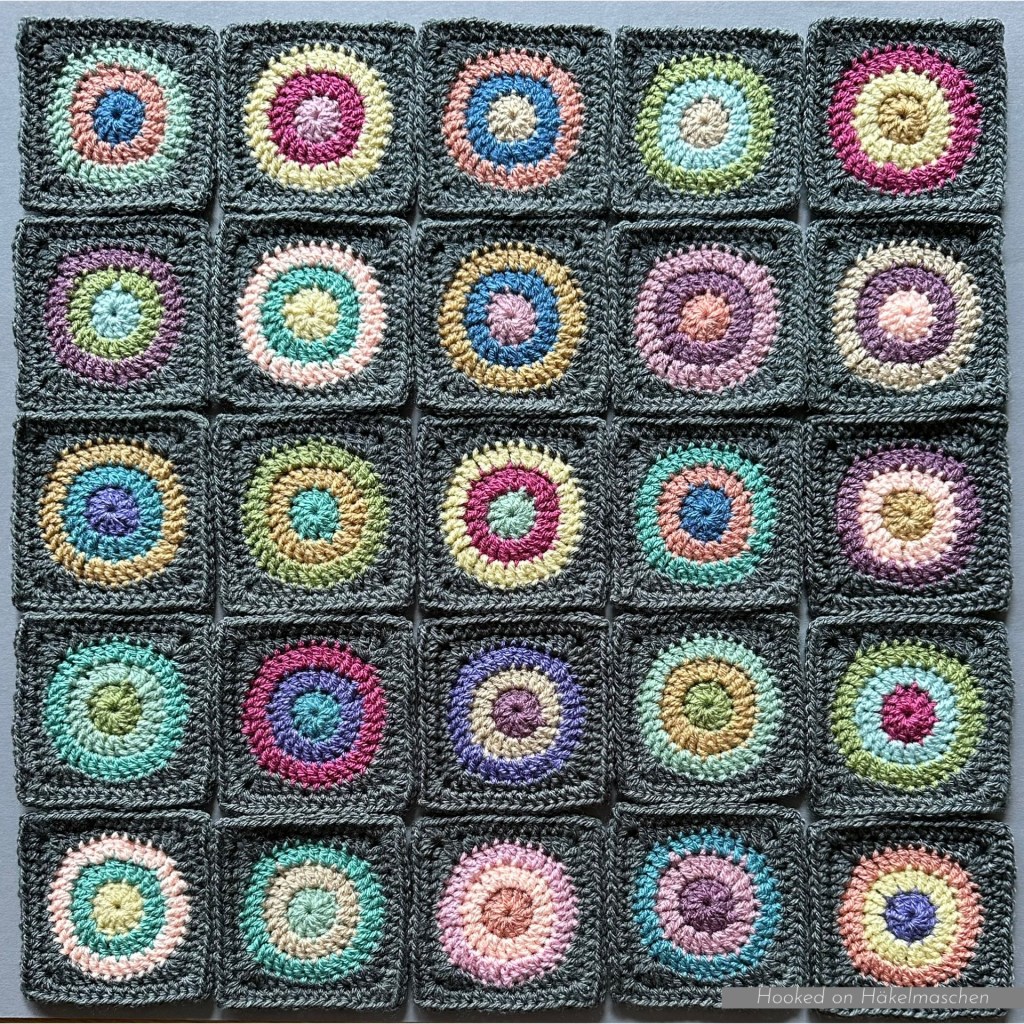
5. Changes
I only made 3 changes by switching some of the squares to make the colour arrangement a bit more balanced. And voilà …
Left side the changes I made and right side the final layout grid.
My final Layout
Colour Details
For all those who are interested, I have listed all the colour combinations and the corresponding layout:

All colours are from Stylecraft Special DK. For squaring the circles I used the colour Graphit.
My Conclusion
Even though I initially had my doubts, a colour combination created with a random generator works surprisingly well.
It is definitely a great way to arrange colours in simpler shapes, such as Granny squares, Triangles, Hexagons. Shapes, which you want to highlight the colours more than the stitches.
Presumably this method cannot be used for every design. I could imagine that it might not work so well with detailed and structured patterns. Afghan squares or blankets where the colours serve to highlight the design. However, I haven’t tried it yet.
And random placement of different squares etc. works great as well. At least it gives you a good basis on which you can continue to work.
And, the best thing is, if you really don’t like something, you don’t have to use it. And you can make changes at any time.
In any case, the randomizer helped me a lot and was a great support. I will definitely use it again!
The only thing I would perhaps change:
For a layout, I wouldn’t number my squares (only) in an Excel or Numbers table. I would simply pin small pieces of paper (in this case: yes!) with the corresponding numbers on them. That probably makes the subsequent sorting a lot easier.
Unfortunately, I only came up with this idea afterwards. My snuffy head was probably to blame :).
See you soon, hopefully with some further progress on my wall hanging 💕


2 thoughts on “Random Layout – Colour Experiment Part 2”