

When you dive into Tunisian crochet you will find that there are many different ways to change colours or to shape your work. Especially for decreasing (and increasing) stitches in Tunisian crochet there are a lot different methods.
I would like to concentrate here on the methods I used in the patterns for my mobile phone cozies. So in this section you will find
Colour change
Depending on whether the colour change is made on the right or left edge, different effects can be achieved. My pouch #3 uses a colour change on the left side. For pouches #2 and #4 the colour is changed at the right edge.
Colour change left edge
If the colour is changed at the left edge, the return pass will have a different colour than the forward pass of the row. Done in every row this creates the woven effect that I used in my phone case #3.

- complete the forward pass until the end
- start the return pass by yarning over with the new colour
- pull it through the first loop on the hook – the first stitch of the return pass now has the new colour
- continue as normal with a standard return pass by yarning over and pulling the yarn through the next two loops on the hook and so on
Colour change right edge
If the colour is changed on the right edge of the work it is made at the end of the return pass. Forward and return pass both have the same colour. This creates a more stripy effect.
- work a standard return pass until there are only two loops left on the hook
- yarn over with the new colour and pull it through the last two loops on hook
- the last loop – the one that remains on the hook and is equal to the first stitch of the next row – now has the new colour

For both variations it is not necessary to cut the unused yarn It can be carried along the sides. In case you work several rows in the same colour just cross it with (wrap it around) your working yarn when starting a new forward or return pass.
Decreasing a stitch
Decreasing a stitch on the left edge
If you want to decrease a stitch on the left edge of your work, you can do this at beginning of a return pass. Normally you start a return pass by yarning over and pulling the yarn through the first loop on hook. To decrease a stitch,

- yarn over and pull the yarn not only through through one but through the first two loops on the hook
- continue with the return pass, always working through two loops
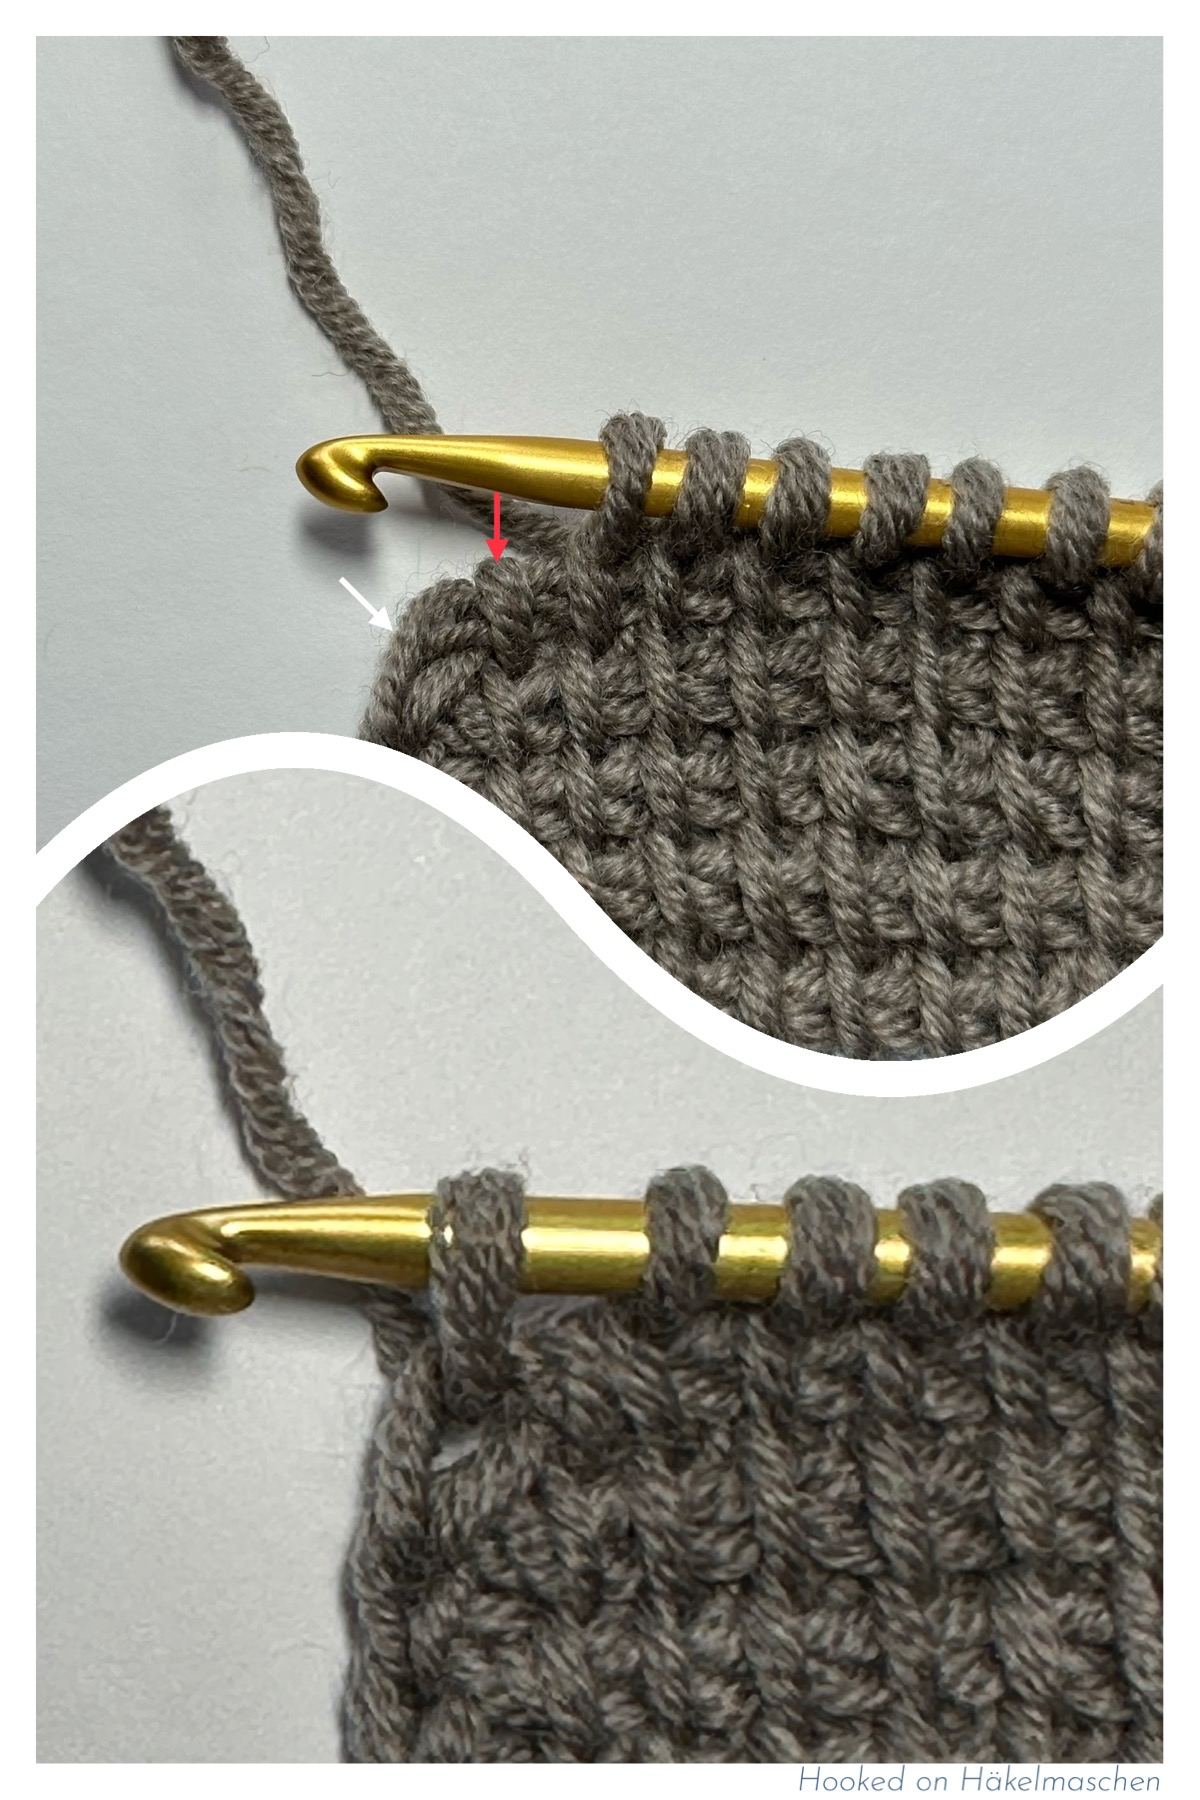
In the following forward pass, be careful when you reach the end of the row. The vertical bar of the decreased stitch is still visible (red arrow in the picture on the left). Skip this vertical bar and work the end stitch.
Decreasing a stitch on the right edge
When you decrease stitches on the right edge your work will lean to the left. I made the decreases at the end of the return pass.
- work the return pass as normal until there are only 3 loops left on the hook
- yarn over and pull through all 3 loops at once
As with decreasing on the left edge the vertical bar of the decreased stitch will still be visible. When starting the next forward pass be careful to skip not only the first vertical bar but also the one of the decreased stitch (red arrow in the picture on the right).


