Stellar

My new potholder

… or new coaster? I am not sure yet …

You may have already seen that Ana from One Skein of Love has published a new blanket pattern: Stellar.

Again, it is a pattern in Overlay Mosaic – this time she used Hobbii Portobello in two different colours.  Of course you can use any other yarn as well and as many colours you like. A colour changing yarn would also look great!

Photocredit: Ana Morais Soares / One Skein of Love

The pattern is available on Ana’s Ravelry page and in all her other shops.

I had the pleasure of testing this pattern and translating it into German. However, I only had little time over Christmas and the turn of the year, so I only made a small square for testing. Originally I wanted to use it as a coaster, but when I finished it I thought it would be a good size for a potholder as well.

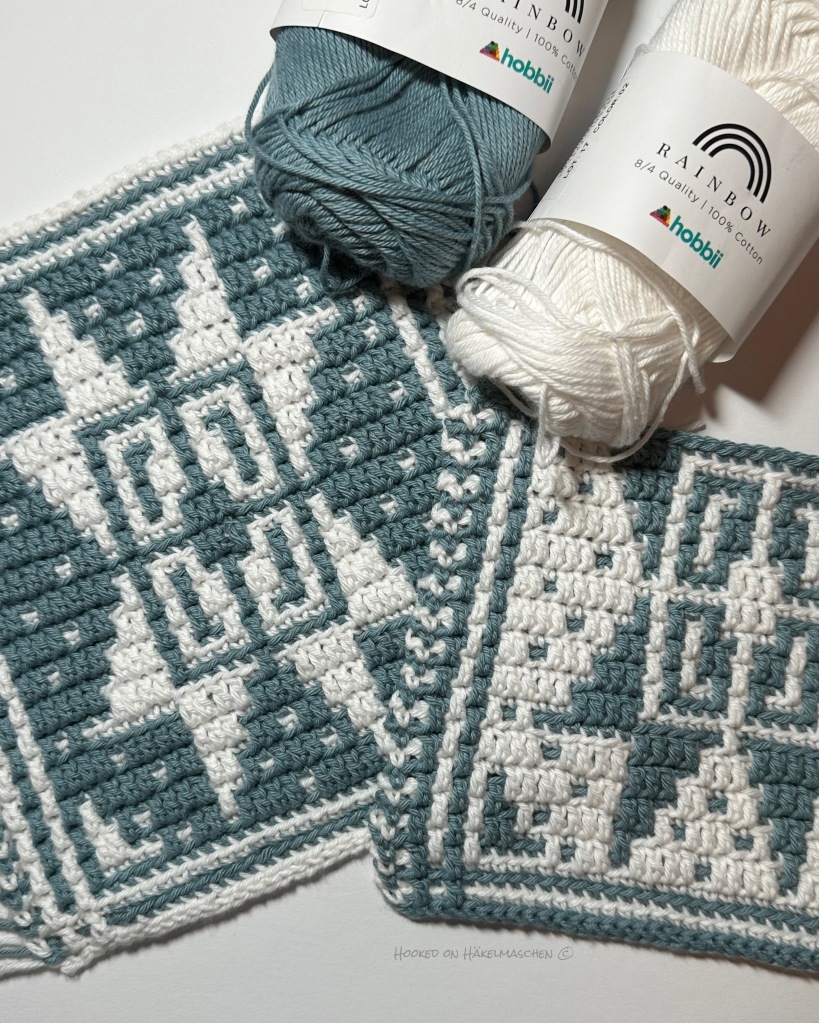
I used Hobbii Rainbow Cotton 8/4 and a 2,75 mm hook. Colours are 002 Natural White and 079 Dusty Blue Green.

With 170 m / 50 g Hobbii Rainbow Cotton 8/4 is rated as a Fingering weight yarn. So it’s actually too thin to make a potholder out of it. Therefore I made a second square in reversed colours and connected them both together – just to achieve a nice thickness.

The Joining

At first I thought about joining the two squares in one step with the slip stich round. Like I did for my Wooly Friends Bag .
What I didn’t like about this method was the patience I needed. It cost me a lot of concentration to catch the corresponding stitches of both parts. All yarn tails were constantly in my way and it took me ages to get it done. I have therefore discarded this idea and tried something else:

I prepared each of the squares with a slip stich round. This gave me the opportunity to work a separate border (front layer) on each square and to use the back of the slip stitches to join the squares.

The layers are joined with simple stitches through the back of every second slip stitch.

When you do a normal double border, it can sometimes be hard to work in the back of the slip stitches in case your stitches are too tight or you started with the front layer first. That’s why I wondered if it would make a difference whether you connect the squares first or work the borders first.
I just gave it a try and initially made the border on one square, then joined it to the other one without a border. As the join is worked with a needle and not with a crochet hook, it is not difficult to work in the back of the slip stitches either way. So, in my opinion, it will not make a difference.

I worked the border on each side of the potholder like I would have done with the front layer of a double border: 4 rounds of single crochet worked in back loops only. Then both layers were joined with a slip stitch round. For the hanger, I made a thin (2 chains) I-cord from both colours and pulled it through one of the corners. That’s it!

The finished size of my potholder is 21 x 24 cm (about. 8 X 9,5 inch).

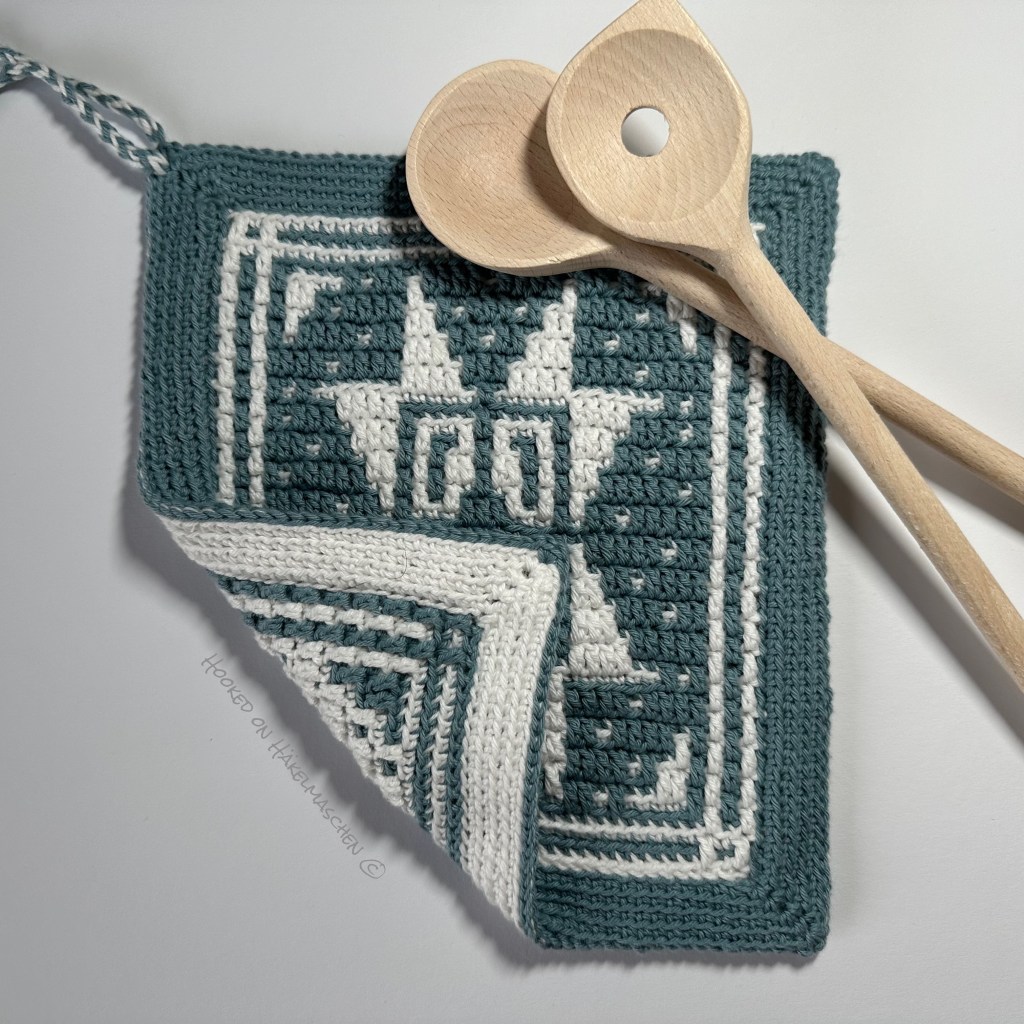
I am absolutely happy with the result!

Finished! – My Legacy Blanket

I hope you all had a great start in 2024 and are doing well!

I’d like to start the new year by showing an ‘old’ project: My Legacy Blanket.

If you’ve read my posts about this last year, you’ll know that it is a design by Pam Knighton-Haener from A Yarn of Serendipity. She designed this blanket as a legacy for her grandchildren. You can read her story here.

The blanket is made up of 12 different squares and a wide border. When Pam completed the pattern for the border last year, she also revised the instructions for the 12 squares, and I had the opportunity to test some of them.

So I started this project somewhere in July or August last year. You might remember that I had a hard time choosing yarn and colours. And also some tries and errors with my colour placement. In the end I did more than one square twice as I was not happy with my colour arrangement. To be honest, I still had doubts when I joined the squares …
BUT – surprisingly- once it was finished, everything fitted perfectly. I think it turned out pretty well and I LOVE the result!


My blanket was finished by the middle of December, but unfortunately I had no chance to take some nice pictures. We had a VERY long period with lots of rain, dark clouds, a bit of snow, fog, lots of rain again, well, you get the picture …

But now, here’s a short summary and some pictures:

My Yarn and Colours

My final choice were

  • Drops Lima – 65% Wool, 35% Alpaca (100 m / 50 g)
    • colour 100 – Off White
  • Drops Merino Extra Fine – 100% Wool (105 m / 50g)
    • colour 07 – Light Taupe
    • colour 15 – Light Sea Green

Both are DK yarns (#3, Light Worsted).
The fact that I mixed both qualities was simply a question of the colour shades. The colour 100 – Off White looks a little softer with Lima than with Merino, probably due to the structure of the yarn. And I liked that better!

My Layout and Colour Placement

I used Drops Lima in Off White as main colour and only added a few accents with Light Taupe and Light Sea Green. So, in my notes below, I just listed the rounds with the accent colours – all other rounds are worked in Off White.

If you are interested in my colour scheme you can also download it here

Some technical aspects and measurements


My squares and the border are worked with a 4 mm hook throughout. Only for the Zipper Join and the last round of the border I went up to a 5 mm hook.

Each of my squares measures about 25 cm (about 10”). The final size of the blanket is about 90 x 115 cm ( 35,5 x 45 inch).

I am sorry, but with all my changes and redoings I did not pay attention on how much yarn I used. In total I needed a bit over 900 g of yarn. As a very rough estimation I‘d say you will need almost 50 g of Off White for each of the squares and another 100 g or 150 g for the border. Additional 2 or 3 balls of each, Light Taupe and Light Sea Green. But that’s without any guarantee.

The patterns for all these lovely squares and the border are available in Pam’s Ravelry store.

In case you missed my previous posts about this project, you will find them here

Looking at these pictures I have to say: with all its ups and downs, it was a great journey and I am absolutely happy with my make!

Have a lovely week 💕