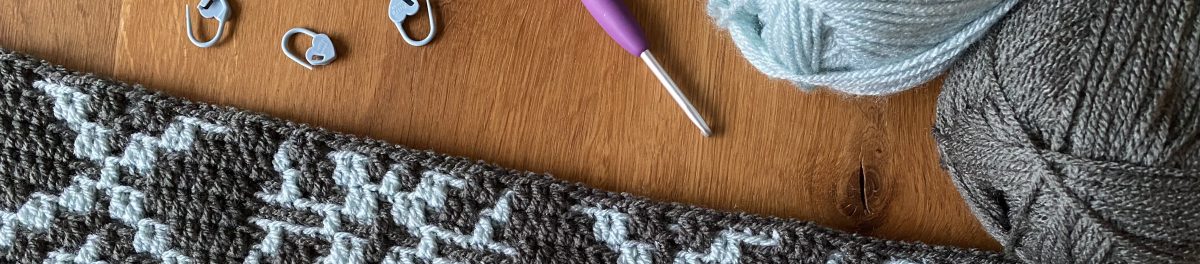
My Winter’s Love blanket – it’s finished

Updated on 16 August 2026

A little note before you start: Winter’s Love was a CAL that ran in November and December 2024. I’m keeping this post as a record of my experience testing the pattern and making my blanket. If you’re discovering Winter’s Love now, you can still get the pattern and use my colour placement as inspiration for your own blanket.

Last weekend I finally crocheted the last stitches on my Winter’s Love blanket — it’s finished! And I really enjoyed working on it!

A short summary

Winter‘s Love is the current CAL (Crochet Along) by Ana Morais Soares from One Skein of Love. It started on 22 November 2024 and is divided into 4 parts. Part 4 – the last one – will be published on Friday, 13 December 2024. Time flies…
It’s never too late to get yourself the pattern, though. It might be a bit late to finish the blanket in time for Christmas. But starting it at Christmas and finishing it for next year is certainly a lovely idea too.

If you’d like to make your own Winter’s Love blanket, you’ll find the pattern link at the end of this post.

Over the last few weeks, I’ve had the pleasure testing this lovely pattern.

My yarn and yarn amounts

This time I tried a completely new yarn. Well, at least completely new to me: Yarnsmiths Create DK. It is an own brand from Wool Warehouse.

Create DK is a 100% acrylic yarn. It comes in 100 g balls and has a yardage of 290 m per 100 g. It is currently available in 120 colours.

I decided to go with Claret Red (3090) and Off White (3045) for my blanket.

In total I needed

4 balls Off-White
6 balls Claret Red

I really like the quality of Create DK. The yarn is of a consistent thickness and is soft and supple. I really enjoyed working with it! I’ll definitely have to get some more colours.

Finished size

I used a 4 mm crochet hook, and my finished blanket measures approximately 120 x 150 cm. That’s about 47 x 59 inches.

My colour placement

After a first attempt (the sample at the top), I decided to reverse the colours and start my blanket with a dark background, against which the motifs appear in white.

I kept this colour scheme for the first eight patterns. Then, I switched the colours again.

I already wrote about the reasons for this in my previous post. There you will also find detailed information on how I proceeded exactly when swapping the colours. The post also includes an overview of my detailed colour placement for all the patterns of the blanket. The only colours not listed there are those used for the border: the slip stitch round, the front and back layers, and the joining round were all worked in Claret Red. And that’s it.

However, to make things easier for you, I’ve now compiled my entire colour scheme into a PDF file. So, if you’re interested, you can download my colour placement guide at the end of this post.

Well, that’s another big crochet project finished. Afterwards, I always feel as though I’ve fallen into a huge, dark hole. Does anyone else get that feeling?

I’ve no idea yet what I’m going to do next. Unfortunately, I’m having some trouble with one of my eyes at the moment (and I’ve got a few appointments with my eye doctor). So I think it’ll be something small. Maybe a few granny squares? Or something small for Christmas? Hmm, we’ll see!

Wish you a lovely time 💕

Get the colour placement guide

More posts in the Winter’s Love series

Winter’s Love Mosaic CAL

My Winter‘s Love blanket – A quick update

Get the pattern

Get the Winter’s Love pattern on Ravelry

My Winter’s Love blanket – A quick update

Revised on 12 August 2026

A little note before you start: Winter’s Love was a CAL that ran in November and December 2024. I’m keeping this post as a record of my experience testing the pattern and making my blanket. If you’re discovering Winter’s Love now, you can still get the pattern and use my colour placement as inspiration for your own blanket.

About a fortnight ago I showed you my current test project: Winter’s Love Cal. A new overlay mosaic pattern by Ana Morais Soares from One Skein of Love. At that point, I had just finished about two-thirds of the blanket.

The CAL has now started, and Ana has just published Part 2 of the pattern. And yes, I am almost finished with my blanket!
All tails are knotted and cut! All the slip stitches to start the border are done! So, last night I started with the back layer of the border.

When I started working on my blanket a few weeks ago, I decided to swap the colours; Ana’s blanket starts with a light background and dark motifs. With my blanket, it’s the other way round. So I started using Off-White as C1 (the motifs) and Claret Red as C2 (background).

I really love the way how this turned out!

However, when I reached pattern 9, I had some doubts about my colour placement.

Due to my colour scheme, the trees in pattern 9 were displayed in Off-White. Combined with the light-coloured baubles in Pattern 8, I didn’t really like the look Although I’d already finished half of Pattern 9, I decided to change it. This meant, I had to go back a few rows!

I kept the first two rows in the my original colour scheme – Row 1 in Off White and Row 2 in Claret Red.

I skipped Row 3 of the instructions. As it’s a simple row of single crochet, this doesn’t affect the pattern. However, it meant I could carry on with Off White instead of Claret Red in Row 4 – and voilà, the colours had swapped places. And: I like it better that way!

Please note: If you decide to do the same for your blanket, you will have one row fewer when counting the rows in Pattern 9 and also in the total number of rows in your blanket. This also means that you will have one stitch fewer on the long sides when you crochet the slip stitches and the border.

Unless, of course, you do it the way I did. After finishing the last pattern, I added a row of single crochet stitches in Off White. That way, I started and finished the blanket in the same colour. But to be honest, it wasn’t the look that made me do it. It was simply the fact that this gave my slip stitches a contrasting background on both short sides. Otherwise, my eyes wouldn’t have been able to cope with it.

My colour placement

Yarn amounts (except border)

For the body of the blanket I have used

  • Off White — 4 balls
  • Claret Red — 4 balls

Yarnsmiths Create DK from Wool Warehouse

The total yarn amounts will be listed in the next post.

There is nothing left from these balls. So with a different tension you might run short with these amounts.

That’s it for today! I’m going to get started on putting up some Christmas decorations now. And I’ll carry on working on the border! I hope you all have a lovely time 💕

More posts in the Winter’s Love series

Winter’s Love Mosaic CAL

My Winter’s Love blanket – it’s finished — including total yarn amounts and detailed colour placement guide

Get the pattern

Get the Winter’s Love pattern on Ravelry

Winter’s Love Mosaic CAL

Revised on 12 August 2026

A little note before you start: Winter’s Love was a CAL that ran in November and December 2024. I’m keeping this post as a record of my experience testing the pattern and making my blanket. If you’re discovering Winter’s Love now, you can still get the pattern and use my colour placement as inspiration for your own blanket.

Now it’s that very special time of the year again! In the northern hemisphere, winter is lurking just around the corner. Christmas is just over 5 weeks away. And Ana from One Skein of Love has just introduced her new Winter CAL (Crochet Along): Winter’s Love!

Winter’s Love is another blanket design in overlay mosaic. It matches her former winter designs – Winter Wonderland, Wintry Forest and Magic Winter – perfectly.

Picture by Ana Morais Soares / One Skein of Love

Lovely, isn’t it?

Winter’s Love CAL dates

The Winter’s Love CAL will start on Friday, 22. November 2024.

It is divided into four parts.
Part 1 will be released on Friday, 22 November 2024. Parts 2 – 4 follow at intervals of one week each. So, the dates are

  • Part 1 – 22 November 2024
  • Part 2 – 29 November 2024
  • Part 3 – 06 December 2024
  • Part 4 – 13 December 2024

All information about the CAL is already available on Ravelry. Once you have purchased the pattern, you can download an introductory file containing all the key information. In it, you will find details on yarn requirements, size and gauge, notes on the pattern, abbreviations, instructions and much more.

My version of Winter’s Love

I promised Ana back in October that I would help testing the pattern. Unfortunately, I have to say I haven’t finished yet. Life — and, sadly, my health too — got in the way.

I’m doing my best to finish it as soon as possible.

My yarn choice

This time I’m trying out a new yarn: Yarnsmiths Create DK.

As far as I know, Yarnsmiths is still relatively new on the market. It is an own-brand range from Wool Warehouse – my favourite online yarn shop, based in the UK.

Create DK is a 100% acrylic yarn. It is currently available in 120 different colours. I imagine many of them are similar to the colours in the Stylecraft Special DK range. However, there are also some really special shades. It’s definitely worth taking a look!
The yardage is 290 m per 100 g ball. Recommended hook size is 4 mm.

And: It works up nicely! I really like it and I’ll definitely be trying out some more colours.

My colours and colour placement

When I first saw Ana’s new design, I immediately thought of using classic colours.
That’s why I originally planned to use white, red and grey to make the blanket look Nordic. From the Create DK palette, I picked Off-White, Claret Red and Storm Grey. I planned to use Off-White as background colour and Claret Red for the motifs. With a little Storm Grey in between.

Once my yarn had arrived, I followed Ana’s instructions, simply replacing her cream-coloured yarn with Off-White.

After the first few rows, however, I changed my mind. I was fascinated by the Claret Red, and I thought about swapping the colours. Of course, I had to try!

The picture below shows the two starts.. The sample on top is the one I started with, using Off-White as background. The other one (with the little blue stitch marker) is my second version, using Claret Red as background colour.

What can I say? I didn’t have to think twice! I preferred my second version with the colours swapped round, and that became my final version. I didn’t end up using the grey, though, my blanket will stay red and white.

My progress so far

I just reached the end of part 2. 150 rows are done.

Now on to part 3. Another 75 rows to go.

I’ll keep you updated on my progress!


And just a side note on my yarn order:

Having not ordered anything from Wool Warehouse in the UK for years, I’ve finally placed an order there again. Since Brexit (the UK’s withdrawal from the European Economic Union), I hadn’t dared to do so.

Brexit has changed the delivery terms for many countries in Europe.
I knew I’d have to pay extra tax. That wouldn’t have been a problem in itself. But unfortunately, I’d read a lot on social media about people in Europe having to pay exorbitant sums. That’s why I really wasn’t sure how it would all work out. I’m glad I finally gave it a go! It’s nothing to be afraid of!

My order was dispatched via Royal Mail and delivered by DHL. Unfortunately, the parcel couldn’t be tracked, and I had no idea how long delivery would take, including customs and everything else. But my parcel arrived within about a week. I received a notification from DHL and had to collect the parcel from the post office. There, I paid the import VAT, which was the standard 19 per cent VAT rate applicable in Germany. I also had to pay a small handling fee to DHL. Overall, however, the price was still reasonable!

All in all, it’s really simple! I just need to make sure my order doesn’t exceed €150. That way, I won’t have to pay any customs duties, just the import VAT. I really wish I’d given it a go sooner!

More posts in the Winter’s Love series

My Winter’s Love blanket – A quick update

My Winter’s Love blanket – it’s finished — including total yarn amounts and detailed colour placement guide

Get the pattern

Get the Winter’s Love pattern on Ravelry